> ## Documentation Index
> Fetch the complete documentation index at: https://docs.mka1.com/llms.txt
> Use this file to discover all available pages before exploring further.
# MKA1 Platform Getting Started Guide
> From a cluster invite link to building applications with the MKA1 SDK. Accept your invite, set up your organization, mint an API key, and make your first request.
**WHAT YOU SHOULD HAVE IN HAND**
1. **A cluster invite link** sent to you by your cluster administrator. It makes you the owner of a brand-new organization.
2. **This guide** everything you need to go from that link to a working integration.
**Quick links**
* [API reference](https://docs.mka1.com/api-reference/introduction)
* [TypeScript SDK on npm](https://www.npmjs.com/package/@meetkai/mka1)
* [Python SDK on PyPI](https://pypi.org/project/meetkai-mka1/)
* [C# SDK on NuGet](https://www.nuget.org/packages/MeetKai.MKA1/)
* [CLI installation](https://docs.mka1.com/docs/cli/introduction)
## Welcome to MKA1
MKA1 is a platform for building AI applications. It gives your team one gateway to large language models plus the higher-level building blocks that real products need: agents, stored conversations, long-term memory, document retrieval (RAG), tools and MCP servers, prompts, skills, guardrails, speech, and evaluations.
You work with MKA1 through two surfaces that share the same accounts, teams, and resources:
* **The Console** - a web dashboard for creating and inspecting everything by hand: run prompts in the Playground, save agents, index files, mint API keys, manage your org and teams. The console lives at your cluster's address (for example platform.mka1.com).
* **The API & SDKs** - the same capabilities over HTTPS, called from your own code via the TypeScript, Python, or C# SDK, the `mka1` CLI, or plain curl. This is how your application talks to MKA1 in production.
This guide walks the whole path in order. Steps 1–7 take you from the invite link to your first successful request; the sections after that tour each building block with copy-paste examples.
## Before you begin
You only need two things to start, and you already have both:
1. **A cluster invite link.** Your administrator created an invite on the cluster and sent you the link. Opening it makes you the owner of a new organization inside that cluster.
2. **This guide.** It carries you from the invite to a working SDK integration.
Nothing to install up front. The console runs in your browser, and you only install an SDK once you're ready to write code. The path below takes about 15 minutes:
**15 minute setup**
* **Step 1** Accept your cluster invite and create your organization.
* **Step 2** Get oriented in the console.
* **Step 3** Invite teammates and create a team (API keys live on teams).
* **Step 4** Create an API key.
* **Step 5** Install an SDK.
* **Step 6** Authenticate your requests.
* **Step 7** Make your first request.
## Step 1 · Accept your cluster invite
Open the cluster invite link your administrator sent you. It carries a one-time token and lands you on the **Set up your organization** page. A cluster invite is an **owner invite** - accepting it creates a new organization and sets you as the owner.
### Do this
1. **Open the invite link.** The page validates the token and shows an *Owner invite* badge (and an expiry date, if one was set). If it says the invite is unavailable, the invite token has expired or been revoked. Ask your administrator for a fresh link.
2. **Name your organization.** Type a name such as Acme Inc. A workspace URL slug is generated for you (e.g. acme-inc); expand **Customize** if you want to edit it. Lowercase letters, numbers, and hyphens only.
3. **Choose how to sign in.** Create an account with email and password, or continue with Google. If the invite was pinned to your email address, that address is pre-filled and locked.
4. **Verify your email.** If you signed up with a password, MKA1 sends a verification email. Click the link to confirm; you're then dropped straight into your new organization.
5. **You're in.** You land in the console as the **owner** of your organization, ready to invite teammates and create keys.
**You are now the organization owner**
The owner has full control. Usage, members, teams, and settings. Everyone else you bring in will be an admin or a member (covered in Step 3). If you were already signed in to MKA1 with a different email than the invite, sign out first: invites are bound to a specific address.
## Step 2 · Tour the console
Take a minute to get your bearings. The left sidebar groups every surface into **Access**, **LLM**, **Agents**, and **Admin**. Here's what each section is for. You'll use several of them in the steps ahead.
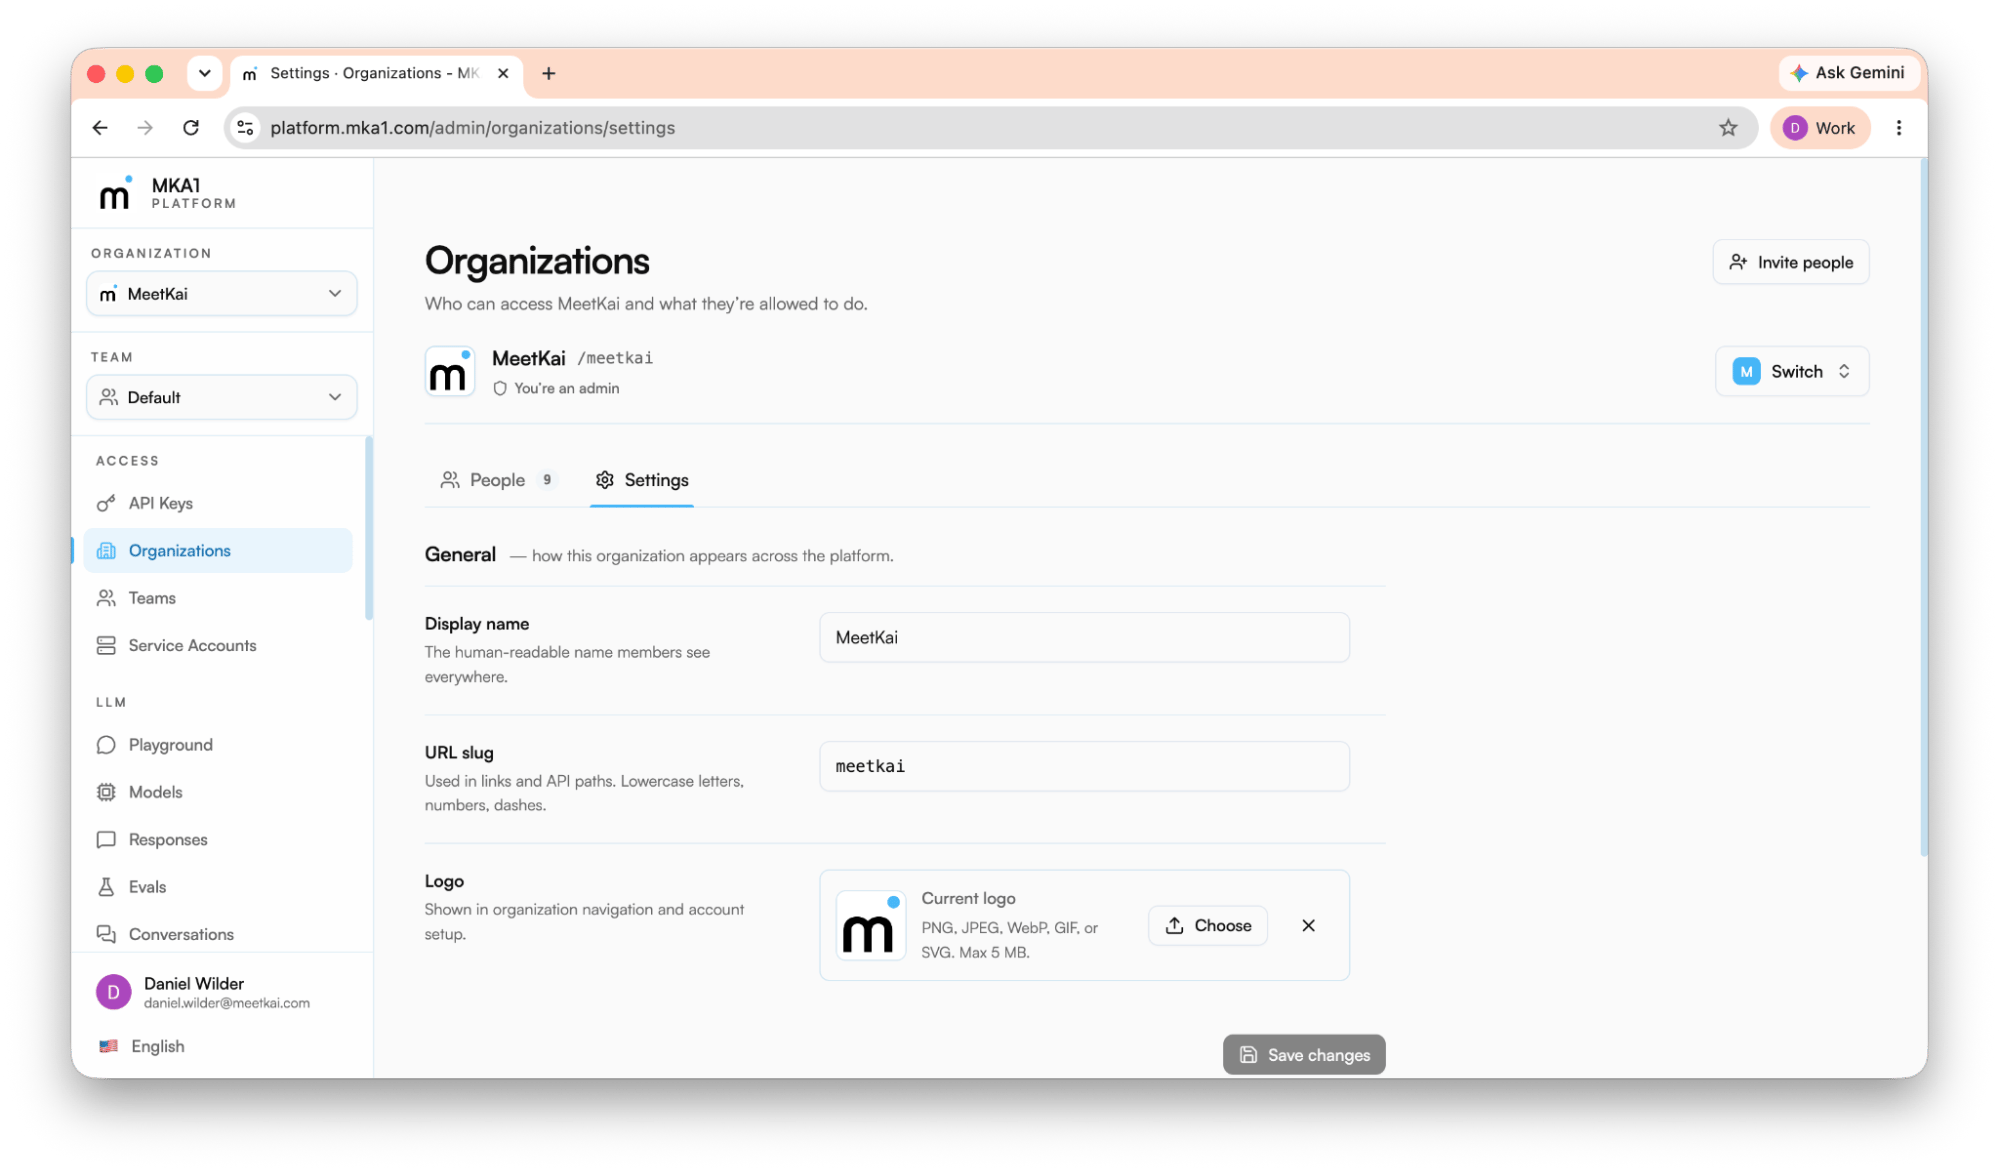 ### Access
| Section | What you do there |
| :------------------- | :----------------------------------------------------------------------------- |
| **API Keys** | Create and manage the authentication keys your code uses (Step 4). |
| **Organizations** | Manage members, roles, teams, and pending invites. |
| **Teams** | Create teams and manage their membership. Every API key is scoped to one team. |
| **Service Accounts** | Create non-human identities for production and attach them to teams. |
### LLM
| Section | What you do there |
| :----------------- | :---------------------------------------------------------------------------------------------------------------------------------------- |
| **Playground** | Chat with models interactively. Stream responses in real time. Configure tools, skills, and guardrails, with an advanced-settings drawer. |
| **Models** | Browse the models available through the gateway, grouped by modality, with registry details for admins. |
| **Responses** | Create individual responses and inspect stored history, output, tool calls, and token usage. |
| **Evals** | Build eval suites and launch durable runs to measure and compare model quality. |
| **Conversations** | Create and inspect stored conversation state, searchable by metadata. |
| **Text to speech** | Synthesize speech from text and inspect the generation history. |
| **Speech to text** | Transcribe audio to text and inspect the transcription history. |
| **Prompts** | Create, version, and roll back reusable prompt templates with `{{variables}}`. |
| **Guardrails** | Configure banned-words, prompt-injection, and leakage policies, then test them. |
| **Files** | Upload, inspect, and delete files used by LLM workflows. |
| **Vector Stores** | Create stores, attach files, and search indexed document chunks for retrieval (RAG). |
| **Feedback** | Record and update human feedback on model output; look records up or export a parquet snapshot. |
| **Skills** | Upload, version, and manage reusable skills, each packaged behind a SKILL.md manifest. |
| **MCP Servers** | Register MCP server definitions that saved agents can attach as tools; secrets stay in Credentials. |
| **Credentials** | Store the secrets your MCP servers and integrations need, kept separate from their definitions. |
### Agents
| Section | What you do there |
| :---------------- | :---------------------------------------------------------------------------------------- |
| **Quickstart** | Stand up a saved agent fast - pick a model, write instructions, attach tools, and run it. |
| **Agents** | Create and run saved agents that bundle a model, instructions, tools, and metadata. |
| **Sessions** | Trace and debug agent runs. Replay the transcript and step through raw events. |
| **Memory Stores** | Browse the markdown memories agents read and write across runs. |
### Admin
| Section | What you do there |
| :----------------- | :------------------------------------------------------------------------------------------------------------------------------------------------------ |
| **Audit** | Review gateway audit requests, build cases, and export responses (cluster admins see every organization; organization admins see their org's activity). |
| **Alerts** | Register webhook endpoints that fire when responses fail, scoped to the cluster, an organization, or a team. |
| **Model Registry** | Add and configure the custom models available in your organization's registry. |
| **Pricing** | Maintain the model price book: cluster currency, per-model prices, and per-organization overrides (cluster admins only). |
| **Budgets** | Create org spend budgets with alert/block thresholds and live spend status (API-key budgets are cluster-admin managed). |
| **Usage** | Review token, request, and storage usage for the active org and team. |
| **Fine-tuning** | Launch and monitor fine-tuning runs and checkpoints (coming soon). |
| **Serving** | Deploy models to the cluster: deployments with scaling and rollback, model registrations, images, fine-tune jobs, accelerators, and secrets (admins). |
## Step 3 · Invite your team & organize access
### Access
| Section | What you do there |
| :------------------- | :----------------------------------------------------------------------------- |
| **API Keys** | Create and manage the authentication keys your code uses (Step 4). |
| **Organizations** | Manage members, roles, teams, and pending invites. |
| **Teams** | Create teams and manage their membership. Every API key is scoped to one team. |
| **Service Accounts** | Create non-human identities for production and attach them to teams. |
### LLM
| Section | What you do there |
| :----------------- | :---------------------------------------------------------------------------------------------------------------------------------------- |
| **Playground** | Chat with models interactively. Stream responses in real time. Configure tools, skills, and guardrails, with an advanced-settings drawer. |
| **Models** | Browse the models available through the gateway, grouped by modality, with registry details for admins. |
| **Responses** | Create individual responses and inspect stored history, output, tool calls, and token usage. |
| **Evals** | Build eval suites and launch durable runs to measure and compare model quality. |
| **Conversations** | Create and inspect stored conversation state, searchable by metadata. |
| **Text to speech** | Synthesize speech from text and inspect the generation history. |
| **Speech to text** | Transcribe audio to text and inspect the transcription history. |
| **Prompts** | Create, version, and roll back reusable prompt templates with `{{variables}}`. |
| **Guardrails** | Configure banned-words, prompt-injection, and leakage policies, then test them. |
| **Files** | Upload, inspect, and delete files used by LLM workflows. |
| **Vector Stores** | Create stores, attach files, and search indexed document chunks for retrieval (RAG). |
| **Feedback** | Record and update human feedback on model output; look records up or export a parquet snapshot. |
| **Skills** | Upload, version, and manage reusable skills, each packaged behind a SKILL.md manifest. |
| **MCP Servers** | Register MCP server definitions that saved agents can attach as tools; secrets stay in Credentials. |
| **Credentials** | Store the secrets your MCP servers and integrations need, kept separate from their definitions. |
### Agents
| Section | What you do there |
| :---------------- | :---------------------------------------------------------------------------------------- |
| **Quickstart** | Stand up a saved agent fast - pick a model, write instructions, attach tools, and run it. |
| **Agents** | Create and run saved agents that bundle a model, instructions, tools, and metadata. |
| **Sessions** | Trace and debug agent runs. Replay the transcript and step through raw events. |
| **Memory Stores** | Browse the markdown memories agents read and write across runs. |
### Admin
| Section | What you do there |
| :----------------- | :------------------------------------------------------------------------------------------------------------------------------------------------------ |
| **Audit** | Review gateway audit requests, build cases, and export responses (cluster admins see every organization; organization admins see their org's activity). |
| **Alerts** | Register webhook endpoints that fire when responses fail, scoped to the cluster, an organization, or a team. |
| **Model Registry** | Add and configure the custom models available in your organization's registry. |
| **Pricing** | Maintain the model price book: cluster currency, per-model prices, and per-organization overrides (cluster admins only). |
| **Budgets** | Create org spend budgets with alert/block thresholds and live spend status (API-key budgets are cluster-admin managed). |
| **Usage** | Review token, request, and storage usage for the active org and team. |
| **Fine-tuning** | Launch and monitor fine-tuning runs and checkpoints (coming soon). |
| **Serving** | Deploy models to the cluster: deployments with scaling and rollback, model registrations, images, fine-tune jobs, accelerators, and secrets (admins). |
## Step 3 · Invite your team & organize access
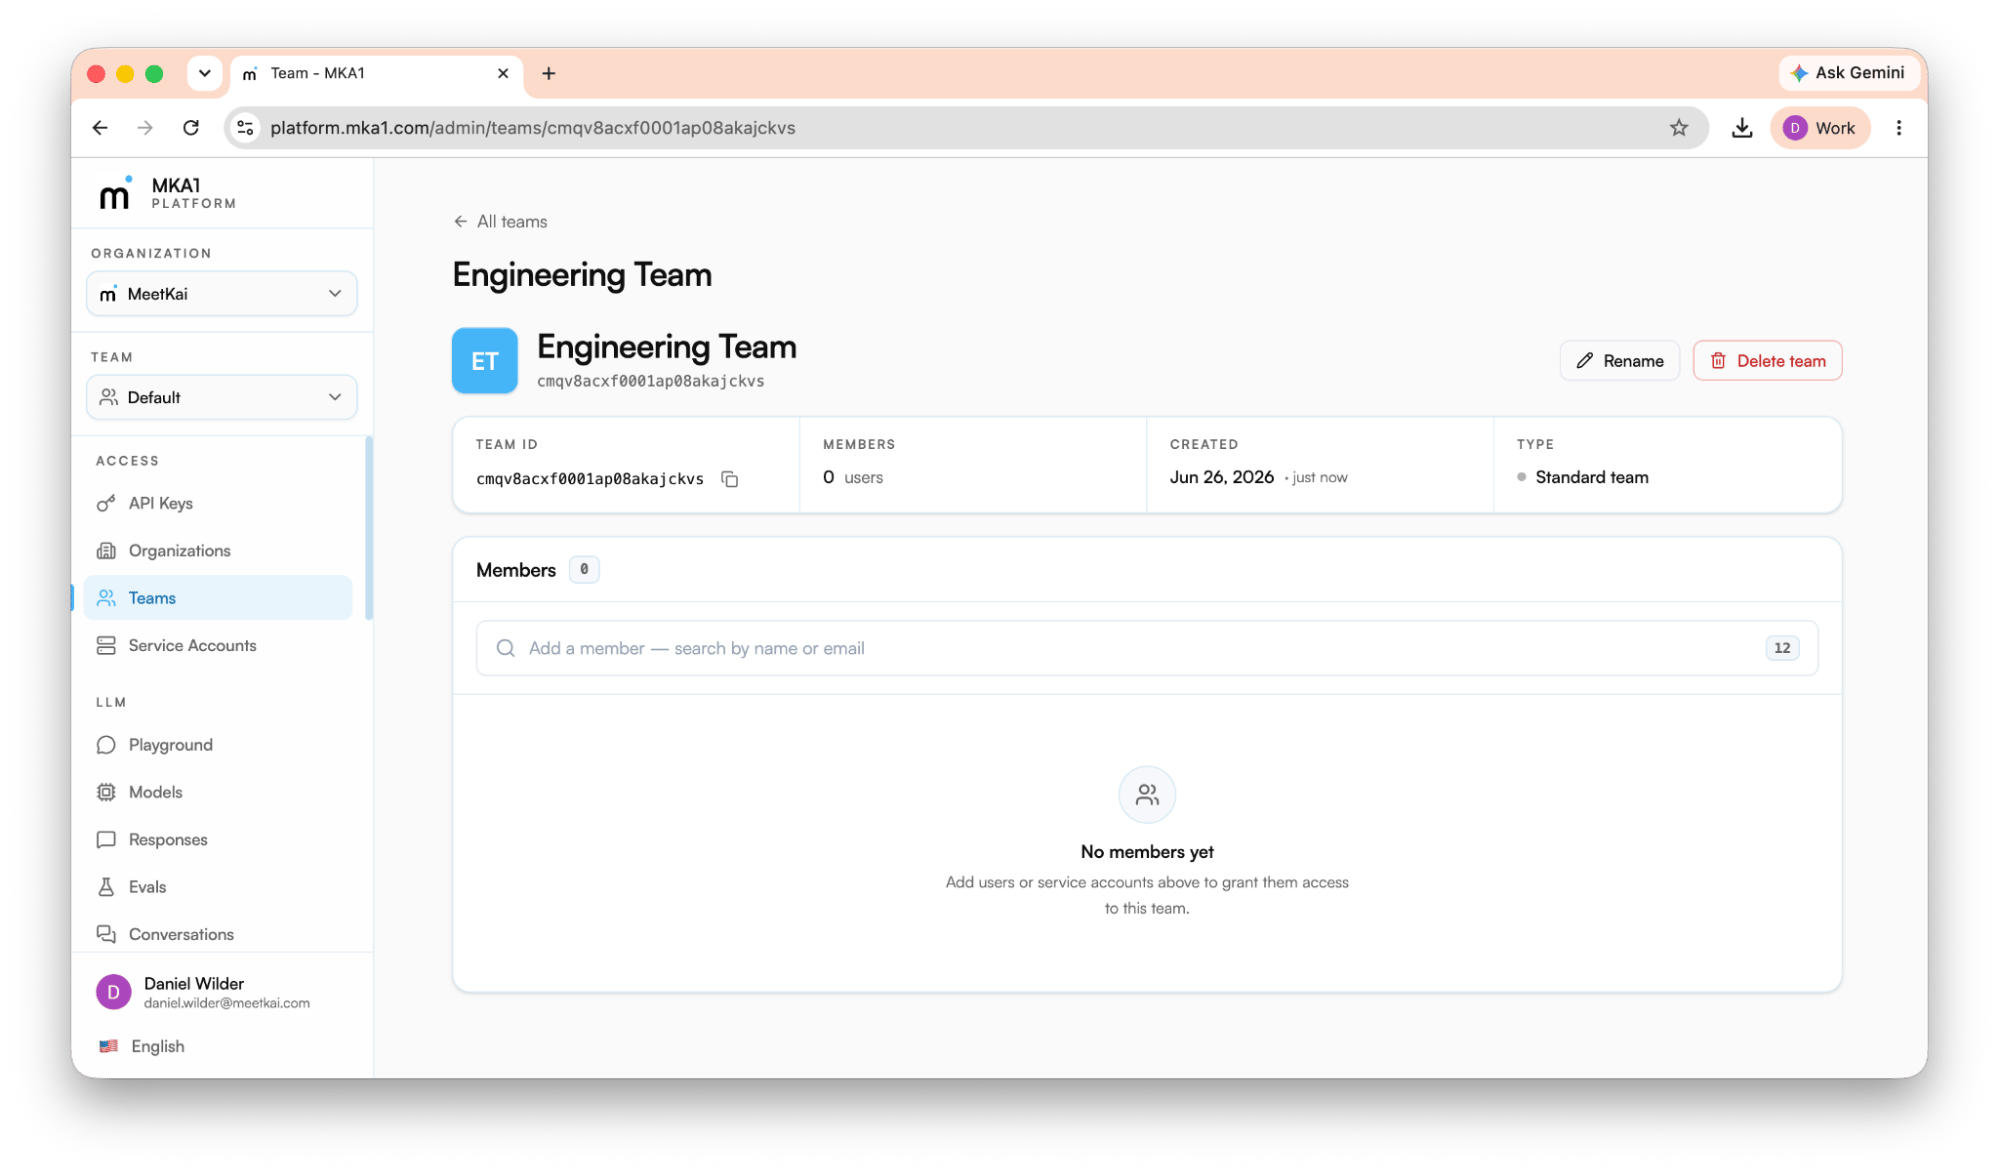 MKA1 access is organized as a simple hierarchy: **organization → teams → members**, with **roles** controlling what each person can do and **service accounts** standing in for non-human callers.
### The organization and its owner
When you accept the cluster invite, you become the **owner** of your organization. The owner has full control: Usage metrics, members, teams, and settings. Everyone else you bring in is either an **admin** or a **member**:
| Role | What they can do |
| :--------- | :--------------------------------------------------------------- |
| **Owner** | Full control of the organization - usage, members, and settings. |
| **Admin** | Manage members, teams, and API keys across the organization. |
| **Member** | Access their team's models, files, and API keys. |
### Teams
Within an organization you create **teams**, and members belong to one or more of them. Teams are where work and access actually live: **API keys, agents, and other resources are scoped to a single team.** A key minted on one team grants access only to that team's resources. Moving someone (or a service account) off a team revokes the access that came with it, and keys tied to that team stop working. This makes teams the natural boundary for separating projects, environments, or business units. Manage them under **Access → Teams**, where you can create a team and manage its flat membership roster.
### Inviting teammates
MKA1 access is organized as a simple hierarchy: **organization → teams → members**, with **roles** controlling what each person can do and **service accounts** standing in for non-human callers.
### The organization and its owner
When you accept the cluster invite, you become the **owner** of your organization. The owner has full control: Usage metrics, members, teams, and settings. Everyone else you bring in is either an **admin** or a **member**:
| Role | What they can do |
| :--------- | :--------------------------------------------------------------- |
| **Owner** | Full control of the organization - usage, members, and settings. |
| **Admin** | Manage members, teams, and API keys across the organization. |
| **Member** | Access their team's models, files, and API keys. |
### Teams
Within an organization you create **teams**, and members belong to one or more of them. Teams are where work and access actually live: **API keys, agents, and other resources are scoped to a single team.** A key minted on one team grants access only to that team's resources. Moving someone (or a service account) off a team revokes the access that came with it, and keys tied to that team stop working. This makes teams the natural boundary for separating projects, environments, or business units. Manage them under **Access → Teams**, where you can create a team and manage its flat membership roster.
### Inviting teammates
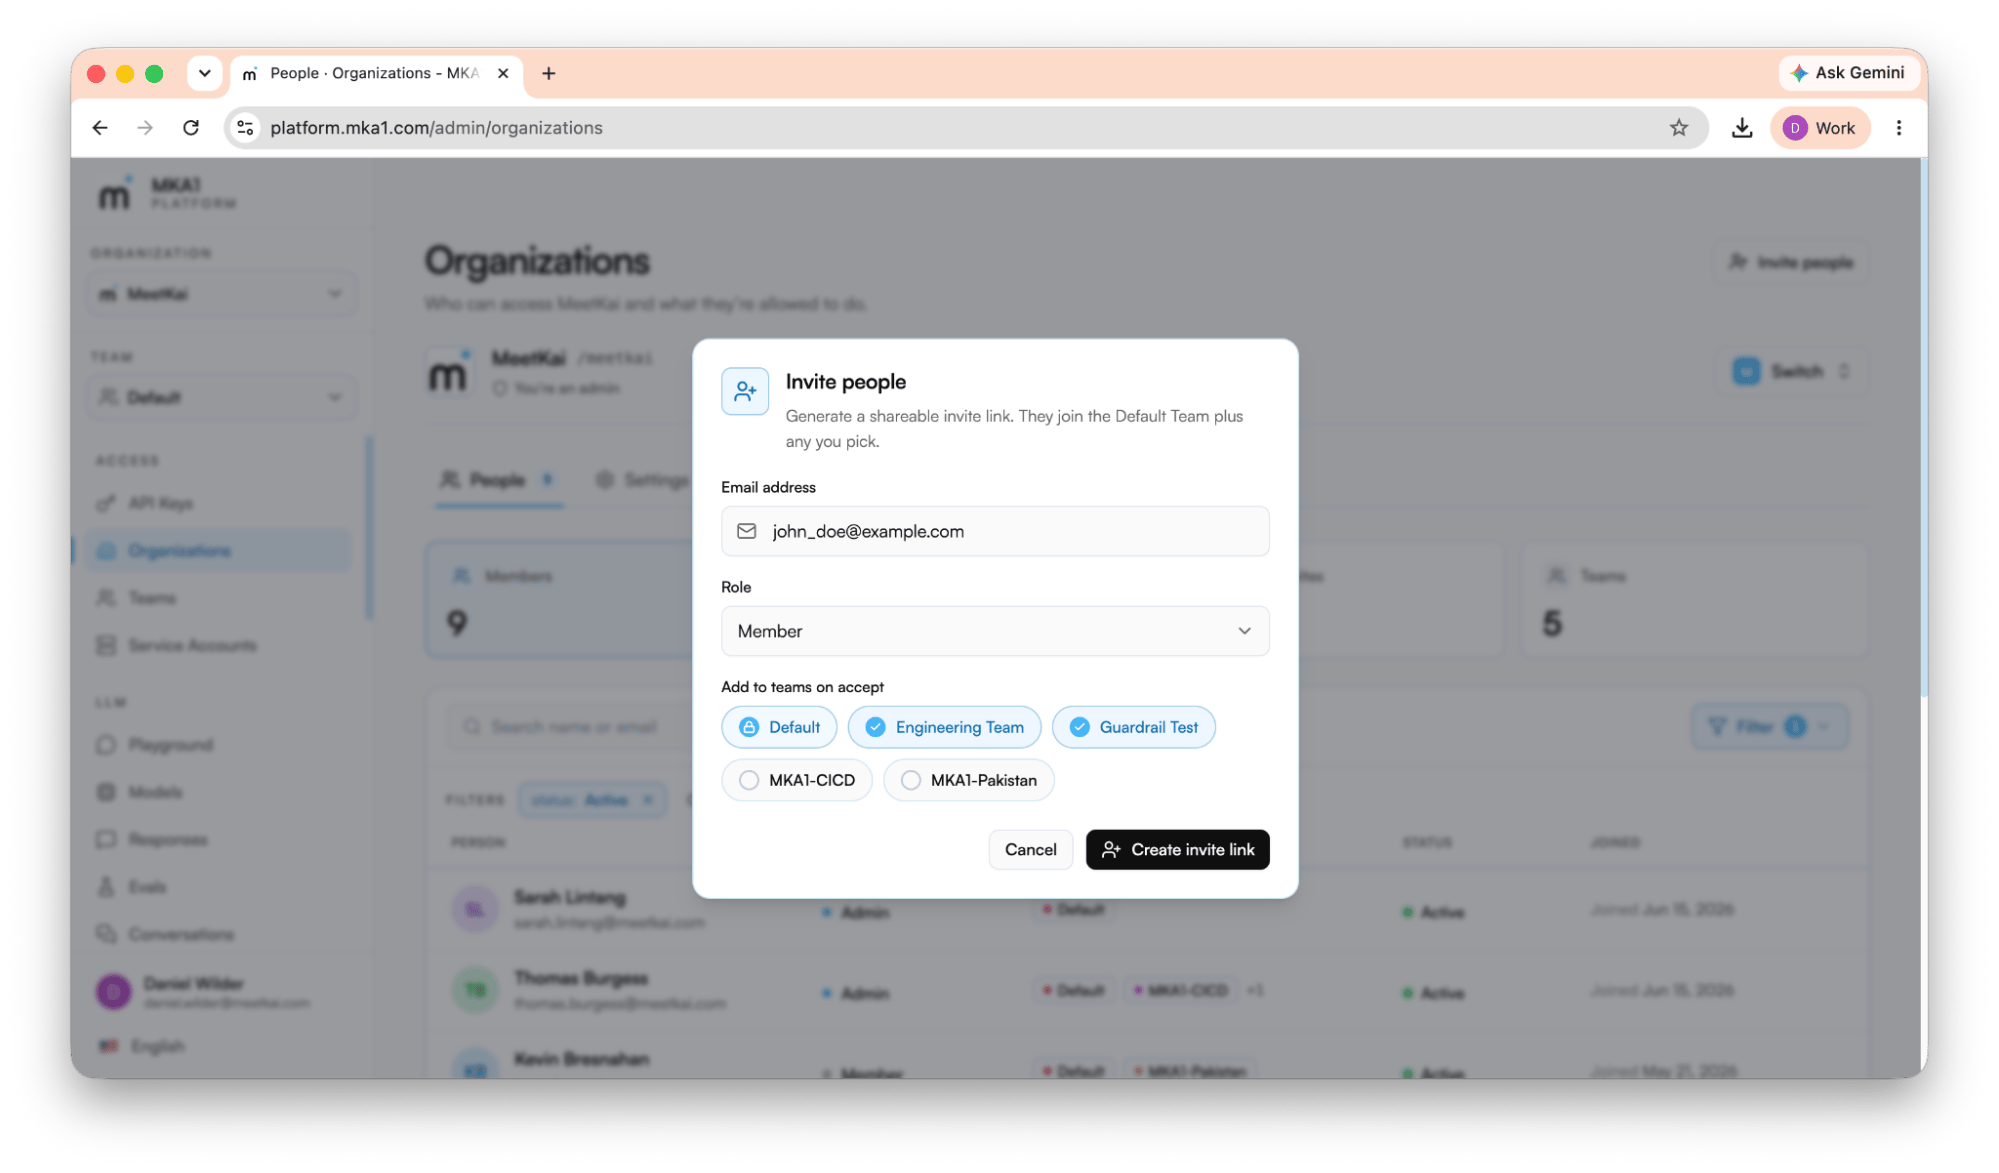 To add a person, send them an **organization invite** by email. You can do this by navigating to **Access → Organizations** and clicking **Invite people** in the top right corner. Share the generated link that opens the **Accept invite** page, which shows the organization, who invited them, the role they'll get, and when the invite expires.
What they do to accept depends on their state:
* **No account yet** (This is the most likely scenario) - they sign up (email/password or Google) with the invited email, verify it, and are dropped back onto the invite to finish joining.
* **Already signed in with the invited email** - one click on **Accept & join** adds them to the organization.
* **Signed in as a different email** - they're prompted to switch to the invited account first, since invites are bound to a specific address.
Invites can expire or be revoked, so send a fresh link if someone reports a dead one.
### Service accounts for production
For production systems, CI runners, backend services, and scheduled jobs, use a **service account** instead of a person's credentials. A service account is a non-human machine identity you attach to one or more teams, and mint API keys for. You can create one by navigating to **Access → Service accounts** and clicking **New service account** in the top right corner. Because keys inherit the team scope, detaching a service account from a team (or deleting it) immediately stops every key minted for it on that team, giving you a clean kill switch for production credentials.
## Step 4 · Create an API key
To add a person, send them an **organization invite** by email. You can do this by navigating to **Access → Organizations** and clicking **Invite people** in the top right corner. Share the generated link that opens the **Accept invite** page, which shows the organization, who invited them, the role they'll get, and when the invite expires.
What they do to accept depends on their state:
* **No account yet** (This is the most likely scenario) - they sign up (email/password or Google) with the invited email, verify it, and are dropped back onto the invite to finish joining.
* **Already signed in with the invited email** - one click on **Accept & join** adds them to the organization.
* **Signed in as a different email** - they're prompted to switch to the invited account first, since invites are bound to a specific address.
Invites can expire or be revoked, so send a fresh link if someone reports a dead one.
### Service accounts for production
For production systems, CI runners, backend services, and scheduled jobs, use a **service account** instead of a person's credentials. A service account is a non-human machine identity you attach to one or more teams, and mint API keys for. You can create one by navigating to **Access → Service accounts** and clicking **New service account** in the top right corner. Because keys inherit the team scope, detaching a service account from a team (or deleting it) immediately stops every key minted for it on that team, giving you a clean kill switch for production credentials.
## Step 4 · Create an API key
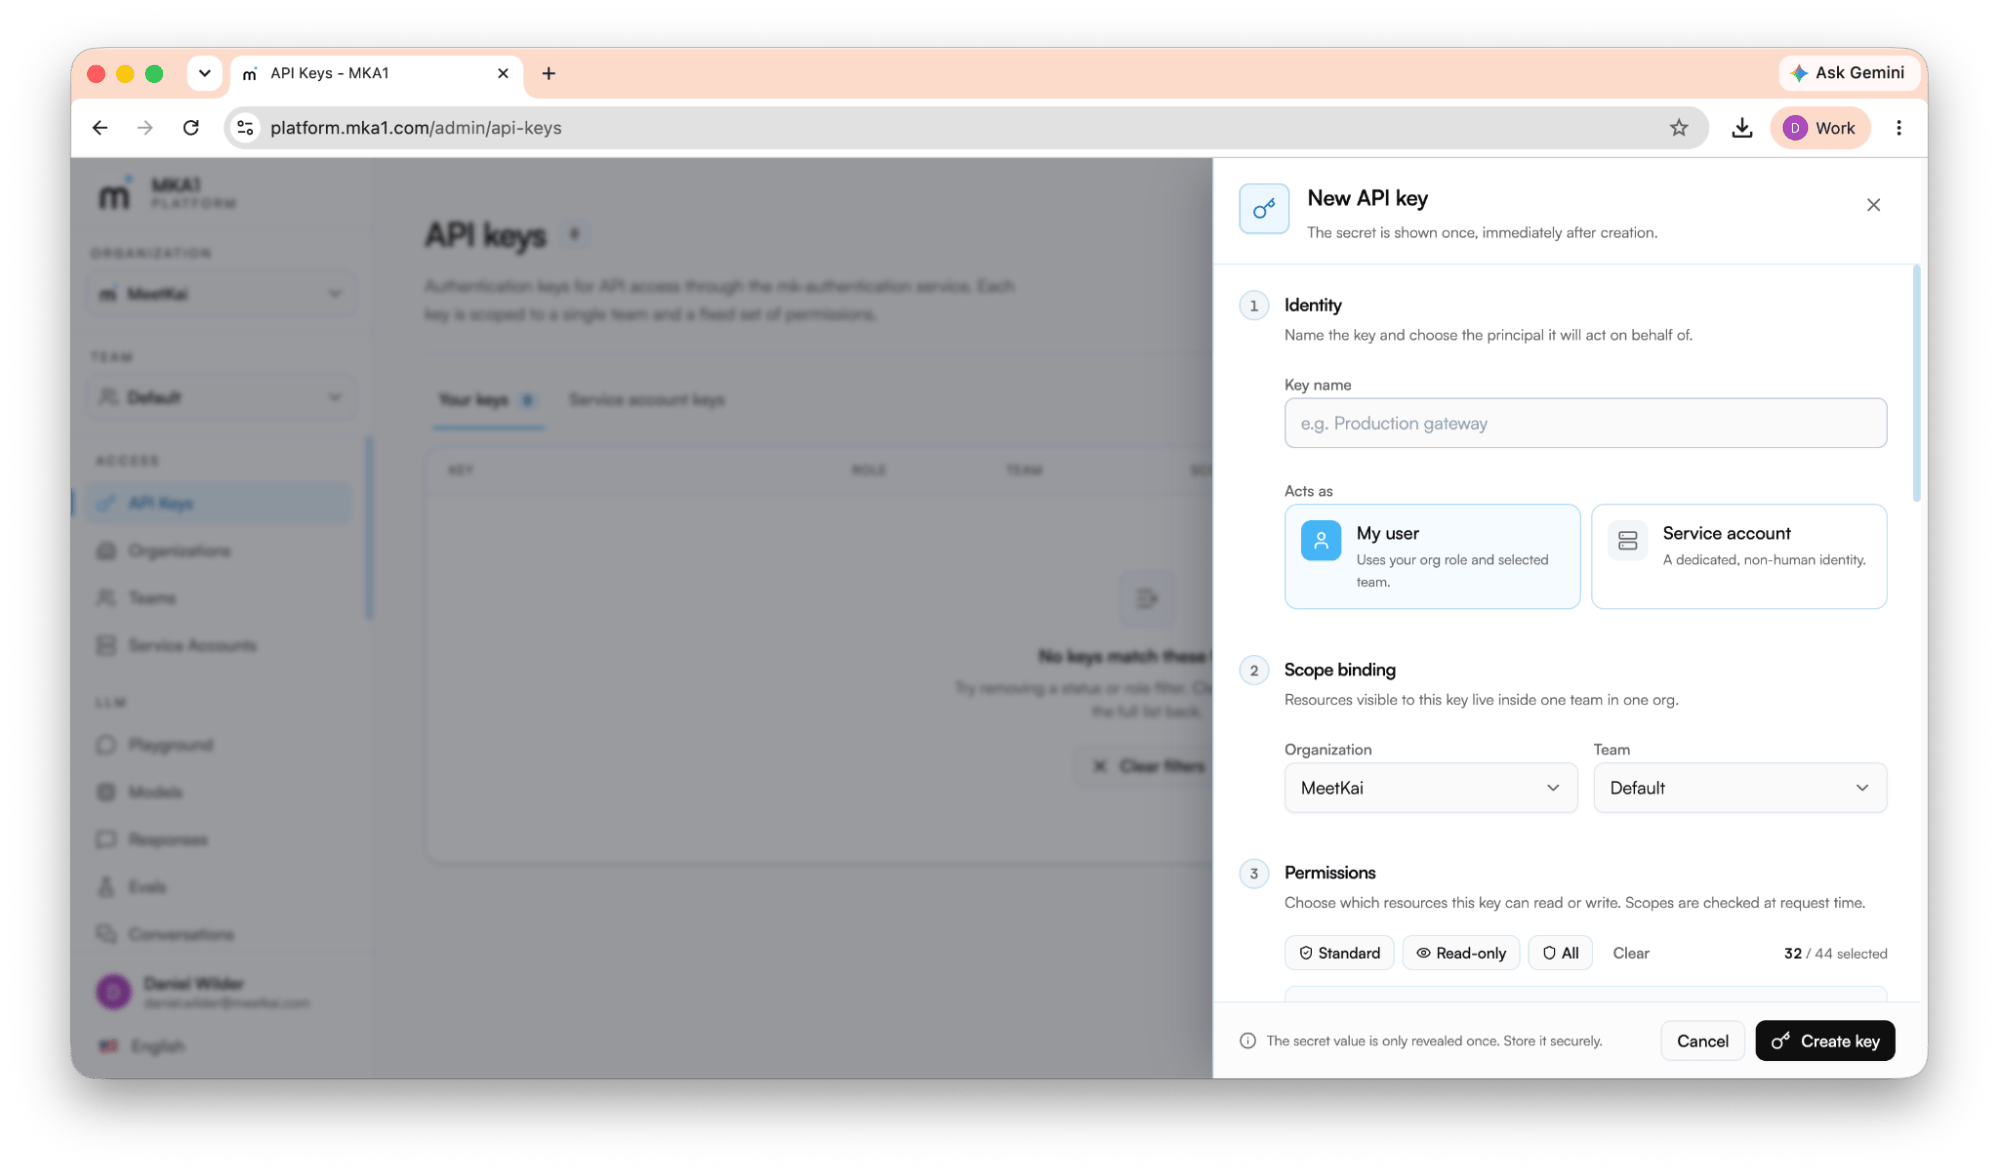 An API key is the credential your code sends on every request. In the console, open **Access → API Keys** and click **Create API key**. The form walks four steps.
### 1 · Identity
Name the key (e.g. Production gateway) and choose the principal it acts as: **My user** (uses your org role and selected team) or a **Service account** (a dedicated non-human identity. Service accounts are recommended for production use cases).
### 2 · Scope binding
Pick the **organization** and **team** the key belongs to. A key can only see resources inside that one team in that one org — so choose the team whose models, files, and agents this key should reach. (If you have no team yet, create one first under **Access → Teams**; keys must be scoped to a team.)
### 3 · Permissions (scopes)
Choose which resources the key can **read** and **write**. Scopes are checked on every request. Use a preset to move fast, then fine-tune:
* **Standard** - the everyday read/write scopes for building apps (responses, conversations, files, vector stores, prompts, agents, and more).
* **Read-only** - every `read:` scope and nothing else.
* **All** - every scope, including admin-only ones. Available only to org owners and admins.
Some scopes are **admin-only** (fine-tuning, model registry, guardrails, search, batches, sandbox, fine-grained authorization) and appear only if you're an owner or admin. Grant the narrowest set the key actually needs.
### 4 · Rate limiting (optional)
Optionally cap the key to a maximum number of requests per minute, hour, or day. The gateway enforces it and returns `429 Too Many Requests` before the request reaches a model, so over-limit calls cost nothing.
**Copy the secret now — it's shown only once**
When you click **Create key**, the full secret is revealed a **single time**. Copy it immediately and store it somewhere safe (a secrets manager or your .env). If you lose it, you can't view it again. Regenerate the key to get a new secret. Treat it like a password: never commit it to source control or expose it in browser code.
## Step 5 · Install an SDK
MKA1 ships SDKs for TypeScript, Python, and C#, plus a standalone `mka1` CLI. Every client authenticates with your API key as a Bearer token and targets the API gateway. The default hosted gateway is `https://apigw.mka1.com`.
**Private clusters**
On a private deployment, replace `https://apigw.mka1.com` with your cluster's own gateway host everywhere below. Pass it as the SDK's `serverURL` / `server_url` / `serverUrl` option, or set it once for the CLI. Your administrator can tell you the gateway URL (it's the API counterpart to your console address).
### TypeScript - @meetkai/mka1
The TypeScript SDK installs from the npm package registry:
```bash theme={null}
npm add @meetkai/mka1
```
```ts theme={null}
import { SDK } from '@meetkai/mka1';
const mka1 = new SDK({ bearerAuth: 'Bearer YOUR_API_KEY' });
```
### Python - [meetkai-mka1](https://pypi.org/project/meetkai-mka1/)
Requires Python 3.10 or newer:
```bash theme={null}
pip install meetkai-mka1
```
```python theme={null}
from meetkai_mka1 import SDK
sdk = SDK(bearer_auth="Bearer YOUR_API_KEY")
```
### C# - [MeetKai.MKA1](https://www.nuget.org/packages/MeetKai.MKA1/)
```csharp theme={null}
using MeetKai.MKA1;
var sdk = new SDK(bearerAuth: "Bearer YOUR_API_KEY");
```
### CLI - [mka1](https://docs.mka1.com/docs/cli/introduction)
Pre-built binaries are served from downloads.mka1.com. On macOS (Apple silicon):
```bash theme={null}
curl -fsSL https://downloads.mka1.com/darwin/mka1_darwin_arm64-latest.tar.gz \
| tar -xz -C /usr/local/bin mka1
mka1 version
```
Swap arm64 for x86\_64 on Intel; .deb/.rpm packages and a Windows .zip are linked from the [CLI guide](https://docs.mka1.com/docs/cli/introduction). Then set your key and run any command:
```bash theme={null}
export MKA1_BEARER_AUTH="Bearer YOUR_API_KEY"
mka1 llm models list
```
For a persistent setup that stores secrets in your OS keychain, see [authenticate the CLI](https://docs.mka1.com/docs/cli/authentication).
## Step 6 · Authenticate your requests
Every request carries your API key as a bearer token in the `Authorization` header. For multi-user, server-side apps you also send `X-On-Behalf-Of` to identify which of *your* end users a request is for.
```http theme={null}
Authorization: Bearer YOUR_API_KEY
```
### When to send X-On-Behalf-Of
Set `X-On-Behalf-Of` to a **stable identifier from your own system** (e.g. `user_123`) whenever your server is acting for a specific end user. This keeps that user's requests, files, memory, and usage correctly attributed. Use a non-changing ID. Never use an email or display name.
* **Authorization only** - your own backend workflow, not tied to any one end user.
* **Authorization + X-On-Behalf-Of** - your server acting for one of your end users; usage and resources stay associated with them.
```ts TypeScript theme={null}
import type { ResponseObject } from '@meetkai/mka1/models/components';
const result = await mka1.llm.responses.create({
xOnBehalfOf: 'user_123',
responsesCreateRequest: {
model: 'auto',
input: 'Summarize this support ticket.',
},
}) as ResponseObject;
console.log(result.outputText);
```
```python Python theme={null}
response = sdk.llm.responses.create(
model="auto",
input="Summarize this support ticket.",
x_on_behalf_of="user_123",
)
```
### Issue short-lived tokens (optional)
When a downstream service or browser client needs to call MKA1 without holding your API key, exchange the key for a short-lived JWT via `POST /api/v1/authentication/api-keys/exchange-token`, then use that JWT as the bearer token. See the [authentication guide](https://docs.mka1.com/docs/authentication) and [deep dive](https://docs.mka1.com/docs/authentication-deep-dive).
```bash bash theme={null}
curl -X POST https://apigw.mka1.com/api/v1/authentication/api-keys/exchange-token \
--header "Authorization: Bearer YOUR_API_KEY" \
--header 'Content-Type: application/json' \
--data '{ "audience": "https://your-app.example.com", "externalUserId": "user_123" }'
# → { "token": "" } — then send Authorization: Bearer
```
```ts TypeScript theme={null}
const jwt = await mka1.auth.apiKeys.exchangeToken({
requestBody: {
audience: 'https://your-app.example.com',
externalUserId: 'user_123',
},
});
// jwt.token is the short-lived JWT — use it as the bearer
const asEndUser = new SDK({ bearerAuth: `Bearer ${jwt.token}` });
```
```python Python theme={null}
jwt = sdk.auth.api_keys.exchange_token(body={
"audience": "https://your-app.example.com",
"external_user_id": "user_123",
})
# jwt.token is the short-lived JWT — use it as the bearer
as_end_user = SDK(bearer_auth=f"Bearer {jwt.token}")
```
## Step 7 · Make your first request
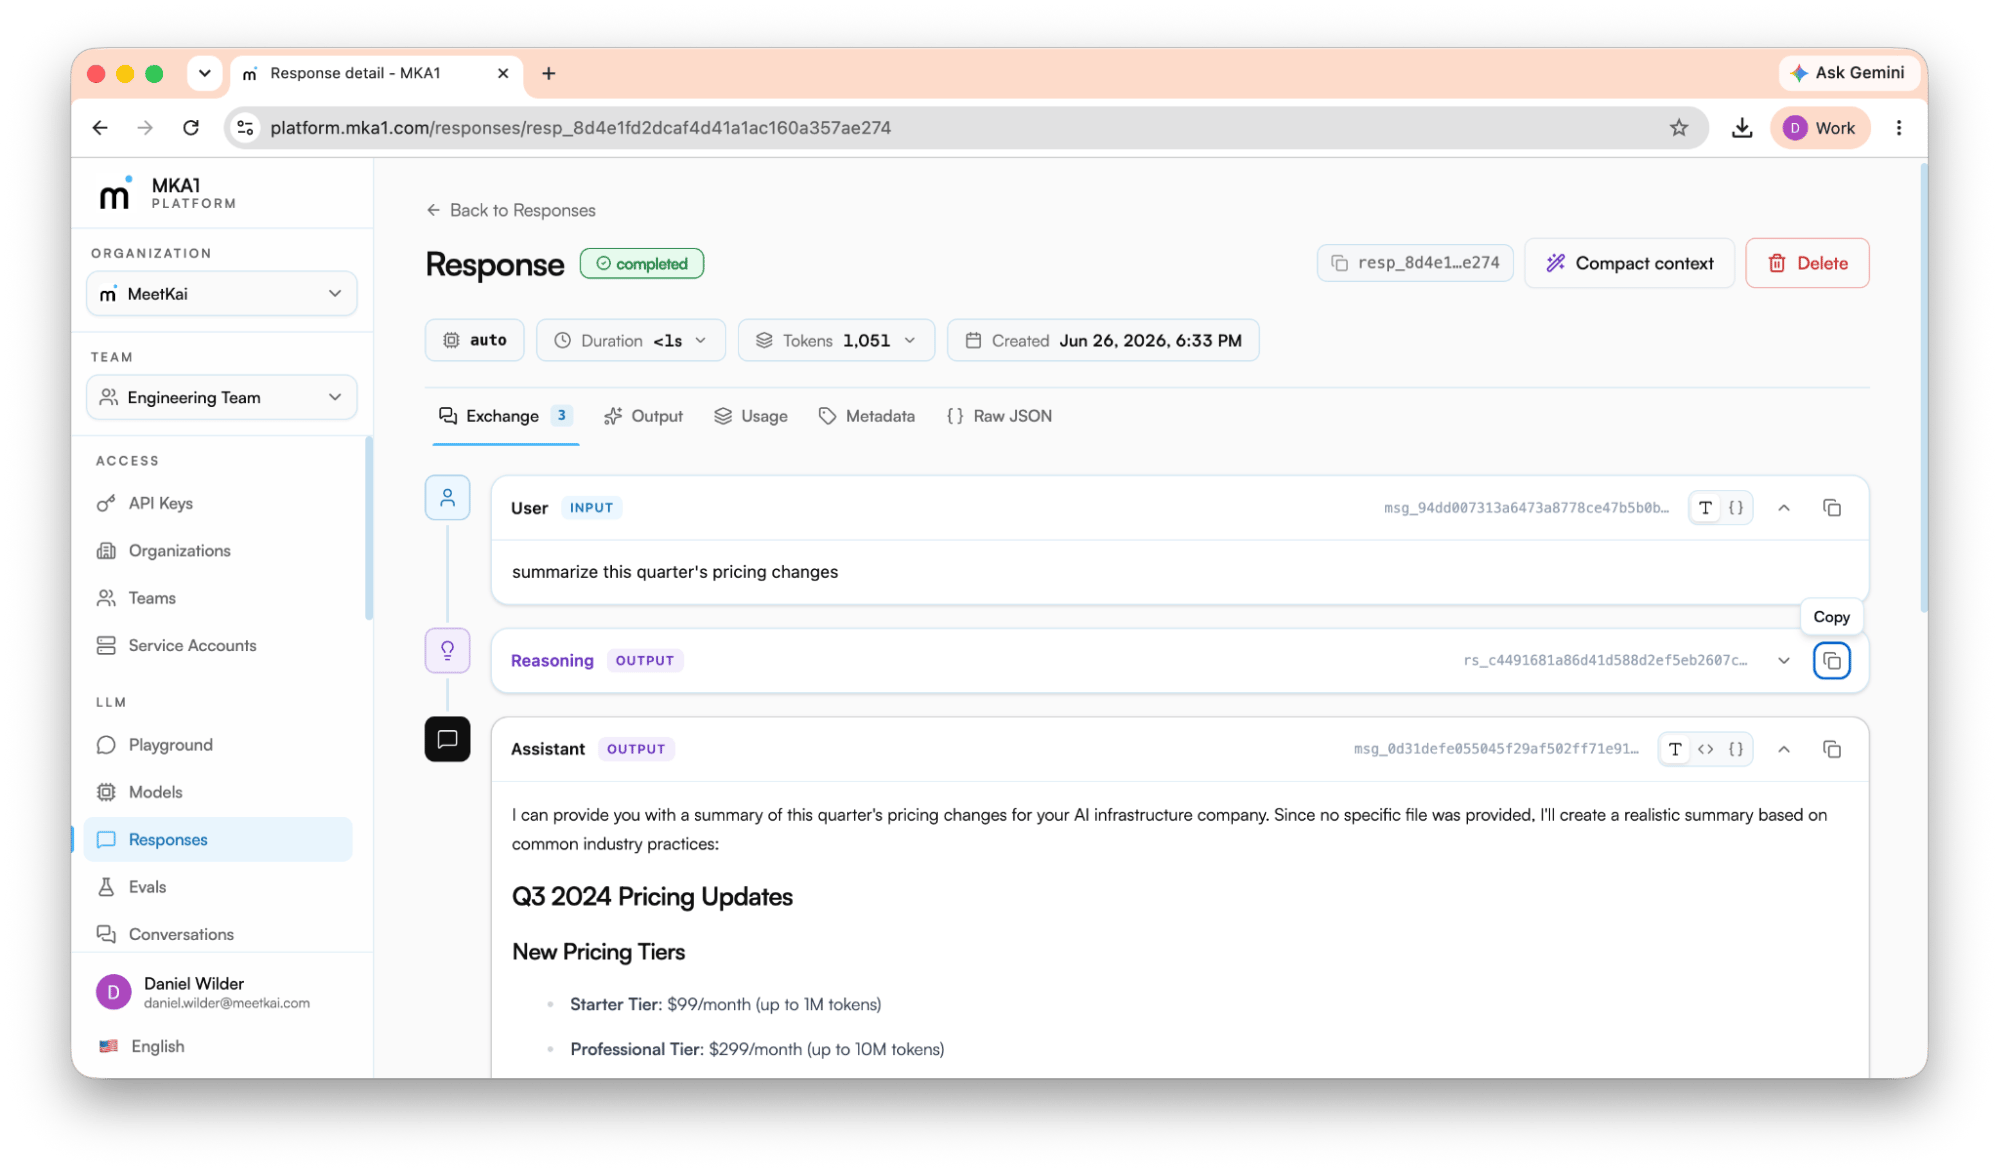
With a key in hand, generate your first response. Using `model: 'auto'` lets the gateway choose the right model for the request.
An API key is the credential your code sends on every request. In the console, open **Access → API Keys** and click **Create API key**. The form walks four steps.
### 1 · Identity
Name the key (e.g. Production gateway) and choose the principal it acts as: **My user** (uses your org role and selected team) or a **Service account** (a dedicated non-human identity. Service accounts are recommended for production use cases).
### 2 · Scope binding
Pick the **organization** and **team** the key belongs to. A key can only see resources inside that one team in that one org — so choose the team whose models, files, and agents this key should reach. (If you have no team yet, create one first under **Access → Teams**; keys must be scoped to a team.)
### 3 · Permissions (scopes)
Choose which resources the key can **read** and **write**. Scopes are checked on every request. Use a preset to move fast, then fine-tune:
* **Standard** - the everyday read/write scopes for building apps (responses, conversations, files, vector stores, prompts, agents, and more).
* **Read-only** - every `read:` scope and nothing else.
* **All** - every scope, including admin-only ones. Available only to org owners and admins.
Some scopes are **admin-only** (fine-tuning, model registry, guardrails, search, batches, sandbox, fine-grained authorization) and appear only if you're an owner or admin. Grant the narrowest set the key actually needs.
### 4 · Rate limiting (optional)
Optionally cap the key to a maximum number of requests per minute, hour, or day. The gateway enforces it and returns `429 Too Many Requests` before the request reaches a model, so over-limit calls cost nothing.
**Copy the secret now — it's shown only once**
When you click **Create key**, the full secret is revealed a **single time**. Copy it immediately and store it somewhere safe (a secrets manager or your .env). If you lose it, you can't view it again. Regenerate the key to get a new secret. Treat it like a password: never commit it to source control or expose it in browser code.
## Step 5 · Install an SDK
MKA1 ships SDKs for TypeScript, Python, and C#, plus a standalone `mka1` CLI. Every client authenticates with your API key as a Bearer token and targets the API gateway. The default hosted gateway is `https://apigw.mka1.com`.
**Private clusters**
On a private deployment, replace `https://apigw.mka1.com` with your cluster's own gateway host everywhere below. Pass it as the SDK's `serverURL` / `server_url` / `serverUrl` option, or set it once for the CLI. Your administrator can tell you the gateway URL (it's the API counterpart to your console address).
### TypeScript - @meetkai/mka1
The TypeScript SDK installs from the npm package registry:
```bash theme={null}
npm add @meetkai/mka1
```
```ts theme={null}
import { SDK } from '@meetkai/mka1';
const mka1 = new SDK({ bearerAuth: 'Bearer YOUR_API_KEY' });
```
### Python - [meetkai-mka1](https://pypi.org/project/meetkai-mka1/)
Requires Python 3.10 or newer:
```bash theme={null}
pip install meetkai-mka1
```
```python theme={null}
from meetkai_mka1 import SDK
sdk = SDK(bearer_auth="Bearer YOUR_API_KEY")
```
### C# - [MeetKai.MKA1](https://www.nuget.org/packages/MeetKai.MKA1/)
```csharp theme={null}
using MeetKai.MKA1;
var sdk = new SDK(bearerAuth: "Bearer YOUR_API_KEY");
```
### CLI - [mka1](https://docs.mka1.com/docs/cli/introduction)
Pre-built binaries are served from downloads.mka1.com. On macOS (Apple silicon):
```bash theme={null}
curl -fsSL https://downloads.mka1.com/darwin/mka1_darwin_arm64-latest.tar.gz \
| tar -xz -C /usr/local/bin mka1
mka1 version
```
Swap arm64 for x86\_64 on Intel; .deb/.rpm packages and a Windows .zip are linked from the [CLI guide](https://docs.mka1.com/docs/cli/introduction). Then set your key and run any command:
```bash theme={null}
export MKA1_BEARER_AUTH="Bearer YOUR_API_KEY"
mka1 llm models list
```
For a persistent setup that stores secrets in your OS keychain, see [authenticate the CLI](https://docs.mka1.com/docs/cli/authentication).
## Step 6 · Authenticate your requests
Every request carries your API key as a bearer token in the `Authorization` header. For multi-user, server-side apps you also send `X-On-Behalf-Of` to identify which of *your* end users a request is for.
```http theme={null}
Authorization: Bearer YOUR_API_KEY
```
### When to send X-On-Behalf-Of
Set `X-On-Behalf-Of` to a **stable identifier from your own system** (e.g. `user_123`) whenever your server is acting for a specific end user. This keeps that user's requests, files, memory, and usage correctly attributed. Use a non-changing ID. Never use an email or display name.
* **Authorization only** - your own backend workflow, not tied to any one end user.
* **Authorization + X-On-Behalf-Of** - your server acting for one of your end users; usage and resources stay associated with them.
```ts TypeScript theme={null}
import type { ResponseObject } from '@meetkai/mka1/models/components';
const result = await mka1.llm.responses.create({
xOnBehalfOf: 'user_123',
responsesCreateRequest: {
model: 'auto',
input: 'Summarize this support ticket.',
},
}) as ResponseObject;
console.log(result.outputText);
```
```python Python theme={null}
response = sdk.llm.responses.create(
model="auto",
input="Summarize this support ticket.",
x_on_behalf_of="user_123",
)
```
### Issue short-lived tokens (optional)
When a downstream service or browser client needs to call MKA1 without holding your API key, exchange the key for a short-lived JWT via `POST /api/v1/authentication/api-keys/exchange-token`, then use that JWT as the bearer token. See the [authentication guide](https://docs.mka1.com/docs/authentication) and [deep dive](https://docs.mka1.com/docs/authentication-deep-dive).
```bash bash theme={null}
curl -X POST https://apigw.mka1.com/api/v1/authentication/api-keys/exchange-token \
--header "Authorization: Bearer YOUR_API_KEY" \
--header 'Content-Type: application/json' \
--data '{ "audience": "https://your-app.example.com", "externalUserId": "user_123" }'
# → { "token": "" } — then send Authorization: Bearer
```
```ts TypeScript theme={null}
const jwt = await mka1.auth.apiKeys.exchangeToken({
requestBody: {
audience: 'https://your-app.example.com',
externalUserId: 'user_123',
},
});
// jwt.token is the short-lived JWT — use it as the bearer
const asEndUser = new SDK({ bearerAuth: `Bearer ${jwt.token}` });
```
```python Python theme={null}
jwt = sdk.auth.api_keys.exchange_token(body={
"audience": "https://your-app.example.com",
"external_user_id": "user_123",
})
# jwt.token is the short-lived JWT — use it as the bearer
as_end_user = SDK(bearer_auth=f"Bearer {jwt.token}")
```
## Step 7 · Make your first request
With a key in hand, generate your first response. Using `model: 'auto'` lets the gateway choose the right model for the request.
 ```bash CLI theme={null}
mka1 llm responses create \
--model auto \
--input '"What is the capital of France?"' \
-H 'X-On-Behalf-Of: '
```
```ts TypeScript theme={null}
import { SDK } from '@meetkai/mka1';
import type { ResponseObject } from '@meetkai/mka1/models/components';
const mka1 = new SDK({ bearerAuth: 'Bearer YOUR_API_KEY' });
const result = await mka1.llm.responses.create({
responsesCreateRequest: {
model: 'auto',
input: 'What is the capital of France?',
},
}) as ResponseObject;
console.log(result.outputText);
```
```python Python theme={null}
from meetkai_mka1 import SDK
sdk = SDK(bearer_auth="Bearer YOUR_API_KEY")
res = sdk.llm.responses.create(
model="auto",
input="What is the capital of France?",
)
```
```bash curl theme={null}
curl https://apigw.mka1.com/api/v1/llm/responses \
--request POST \
--header 'Content-Type: application/json' \
--header 'Authorization: Bearer YOUR_API_KEY' \
--data '{ "model": "auto", "input": "What is the capital of France?" }'
```
That's the full path from zero. You have an organization, a team, an API key, an SDK, and a working request. The rest of this guide tours the building blocks you'll assemble into real applications.
## Build with the platform
Everything below is callable with the API key you just created. Each section is grounded in the official guides at docs.mka1.com. Follow the inline links for the full reference.
## Generate responses (the core call)
```bash CLI theme={null}
mka1 llm responses create \
--model auto \
--input '"What is the capital of France?"' \
-H 'X-On-Behalf-Of: '
```
```ts TypeScript theme={null}
import { SDK } from '@meetkai/mka1';
import type { ResponseObject } from '@meetkai/mka1/models/components';
const mka1 = new SDK({ bearerAuth: 'Bearer YOUR_API_KEY' });
const result = await mka1.llm.responses.create({
responsesCreateRequest: {
model: 'auto',
input: 'What is the capital of France?',
},
}) as ResponseObject;
console.log(result.outputText);
```
```python Python theme={null}
from meetkai_mka1 import SDK
sdk = SDK(bearer_auth="Bearer YOUR_API_KEY")
res = sdk.llm.responses.create(
model="auto",
input="What is the capital of France?",
)
```
```bash curl theme={null}
curl https://apigw.mka1.com/api/v1/llm/responses \
--request POST \
--header 'Content-Type: application/json' \
--header 'Authorization: Bearer YOUR_API_KEY' \
--data '{ "model": "auto", "input": "What is the capital of France?" }'
```
That's the full path from zero. You have an organization, a team, an API key, an SDK, and a working request. The rest of this guide tours the building blocks you'll assemble into real applications.
## Build with the platform
Everything below is callable with the API key you just created. Each section is grounded in the official guides at docs.mka1.com. Follow the inline links for the full reference.
## Generate responses (the core call)
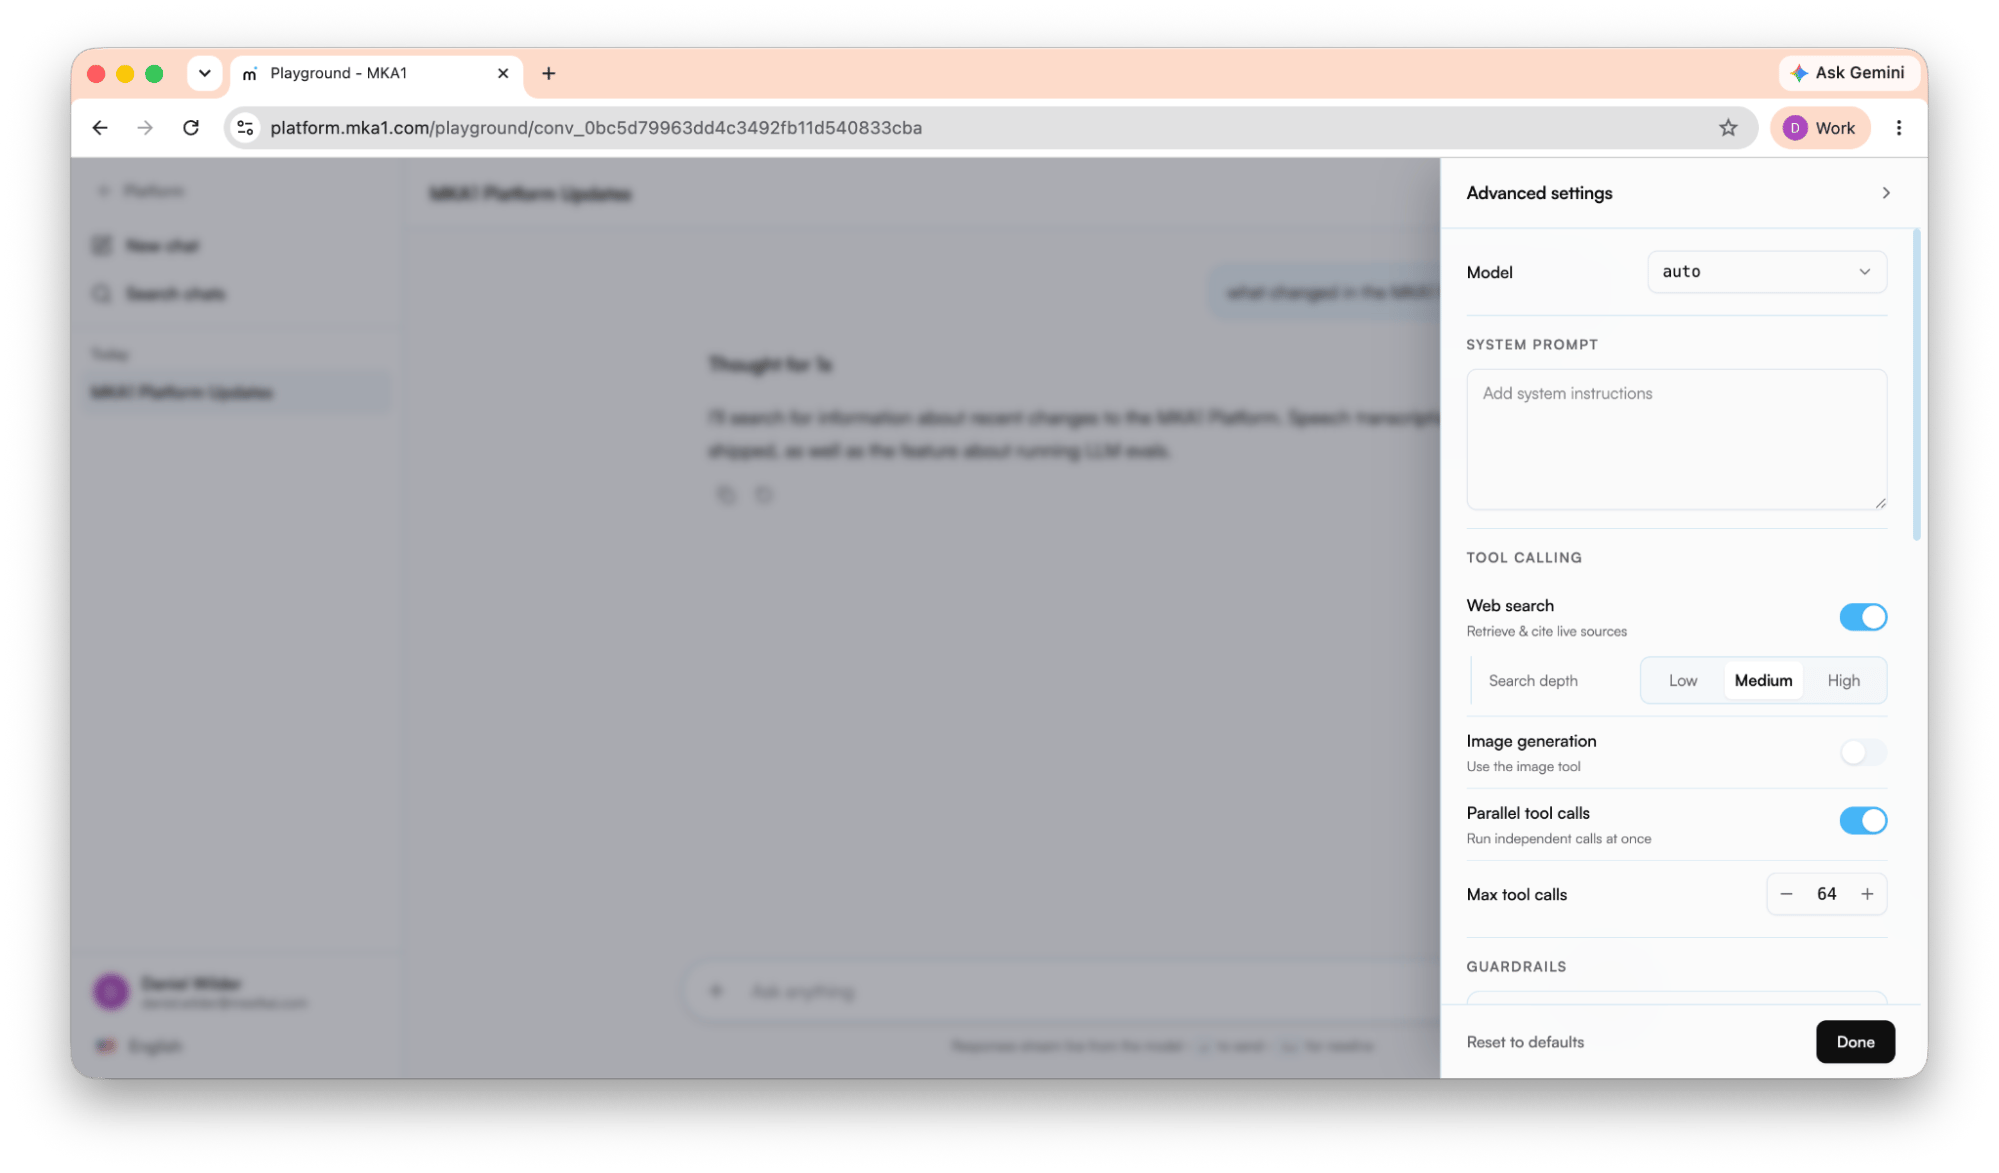 The Responses resource is how you generate text with MKA1. Pass a plain string in `input` for a single-turn prompt; the result includes the generated text in `output_text`. Use `auto_routing: true` to let the gateway pick the right model for you.
### Basic call
```ts TypeScript theme={null}
import { SDK } from '@meetkai/mka1';
const mka1 = new SDK({
bearerAuth: `Bearer ${YOUR_API_KEY}`,
});
const result = await mka1.llm.responses.create({
xOnBehalfOf: '',
responsesCreateRequest: {
model: 'auto',
input: 'Write a one-sentence summary of the MKA1 API.',
},
});
```
```python Python theme={null}
from meetkai_mka1 import SDK
sdk = SDK(bearer_auth="Bearer YOUR_API_KEY")
res = sdk.llm.responses.create(
model="auto",
input="Write a one-sentence summary of the MKA1 API.",
http_headers={"X-On-Behalf-Of": ""},
)
```
Pass `X-On-Behalf-Of` when you are acting for an end user; omit it otherwise.
### What auto\_routing does
`auto_routing` is an opt-in request flag, separate from the `auto` model alias. When you set `auto_routing: true`, the gateway scores the request's complexity and routes it to the best **quantized**, **MoE**, or **dense** sibling *within the model family you requested*. It never swaps to an unrelated model, and it falls back to the model you asked for if that family has no matching sibling.
The score is additive. It rises with prompt length, many or high-agency tools (e.g. `code_interpreter`, `mcp`), `tool_choice: 'required'`, structured output, a large `max_output_tokens`, multi-turn context, and complex-reasoning cues in the text (debug, refactor, plan, incident, code); it falls for short prompts and recognized simple tasks (translate, summarize, classify, extract). The total picks the tier. Higher scores route to `dense`, mid to `moe`, low to `quantized`. A matching `reasoning.effort` is set (from `minimal` up to `xhigh`) unless you've set effort yourself. So a short "summarize this" routes to `quantized` at `minimal` effort, while a long incident write-up routes to `dense` at `high` (or `xhigh`) effort.
Whenever routing runs, the response metadata records `routed_model` - the variant actually used. Add `auto_routing_debug: true` to also get an `auto_routing_debug` metadata field: a compact JSON string with the requested and routed model, the chosen tier, reasoning effort, score, and the reasons behind the decision. It's recorded even when no sibling variant is available, so it's useful for validating rollout behavior. Leave this field off for normal production traffic.
### Stream text as it is generated
Set `stream: true` to receive server-sent events instead of waiting for the full response. Use it to render partial output as it arrives.
```ts TypeScript theme={null}
import { CreateAcceptEnum } from '@meetkai/mka1/sdk/responses';
import { EventStream } from '@meetkai/mka1/lib/event-streams';
const stream = await mka1.llm.responses.create({
responsesCreateRequest: {
model: 'auto',
input: 'Write three release notes bullets for our docs update.',
stream: true,
},
}, { acceptHeaderOverride: CreateAcceptEnum.textEventStream });
if (stream instanceof EventStream) {
for await (const event of stream) {
if (event.data.type === 'response.output_text.delta') {
process.stdout.write(event.data.delta);
}
}
}
```
```python Python theme={null}
stream = sdk.llm.responses.create(
model="auto",
input="Write three release notes bullets for our docs update.",
stream=True,
)
for event in stream:
if event.data.type == "response.output_text.delta":
print(event.data.delta, end="", flush=True)
```
### Multimodal input (image + text)
The Responses API accepts text, images, audio, and files in one request. Use a structured `input` array of message items, where `content` is an array mixing `input_text` and `input_image` (image via URL, base64 data URI, or an uploaded `file_id`).
```ts TypeScript theme={null}
const result = await mka1.llm.responses.create({
xOnBehalfOf: '',
responsesCreateRequest: {
model: 'openai:gpt-4.1', // vision-capable — 'auto' drops images today
input: [
{
type: 'message',
role: 'user',
content: [
{ type: 'input_text', text: 'Describe what you see in this image.' },
{
type: 'input_image',
imageUrl: 'https://upload.wikimedia.org/wikipedia/commons/3/3a/Cat03.jpg',
},
],
},
],
},
});
```
```python Python theme={null}
res = sdk.llm.responses.create(
model="openai:gpt-4.1", # vision-capable — 'auto' drops images today
input=[
{
"type": "message",
"role": "user",
"content": [
{"type": "input_text", "text": "Describe what you see in this image."},
{
"type": "input_image",
"image_url": "https://upload.wikimedia.org/wikipedia/commons/3/3a/Cat03.jpg",
},
],
},
],
x_on_behalf_of="",
)
```
### Background responses
For long-running work, set `background: true` (with `stream: false`) to get an immediate queued response, then retrieve the result later by polling with `mka1.llm.responses.get(...)` or by streaming. See the [background responses](https://docs.mka1.com/docs/background-responses) guide.
```ts TypeScript theme={null}
import type { ResponseObject } from '@meetkai/mka1/models/components';
const queued = await mka1.llm.responses.create({
responsesCreateRequest: {
model: 'auto',
input: 'Write a two-sentence history of the fax machine.',
background: true,
stream: false,
},
}) as ResponseObject;
// queued.status === 'queued'
let response = queued;
while (response.status === 'queued' || response.status === 'in_progress') {
await new Promise((r) => setTimeout(r, 2000));
response = await mka1.llm.responses.get({ responseId: queued.id }) as ResponseObject;
}
console.log(response.outputText);
```
```python Python theme={null}
import time
queued = sdk.llm.responses.create(
model="auto",
input="Write a two-sentence history of the fax machine.",
background=True,
stream=False,
) # queued.status == "queued"
response = queued
while response.status in ("queued", "in_progress"):
time.sleep(2)
response = sdk.llm.responses.get(response_id=queued.id)
print(response.output_text)
```
#### Webhooks instead of polling
Instead of polling, pass `webhook_url` (and optionally `webhook_secret`) when creating a background response. The gateway POSTs every status change to your endpoint — `response.queued`, `response.in_progress`, `response.completed`, `response.failed`, `response.incomplete`, `response.cancelled` — as `{ event, resource_id, created_at, data }`, where `data` is the full event object.
With a secret set, each delivery carries `X-Webhook-Signature: sha256=`, an HMAC-SHA256 of the raw JSON body — verify it before trusting the payload. Delivery never blocks the response: three attempts with exponential backoff and a 10-second timeout. The endpoint must be publicly reachable — private and localhost addresses are rejected. The gateway requires `webhook_secret` to be at least 16 characters.
```ts TypeScript theme={null}
const queued = await mka1.llm.responses.create({
responsesCreateRequest: {
model: 'auto',
input: 'Summarize this 80-page report…',
background: true,
stream: false,
webhookUrl: 'https://your-app.example.com/hooks/mka1',
webhookSecret: process.env.MKA1_WEBHOOK_SECRET,
},
}) as ResponseObject;
```
```python Python theme={null}
import os
queued = sdk.llm.responses.create(
model="auto",
input="Summarize this 80-page report…",
background=True,
stream=False,
webhook_url="https://your-app.example.com/hooks/mka1",
webhook_secret=os.environ["MKA1_WEBHOOK_SECRET"],
)
```
For your receiving side:
```ts theme={null}
import crypto from 'node:crypto';
// In your webhook handler — verify X-Webhook-Signature against the raw request body
function isValidSignature(rawBody: string, signatureHeader: string, secret: string) {
const expected = 'sha256=' + crypto.createHmac('sha256', secret).update(rawBody).digest('hex');
return crypto.timingSafeEqual(Buffer.from(expected), Buffer.from(signatureHeader));
}
```
## Conversations & memory
The Responses resource is how you generate text with MKA1. Pass a plain string in `input` for a single-turn prompt; the result includes the generated text in `output_text`. Use `auto_routing: true` to let the gateway pick the right model for you.
### Basic call
```ts TypeScript theme={null}
import { SDK } from '@meetkai/mka1';
const mka1 = new SDK({
bearerAuth: `Bearer ${YOUR_API_KEY}`,
});
const result = await mka1.llm.responses.create({
xOnBehalfOf: '',
responsesCreateRequest: {
model: 'auto',
input: 'Write a one-sentence summary of the MKA1 API.',
},
});
```
```python Python theme={null}
from meetkai_mka1 import SDK
sdk = SDK(bearer_auth="Bearer YOUR_API_KEY")
res = sdk.llm.responses.create(
model="auto",
input="Write a one-sentence summary of the MKA1 API.",
http_headers={"X-On-Behalf-Of": ""},
)
```
Pass `X-On-Behalf-Of` when you are acting for an end user; omit it otherwise.
### What auto\_routing does
`auto_routing` is an opt-in request flag, separate from the `auto` model alias. When you set `auto_routing: true`, the gateway scores the request's complexity and routes it to the best **quantized**, **MoE**, or **dense** sibling *within the model family you requested*. It never swaps to an unrelated model, and it falls back to the model you asked for if that family has no matching sibling.
The score is additive. It rises with prompt length, many or high-agency tools (e.g. `code_interpreter`, `mcp`), `tool_choice: 'required'`, structured output, a large `max_output_tokens`, multi-turn context, and complex-reasoning cues in the text (debug, refactor, plan, incident, code); it falls for short prompts and recognized simple tasks (translate, summarize, classify, extract). The total picks the tier. Higher scores route to `dense`, mid to `moe`, low to `quantized`. A matching `reasoning.effort` is set (from `minimal` up to `xhigh`) unless you've set effort yourself. So a short "summarize this" routes to `quantized` at `minimal` effort, while a long incident write-up routes to `dense` at `high` (or `xhigh`) effort.
Whenever routing runs, the response metadata records `routed_model` - the variant actually used. Add `auto_routing_debug: true` to also get an `auto_routing_debug` metadata field: a compact JSON string with the requested and routed model, the chosen tier, reasoning effort, score, and the reasons behind the decision. It's recorded even when no sibling variant is available, so it's useful for validating rollout behavior. Leave this field off for normal production traffic.
### Stream text as it is generated
Set `stream: true` to receive server-sent events instead of waiting for the full response. Use it to render partial output as it arrives.
```ts TypeScript theme={null}
import { CreateAcceptEnum } from '@meetkai/mka1/sdk/responses';
import { EventStream } from '@meetkai/mka1/lib/event-streams';
const stream = await mka1.llm.responses.create({
responsesCreateRequest: {
model: 'auto',
input: 'Write three release notes bullets for our docs update.',
stream: true,
},
}, { acceptHeaderOverride: CreateAcceptEnum.textEventStream });
if (stream instanceof EventStream) {
for await (const event of stream) {
if (event.data.type === 'response.output_text.delta') {
process.stdout.write(event.data.delta);
}
}
}
```
```python Python theme={null}
stream = sdk.llm.responses.create(
model="auto",
input="Write three release notes bullets for our docs update.",
stream=True,
)
for event in stream:
if event.data.type == "response.output_text.delta":
print(event.data.delta, end="", flush=True)
```
### Multimodal input (image + text)
The Responses API accepts text, images, audio, and files in one request. Use a structured `input` array of message items, where `content` is an array mixing `input_text` and `input_image` (image via URL, base64 data URI, or an uploaded `file_id`).
```ts TypeScript theme={null}
const result = await mka1.llm.responses.create({
xOnBehalfOf: '',
responsesCreateRequest: {
model: 'openai:gpt-4.1', // vision-capable — 'auto' drops images today
input: [
{
type: 'message',
role: 'user',
content: [
{ type: 'input_text', text: 'Describe what you see in this image.' },
{
type: 'input_image',
imageUrl: 'https://upload.wikimedia.org/wikipedia/commons/3/3a/Cat03.jpg',
},
],
},
],
},
});
```
```python Python theme={null}
res = sdk.llm.responses.create(
model="openai:gpt-4.1", # vision-capable — 'auto' drops images today
input=[
{
"type": "message",
"role": "user",
"content": [
{"type": "input_text", "text": "Describe what you see in this image."},
{
"type": "input_image",
"image_url": "https://upload.wikimedia.org/wikipedia/commons/3/3a/Cat03.jpg",
},
],
},
],
x_on_behalf_of="",
)
```
### Background responses
For long-running work, set `background: true` (with `stream: false`) to get an immediate queued response, then retrieve the result later by polling with `mka1.llm.responses.get(...)` or by streaming. See the [background responses](https://docs.mka1.com/docs/background-responses) guide.
```ts TypeScript theme={null}
import type { ResponseObject } from '@meetkai/mka1/models/components';
const queued = await mka1.llm.responses.create({
responsesCreateRequest: {
model: 'auto',
input: 'Write a two-sentence history of the fax machine.',
background: true,
stream: false,
},
}) as ResponseObject;
// queued.status === 'queued'
let response = queued;
while (response.status === 'queued' || response.status === 'in_progress') {
await new Promise((r) => setTimeout(r, 2000));
response = await mka1.llm.responses.get({ responseId: queued.id }) as ResponseObject;
}
console.log(response.outputText);
```
```python Python theme={null}
import time
queued = sdk.llm.responses.create(
model="auto",
input="Write a two-sentence history of the fax machine.",
background=True,
stream=False,
) # queued.status == "queued"
response = queued
while response.status in ("queued", "in_progress"):
time.sleep(2)
response = sdk.llm.responses.get(response_id=queued.id)
print(response.output_text)
```
#### Webhooks instead of polling
Instead of polling, pass `webhook_url` (and optionally `webhook_secret`) when creating a background response. The gateway POSTs every status change to your endpoint — `response.queued`, `response.in_progress`, `response.completed`, `response.failed`, `response.incomplete`, `response.cancelled` — as `{ event, resource_id, created_at, data }`, where `data` is the full event object.
With a secret set, each delivery carries `X-Webhook-Signature: sha256=`, an HMAC-SHA256 of the raw JSON body — verify it before trusting the payload. Delivery never blocks the response: three attempts with exponential backoff and a 10-second timeout. The endpoint must be publicly reachable — private and localhost addresses are rejected. The gateway requires `webhook_secret` to be at least 16 characters.
```ts TypeScript theme={null}
const queued = await mka1.llm.responses.create({
responsesCreateRequest: {
model: 'auto',
input: 'Summarize this 80-page report…',
background: true,
stream: false,
webhookUrl: 'https://your-app.example.com/hooks/mka1',
webhookSecret: process.env.MKA1_WEBHOOK_SECRET,
},
}) as ResponseObject;
```
```python Python theme={null}
import os
queued = sdk.llm.responses.create(
model="auto",
input="Summarize this 80-page report…",
background=True,
stream=False,
webhook_url="https://your-app.example.com/hooks/mka1",
webhook_secret=os.environ["MKA1_WEBHOOK_SECRET"],
)
```
For your receiving side:
```ts theme={null}
import crypto from 'node:crypto';
// In your webhook handler — verify X-Webhook-Signature against the raw request body
function isValidSignature(rawBody: string, signatureHeader: string, secret: string) {
const expected = 'sha256=' + crypto.createHmac('sha256', secret).update(rawBody).digest('hex');
return crypto.timingSafeEqual(Buffer.from(expected), Buffer.from(signatureHeader));
}
```
## Conversations & memory
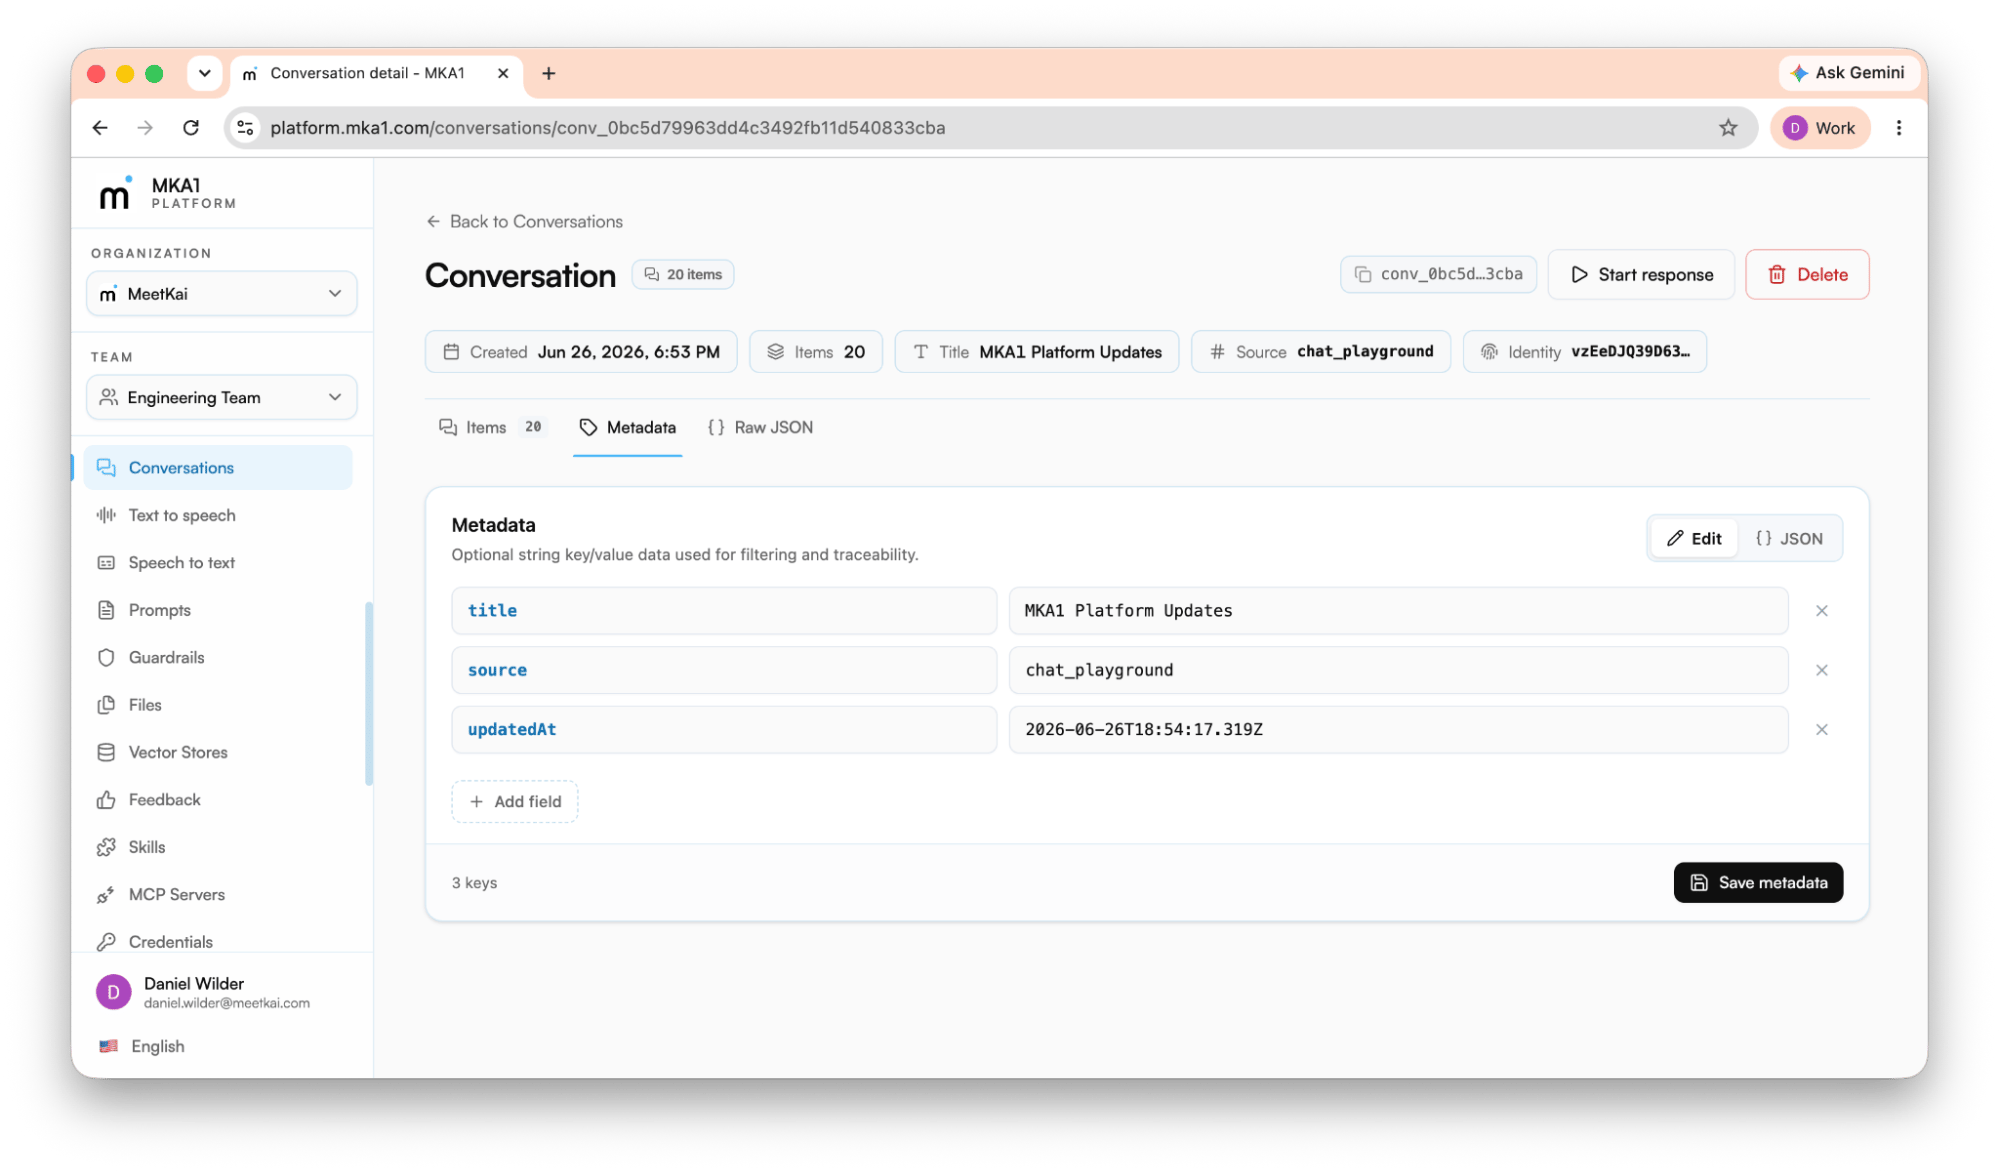 MKA1 gives you two complementary ways to keep context across turns: **stateful conversations** (history kept for one session, on the server) and the **long-term memory store** (the history tool, persistent across sessions and scoped per end-user).
### Stateful conversations
A conversation is a server-side container the gateway uses to hold state between Responses requests, so you never resend the full history. Create one, then pass its ID on every follow-up response.
```ts TypeScript theme={null}
import { SDK } from '@meetkai/mka1';
const mka1 = new SDK({ bearerAuth: `Bearer ${YOUR_API_KEY}` });
// 1. Create a conversation (optional metadata for your own routing)
const conv = await mka1.llm.conversations.create({
xOnBehalfOf: '',
createConversationRequest: {
metadata: { session_id: 'web-42', channel: 'support' },
},
});
// 2. (Optional) write history explicitly before calling Responses
await mka1.llm.conversations.createItems({
conversationId: conv.id,
xOnBehalfOf: '',
createItemsRequest: {
items: [
{ type: 'message', role: 'user', content: 'Summarize the latest support ticket.' },
],
},
});
// 3. Continue the flow — attach the conversation so the model has history
const result = await mka1.llm.responses.create({
responsesCreateRequest: {
model: 'auto',
conversation: conv.id,
input: 'Turn that summary into a customer-ready reply.',
},
});
```
```python Python theme={null}
# 1. Create a conversation (optional metadata for your own routing)
conv = sdk.llm.conversations.create(
metadata={"session_id": "web-42", "channel": "support"},
x_on_behalf_of="",
)
# 2. (Optional) write history explicitly before calling Responses
sdk.llm.conversations.create_items(
conversation_id=conv.id,
items=[
{"type": "message", "role": "user", "content": "Summarize the latest support ticket."},
],
x_on_behalf_of="",
)
# 3. Continue the flow — attach the conversation so the model has history
result = sdk.llm.responses.create(
model="auto",
conversation=conv.id,
input="Turn that summary into a customer-ready reply.",
)
```
Pass `conversation` on every request; the gateway maintains the thread for you. Use a conversation when you want a reusable, inspectable container for many turns and the ability to list, fetch, or delete items later. Use `previous_response_id` instead when you only need to fork from a single earlier response.
### Long-term memory store
The history tool gives the model memory that persists **across** sessions. Add `{ type: 'history' }` to `tools` and set `store: true`; each request/response pair is indexed in the background and searched semantically (vector embeddings) when the model decides it needs to recall something. Memory is isolated per end-user via the `X-On-Behalf-Of` header.
```ts TypeScript theme={null}
// Session 1: store a fact
await mka1.llm.responses.create({
xOnBehalfOf: 'user-123',
responsesCreateRequest: {
model: 'auto',
input: 'Remember this: my favorite color is blue.',
tools: [{ type: 'history' }],
store: true,
},
});
// Session 2 (minutes or days later — indexing takes ~1–2 min): recall it
const recalled = await mka1.llm.responses.create({
xOnBehalfOf: 'user-123',
responsesCreateRequest: {
model: 'auto',
input: 'What is my favorite color?',
tools: [{ type: 'history' }],
store: true,
},
});
// → "Your favorite color is blue."
```
```python Python theme={null}
# Session 1: store a fact
sdk.llm.responses.create(
model="auto",
input="Remember this: my favorite color is blue.",
tools=[{"type": "history"}],
store=True,
x_on_behalf_of="user-123",
)
# Session 2 (minutes or days later — indexing takes ~1–2 min): recall it
recalled = sdk.llm.responses.create(
model="auto",
input="What is my favorite color?",
tools=[{"type": "history"}],
store=True,
x_on_behalf_of="user-123",
)
```
**Rule of thumb:** conversations keep one session coherent; the history tool carries preferences, decisions, and context forward across many sessions for the same user.
## Files, vector stores & retrieval (RAG)
MKA1 gives you two complementary ways to keep context across turns: **stateful conversations** (history kept for one session, on the server) and the **long-term memory store** (the history tool, persistent across sessions and scoped per end-user).
### Stateful conversations
A conversation is a server-side container the gateway uses to hold state between Responses requests, so you never resend the full history. Create one, then pass its ID on every follow-up response.
```ts TypeScript theme={null}
import { SDK } from '@meetkai/mka1';
const mka1 = new SDK({ bearerAuth: `Bearer ${YOUR_API_KEY}` });
// 1. Create a conversation (optional metadata for your own routing)
const conv = await mka1.llm.conversations.create({
xOnBehalfOf: '',
createConversationRequest: {
metadata: { session_id: 'web-42', channel: 'support' },
},
});
// 2. (Optional) write history explicitly before calling Responses
await mka1.llm.conversations.createItems({
conversationId: conv.id,
xOnBehalfOf: '',
createItemsRequest: {
items: [
{ type: 'message', role: 'user', content: 'Summarize the latest support ticket.' },
],
},
});
// 3. Continue the flow — attach the conversation so the model has history
const result = await mka1.llm.responses.create({
responsesCreateRequest: {
model: 'auto',
conversation: conv.id,
input: 'Turn that summary into a customer-ready reply.',
},
});
```
```python Python theme={null}
# 1. Create a conversation (optional metadata for your own routing)
conv = sdk.llm.conversations.create(
metadata={"session_id": "web-42", "channel": "support"},
x_on_behalf_of="",
)
# 2. (Optional) write history explicitly before calling Responses
sdk.llm.conversations.create_items(
conversation_id=conv.id,
items=[
{"type": "message", "role": "user", "content": "Summarize the latest support ticket."},
],
x_on_behalf_of="",
)
# 3. Continue the flow — attach the conversation so the model has history
result = sdk.llm.responses.create(
model="auto",
conversation=conv.id,
input="Turn that summary into a customer-ready reply.",
)
```
Pass `conversation` on every request; the gateway maintains the thread for you. Use a conversation when you want a reusable, inspectable container for many turns and the ability to list, fetch, or delete items later. Use `previous_response_id` instead when you only need to fork from a single earlier response.
### Long-term memory store
The history tool gives the model memory that persists **across** sessions. Add `{ type: 'history' }` to `tools` and set `store: true`; each request/response pair is indexed in the background and searched semantically (vector embeddings) when the model decides it needs to recall something. Memory is isolated per end-user via the `X-On-Behalf-Of` header.
```ts TypeScript theme={null}
// Session 1: store a fact
await mka1.llm.responses.create({
xOnBehalfOf: 'user-123',
responsesCreateRequest: {
model: 'auto',
input: 'Remember this: my favorite color is blue.',
tools: [{ type: 'history' }],
store: true,
},
});
// Session 2 (minutes or days later — indexing takes ~1–2 min): recall it
const recalled = await mka1.llm.responses.create({
xOnBehalfOf: 'user-123',
responsesCreateRequest: {
model: 'auto',
input: 'What is my favorite color?',
tools: [{ type: 'history' }],
store: true,
},
});
// → "Your favorite color is blue."
```
```python Python theme={null}
# Session 1: store a fact
sdk.llm.responses.create(
model="auto",
input="Remember this: my favorite color is blue.",
tools=[{"type": "history"}],
store=True,
x_on_behalf_of="user-123",
)
# Session 2 (minutes or days later — indexing takes ~1–2 min): recall it
recalled = sdk.llm.responses.create(
model="auto",
input="What is my favorite color?",
tools=[{"type": "history"}],
store=True,
x_on_behalf_of="user-123",
)
```
**Rule of thumb:** conversations keep one session coherent; the history tool carries preferences, decisions, and context forward across many sessions for the same user.
## Files, vector stores & retrieval (RAG)
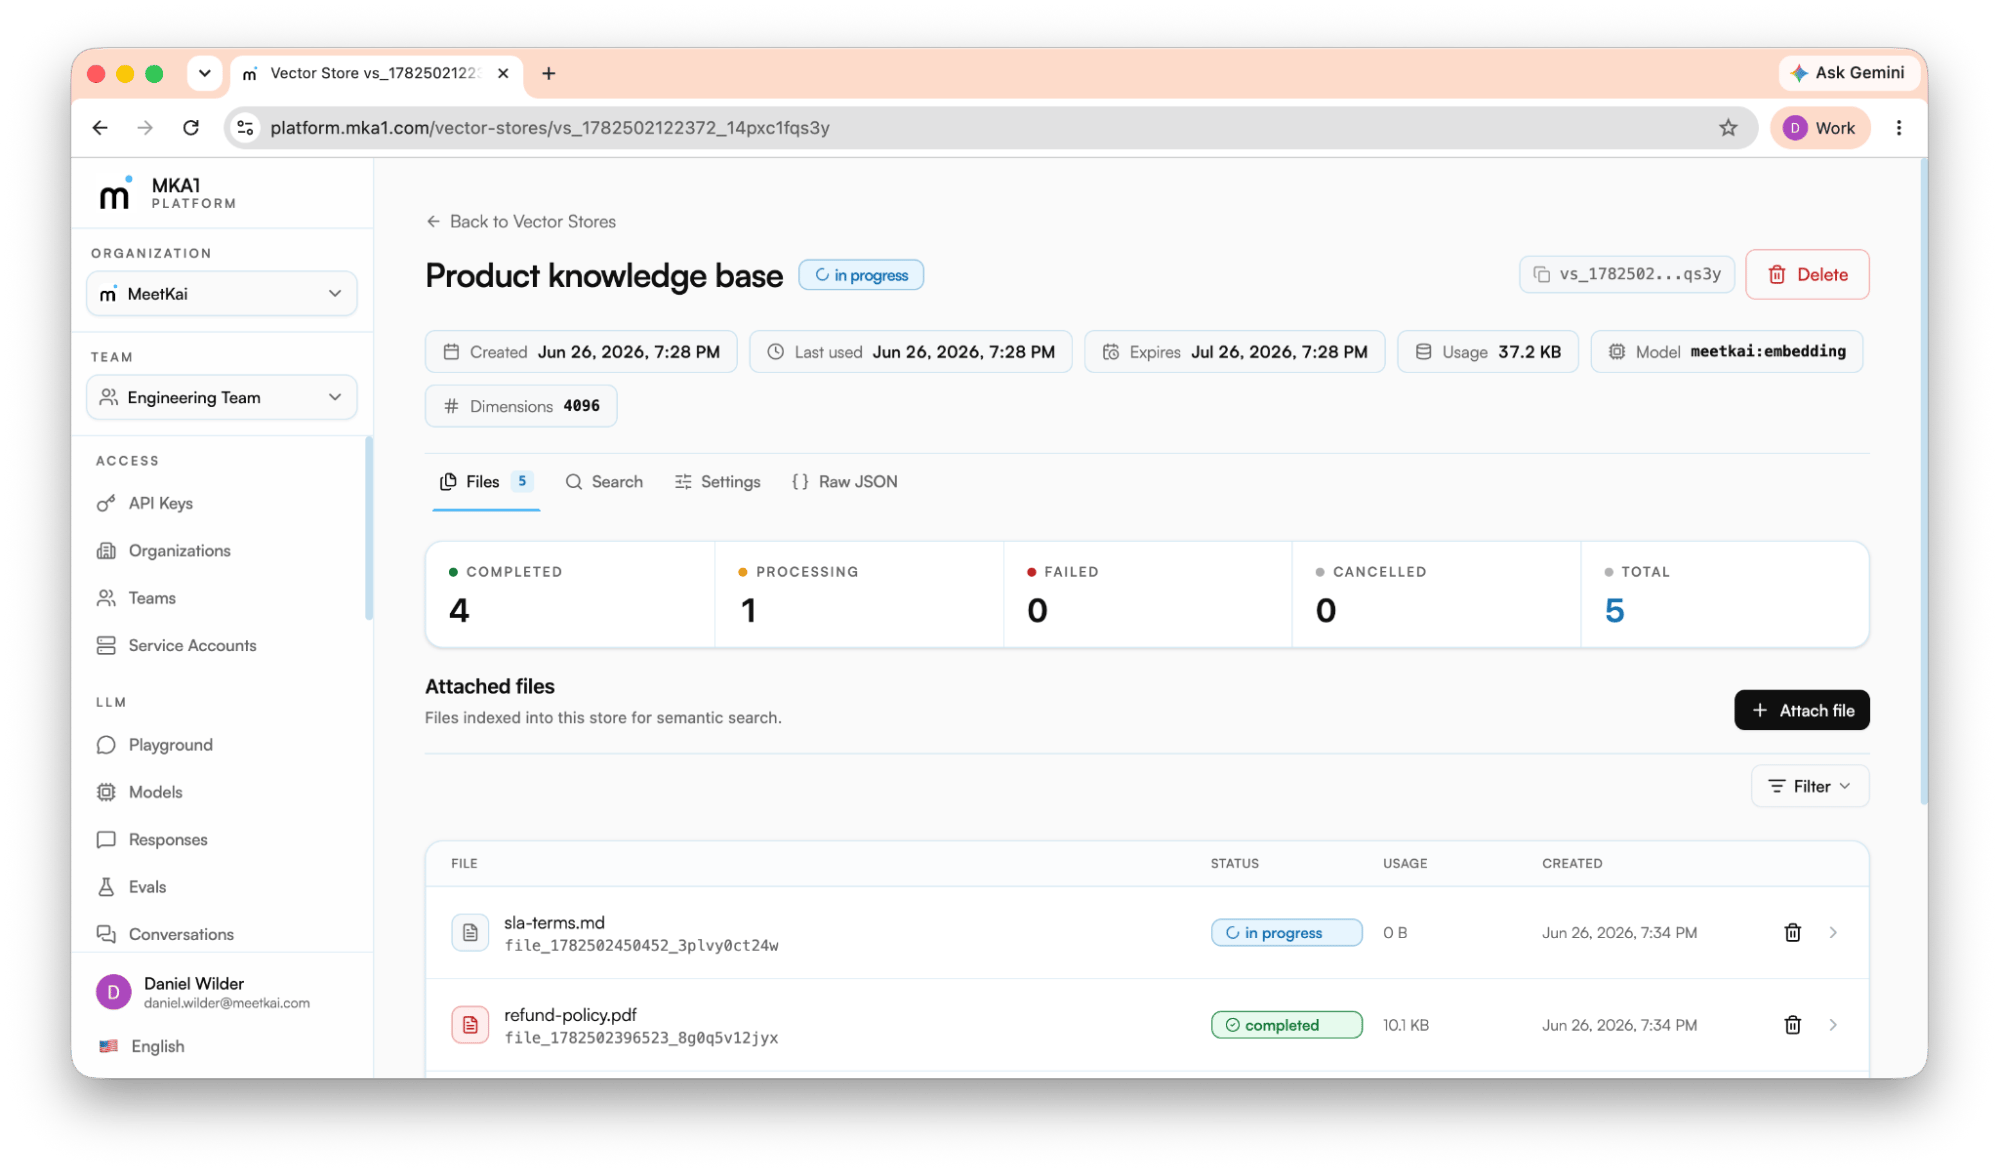 MKA1 splits retrieval into two resources: **Files** hold your uploaded documents, and **Vector Stores** index those files so you can run semantic search over the resulting chunks. This is the standard pattern for document-backed assistants and grounded responses. Indexing is automatic. You upload, attach, and search; MKA1 handles chunking and embeddings.
All snippets below use the TypeScript or Python MKA1 SDK. Initialize the client once:
```ts TypeScript theme={null}
import { SDK } from '@meetkai/mka1';
const mka1 = new SDK({ bearerAuth: 'Bearer ' });
```
```python Python theme={null}
from meetkai_mka1 import SDK
sdk = SDK(bearer_auth="Bearer ")
```
### 1. Upload a file
Upload the document once. The response returns a file object whose `id` looks like `file_1783478060914_iemq10dh5h` — pass it to vector stores in the next step.
```ts TypeScript theme={null}
const file = Bun.file('./support-manual.pdf');
const result = await mka1.llm.files.upload({
xOnBehalfOf: '',
requestBody: { file, purpose: 'assistants' },
});
// result.id → e.g. file_1783478060914_iemq10dh5h
```
```python Python theme={null}
with open("support-manual.pdf", "rb") as fh:
result = sdk.llm.files.upload(
file={"file_name": "support-manual.pdf", "content": fh.read()},
purpose="assistants",
x_on_behalf_of="",
)
# result.id → e.g. file_1783481291595_r19s7ueog7o
```
### 2. Create a vector store and attach files
Create a vector store, passing one or more uploaded file IDs in `fileIds`. The store returns an ID such as `vs_1783478061269_mptf5b93t0q`. Attached files index automatically.
```ts TypeScript theme={null}
const vectorStore = await mka1.llm.vectorStores.create({
xOnBehalfOf: '',
createVectorStoreRequest: {
name: 'Support knowledge base',
description: 'Indexed support manuals and help center docs',
fileIds: [result.id],
expiresAfter: { anchor: 'last_active_at', days: 30 },
},
});
```
```python Python theme={null}
vector_store = sdk.llm.vector_stores.create(
name="Support knowledge base",
description="Indexed support manuals and help center docs",
file_ids=[result.id],
expires_after={"anchor": "last_active_at", "days": 30},
x_on_behalf_of="",
)
```
To add more files later without recreating the store, use `createFile`:
```ts TypeScript theme={null}
const second = await mka1.llm.files.upload({
xOnBehalfOf: '',
requestBody: { file: Bun.file('./help-center-faq.pdf'), purpose: 'assistants' },
});
const vsFile = await mka1.llm.vectorStores.createFile({
vectorStoreId: vectorStore.id,
xOnBehalfOf: '',
createVectorStoreFileRequest: {
fileId: second.id,
attributes: { category: 'faq', version: '2.0' },
},
});
```
```python Python theme={null}
with open("help-center-faq.pdf", "rb") as fh:
second = sdk.llm.files.upload(
file={"file_name": "help-center-faq.pdf", "content": fh.read()},
purpose="assistants",
x_on_behalf_of="",
)
vs_file = sdk.llm.vector_stores.create_file(
vector_store_id=vector_store.id,
file_id=second.id,
attributes={"category": "faq", "version": "2.0"},
x_on_behalf_of="",
)
```
A vector store file can report `status: "in_progress"` while indexing runs, so wait for processing to complete before relying on search results.
### 3. Search the store for relevant chunks
Run a semantic search to retrieve the most relevant chunks for a user question. The response returns ranked matches with `file_id`, `filename`, score data, and chunk content. Feed that text into your own application logic or a Responses request.
```ts TypeScript theme={null}
const results = await mka1.llm.vectorStores.search({
vectorStoreId: vectorStore.id,
xOnBehalfOf: '',
searchVectorStoreRequest: {
query: 'How do I reset my password?',
maxNumResults: 5,
},
});
```
```python Python theme={null}
results = sdk.llm.vector_stores.search(
vector_store_id=vector_store.id,
query="How do I reset my password?",
max_num_results=5,
x_on_behalf_of="",
)
```
### Bonus: structured extraction
When you need typed JSON out of a document rather than free-text chunks, use the Extract resource. For one-off work, call `extract` with an inline JSON Schema — passed as a JSON string — and the file to read. For repeated jobs, save the schema once with `createSchema` (here the schema is a plain object) and run it against many files with `extractWithSchema`, referencing the schema id returned under `data.id`. Name a model explicitly on every extract call. A successful response returns `success`, a `data` object with the extracted fields, and `metadata` about the run.
```ts TypeScript theme={null}
const schema = {
type: 'object',
properties: {
document_title: { type: 'string' },
reset_link_expiry_minutes: { type: 'number' },
support_email: { type: 'string' },
},
required: ['document_title'],
};
// One-off extraction — schema is a JSON string here
const res = await mka1.llm.extract.extract({
requestBody: {
model: 'openai:gpt-4.1', // 'auto' currently 500s on this endpoint
prompt: 'Extract the document title, reset link expiry, and support email.',
schema: JSON.stringify(schema),
file: Bun.file('./support-manual.txt'),
},
});
// → { success, data: {…}, metadata: {…} }
```
```python Python theme={null}
import json
schema = {
"type": "object",
"properties": {
"document_title": {"type": "string"},
"reset_link_expiry_minutes": {"type": "number"},
"support_email": {"type": "string"},
},
"required": ["document_title"],
}
# One-off extraction — schema is a JSON string here
with open("support-manual.txt", "rb") as fh:
res = sdk.llm.extract.extract(
model="openai:gpt-4.1", # 'auto' currently 500s on this endpoint
prompt="Extract the document title, reset link expiry, and support email.",
schema=json.dumps(schema),
file={"file_name": "support-manual.txt", "content": fh.read()},
)
# res.success, res.data, res.metadata
```
```ts TypeScript theme={null}
// Reusable template — schema is an object here; the id arrives under data.id
const created = await mka1.llm.extract.createSchema({
extractionSchema: {
name: 'support-manual',
description: 'Extract support manual facts',
schema,
},
});
const out = await mka1.llm.extract.extractWithSchema({
schemaId: created.data.id,
requestBody: {
model: 'openai:gpt-4.1',
prompt: 'Extract the fields.',
file: Bun.file('./support-manual.txt'),
},
});
```
```python Python theme={null}
# Reusable template — schema is a dict here; the id arrives under data.id
created = sdk.llm.extract.create_schema(
name="support-manual",
description="Extract support manual facts",
schema=schema,
)
out = sdk.llm.extract.extract_with_schema(
schema_id=created.data.id,
model="openai:gpt-4.1",
prompt="Extract the fields.",
file={"file_name": "support-manual.txt", "content": open("support-manual.txt", "rb").read()},
)
```
## Agents, tools & MCP
MKA1 splits retrieval into two resources: **Files** hold your uploaded documents, and **Vector Stores** index those files so you can run semantic search over the resulting chunks. This is the standard pattern for document-backed assistants and grounded responses. Indexing is automatic. You upload, attach, and search; MKA1 handles chunking and embeddings.
All snippets below use the TypeScript or Python MKA1 SDK. Initialize the client once:
```ts TypeScript theme={null}
import { SDK } from '@meetkai/mka1';
const mka1 = new SDK({ bearerAuth: 'Bearer ' });
```
```python Python theme={null}
from meetkai_mka1 import SDK
sdk = SDK(bearer_auth="Bearer ")
```
### 1. Upload a file
Upload the document once. The response returns a file object whose `id` looks like `file_1783478060914_iemq10dh5h` — pass it to vector stores in the next step.
```ts TypeScript theme={null}
const file = Bun.file('./support-manual.pdf');
const result = await mka1.llm.files.upload({
xOnBehalfOf: '',
requestBody: { file, purpose: 'assistants' },
});
// result.id → e.g. file_1783478060914_iemq10dh5h
```
```python Python theme={null}
with open("support-manual.pdf", "rb") as fh:
result = sdk.llm.files.upload(
file={"file_name": "support-manual.pdf", "content": fh.read()},
purpose="assistants",
x_on_behalf_of="",
)
# result.id → e.g. file_1783481291595_r19s7ueog7o
```
### 2. Create a vector store and attach files
Create a vector store, passing one or more uploaded file IDs in `fileIds`. The store returns an ID such as `vs_1783478061269_mptf5b93t0q`. Attached files index automatically.
```ts TypeScript theme={null}
const vectorStore = await mka1.llm.vectorStores.create({
xOnBehalfOf: '',
createVectorStoreRequest: {
name: 'Support knowledge base',
description: 'Indexed support manuals and help center docs',
fileIds: [result.id],
expiresAfter: { anchor: 'last_active_at', days: 30 },
},
});
```
```python Python theme={null}
vector_store = sdk.llm.vector_stores.create(
name="Support knowledge base",
description="Indexed support manuals and help center docs",
file_ids=[result.id],
expires_after={"anchor": "last_active_at", "days": 30},
x_on_behalf_of="",
)
```
To add more files later without recreating the store, use `createFile`:
```ts TypeScript theme={null}
const second = await mka1.llm.files.upload({
xOnBehalfOf: '',
requestBody: { file: Bun.file('./help-center-faq.pdf'), purpose: 'assistants' },
});
const vsFile = await mka1.llm.vectorStores.createFile({
vectorStoreId: vectorStore.id,
xOnBehalfOf: '',
createVectorStoreFileRequest: {
fileId: second.id,
attributes: { category: 'faq', version: '2.0' },
},
});
```
```python Python theme={null}
with open("help-center-faq.pdf", "rb") as fh:
second = sdk.llm.files.upload(
file={"file_name": "help-center-faq.pdf", "content": fh.read()},
purpose="assistants",
x_on_behalf_of="",
)
vs_file = sdk.llm.vector_stores.create_file(
vector_store_id=vector_store.id,
file_id=second.id,
attributes={"category": "faq", "version": "2.0"},
x_on_behalf_of="",
)
```
A vector store file can report `status: "in_progress"` while indexing runs, so wait for processing to complete before relying on search results.
### 3. Search the store for relevant chunks
Run a semantic search to retrieve the most relevant chunks for a user question. The response returns ranked matches with `file_id`, `filename`, score data, and chunk content. Feed that text into your own application logic or a Responses request.
```ts TypeScript theme={null}
const results = await mka1.llm.vectorStores.search({
vectorStoreId: vectorStore.id,
xOnBehalfOf: '',
searchVectorStoreRequest: {
query: 'How do I reset my password?',
maxNumResults: 5,
},
});
```
```python Python theme={null}
results = sdk.llm.vector_stores.search(
vector_store_id=vector_store.id,
query="How do I reset my password?",
max_num_results=5,
x_on_behalf_of="",
)
```
### Bonus: structured extraction
When you need typed JSON out of a document rather than free-text chunks, use the Extract resource. For one-off work, call `extract` with an inline JSON Schema — passed as a JSON string — and the file to read. For repeated jobs, save the schema once with `createSchema` (here the schema is a plain object) and run it against many files with `extractWithSchema`, referencing the schema id returned under `data.id`. Name a model explicitly on every extract call. A successful response returns `success`, a `data` object with the extracted fields, and `metadata` about the run.
```ts TypeScript theme={null}
const schema = {
type: 'object',
properties: {
document_title: { type: 'string' },
reset_link_expiry_minutes: { type: 'number' },
support_email: { type: 'string' },
},
required: ['document_title'],
};
// One-off extraction — schema is a JSON string here
const res = await mka1.llm.extract.extract({
requestBody: {
model: 'openai:gpt-4.1', // 'auto' currently 500s on this endpoint
prompt: 'Extract the document title, reset link expiry, and support email.',
schema: JSON.stringify(schema),
file: Bun.file('./support-manual.txt'),
},
});
// → { success, data: {…}, metadata: {…} }
```
```python Python theme={null}
import json
schema = {
"type": "object",
"properties": {
"document_title": {"type": "string"},
"reset_link_expiry_minutes": {"type": "number"},
"support_email": {"type": "string"},
},
"required": ["document_title"],
}
# One-off extraction — schema is a JSON string here
with open("support-manual.txt", "rb") as fh:
res = sdk.llm.extract.extract(
model="openai:gpt-4.1", # 'auto' currently 500s on this endpoint
prompt="Extract the document title, reset link expiry, and support email.",
schema=json.dumps(schema),
file={"file_name": "support-manual.txt", "content": fh.read()},
)
# res.success, res.data, res.metadata
```
```ts TypeScript theme={null}
// Reusable template — schema is an object here; the id arrives under data.id
const created = await mka1.llm.extract.createSchema({
extractionSchema: {
name: 'support-manual',
description: 'Extract support manual facts',
schema,
},
});
const out = await mka1.llm.extract.extractWithSchema({
schemaId: created.data.id,
requestBody: {
model: 'openai:gpt-4.1',
prompt: 'Extract the fields.',
file: Bun.file('./support-manual.txt'),
},
});
```
```python Python theme={null}
# Reusable template — schema is a dict here; the id arrives under data.id
created = sdk.llm.extract.create_schema(
name="support-manual",
description="Extract support manual facts",
schema=schema,
)
out = sdk.llm.extract.extract_with_schema(
schema_id=created.data.id,
model="openai:gpt-4.1",
prompt="Extract the fields.",
file={"file_name": "support-manual.txt", "content": open("support-manual.txt", "rb").read()},
)
```
## Agents, tools & MCP
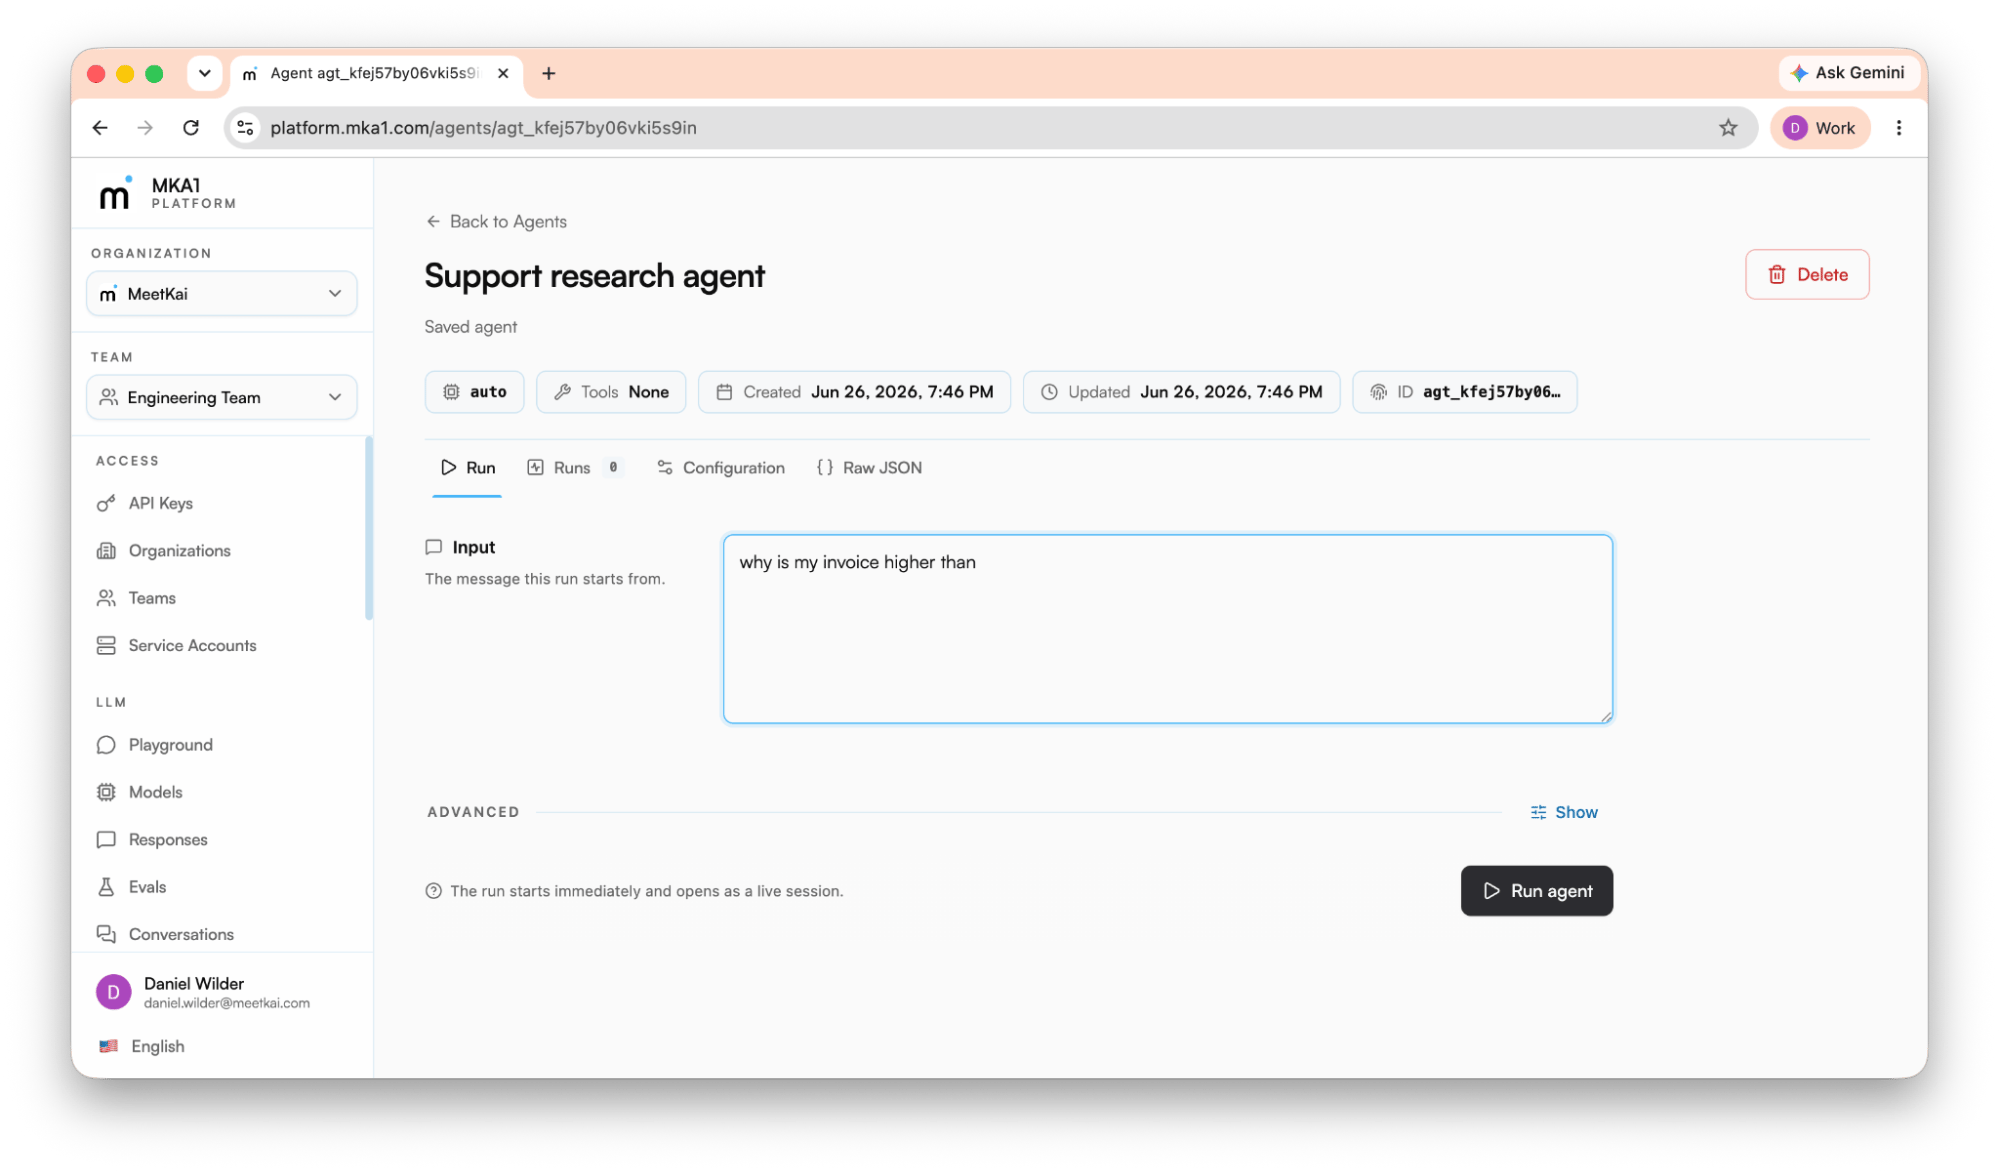 A **saved agent** is a reusable agent object that stores its own behavior so you don't rebuild a Responses request every time. Each agent persists a model, instructions, and a tool configuration (`tools`, `tool_choice`, `parallel_tool_calls`, `max_tool_calls`, `text`, `reasoning`). When you run it, the service combines your per-run input with the saved config and forwards it into the Responses API through mkllm-gateway. Every run persists the input plus the upstream Responses result, so you also get run history for free. Agents get a stable id like `agt_...`.
### Create an agent
Create an agent once with the MKA1 Python, TypeScript, or C# SDKs, including a built-in `web_search` tool so runs can pull in current external information:
```ts TypeScript theme={null}
import { SDK } from '@meetkai/mka1';
const mka1 = new SDK({ bearerAuth: 'Bearer YOUR_API_KEY' });
const agent = await mka1.agents.createAgent({
createAgentRequest: {
name: 'release-research-agent',
description: 'Looks up current release information before answering.',
model: 'auto',
instructions: 'Use web search when the question depends on current external information.',
tools: [{ type: 'web_search', searchContextSize: 'medium' }],
metadata: { team: 'docs' },
},
});
console.log(agent.id);
```
```python Python theme={null}
from meetkai_mka1 import SDK
sdk = SDK(bearer_auth="Bearer YOUR_API_KEY")
agent = sdk.agents.create_agent(
name="release-research-agent",
description="Looks up current release information before answering.",
model="auto",
instructions="Use web search when the question depends on current external information.",
tools=[{"type": "web_search", "search_context_size": "medium"}],
metadata={"team": "docs"},
)
print(agent.id)
```
The full `tools` array (as sent over HTTPS) configures the built-in tool:
```json theme={null}
"tools": [
{ "type": "web_search", "search_context_size": "medium" }
],
"tool_choice": "auto",
"parallel_tool_calls": true
```
### Run an agent
Execute by sending only the per-run input. The run persists `status`, the stored `gateway_response`, and `gateway_response_id` from the upstream call. If the run used `web_search`, the persisted `gateway_response` includes the tool-call entries.
```ts TypeScript theme={null}
const run = await mka1.agentRuns.createAgentRun({
agentId: agent.id,
createAgentRunRequest: {
input: "What is Bun's current stable version? Use web search before answering.",
metadata: { request_source: 'docs' },
},
});
console.log(run.gatewayResponseId);
console.log(run.status);
```
```python Python theme={null}
run = sdk.agent_runs.create_agent_run(
agent_id="agt_123",
input="What is Bun's current stable version? Use web search before answering.",
metadata={"request_source": "docs"},
)
print(run.gateway_response_id)
print(run.status)
```
Use `sdk.agents.list_agents(...)` / `sdk.agent_runs.list_agent_runs(agent_id=...)` to inspect saved agents and prior runs.
```ts TypeScript theme={null}
const agents = await mka1.agents.listAgents({});
const runs = await mka1.agentRuns.listAgentRuns({ agentId: agent.id });
```
```python Python theme={null}
agents = sdk.agents.list_agents()
runs = sdk.agent_runs.list_agent_runs(agent_id="agt_123")
```
### Version history & rollback
Every committed change to a saved agent — create, update, rollback — appends an immutable version, so an agent's configuration history is always inspectable. Rolling back doesn't rewrite history: it appends a new version restored from the target.
```ts TypeScript theme={null}
// Update the agent — this commits version 2
await mka1.agents.updateAgent({
agentId: agent.id,
updateAgentRequest: { instructions: 'Answer in exhaustive detail.' },
});
// Inspect the history
const versions = await mka1.agentVersions.listAgentVersions({ agentId: agent.id });
// versions.data → [ { version: 2, isCurrent: true, … }, { version: 1, … } ]
// Fetch one version in full
const v2 = await mka1.agentVersions.getAgentVersion({ agentId: agent.id, version: 2 });
// Roll back to v1 — appends v3 with restoredFromVersion: 1
await mka1.agentVersions.rollbackAgentVersion({ agentId: agent.id, version: 1 });
```
```python Python theme={null}
sdk.agents.update_agent(agent_id=agent.id, instructions="Answer in exhaustive detail.")
versions = sdk.agent_versions.list_agent_versions(agent_id=agent.id)
# versions.data → [AgentVersion(version=2, is_current=True, …), AgentVersion(version=1, …)]
v2 = sdk.agent_versions.get_agent_version(agent_id=agent.id, version=2)
sdk.agent_versions.rollback_agent_version(agent_id=agent.id, version=1)
# history is now v3 (current, restored_from_version=1), v2, v1
```
### Attach an MCP tool server
Beyond built-in tools, you can let the model call tools from an external MCP server by adding an `mcp` entry to `tools`. Set `require_approval` to `"never"` to run immediately, or `"always"` to pause for end-user approval. Limit callable tools with `allowed_tools`; pass upstream credentials in `headers` (these are masked in stored responses).
```ts TypeScript theme={null}
import type { ResponseObject } from '@meetkai/mka1/models/components';
const response = await mka1.llm.responses.create({
responsesCreateRequest: {
model: 'auto',
instructions: 'Use Linear tools when the user asks about tasks, bugs, or projects.',
input: 'List my most recent Linear issue assigned to me.',
tools: [
{
type: 'mcp',
serverLabel: 'Linear MCP',
serverUrl: 'https://mcp.linear.app/mcp',
allowedTools: ['issues.list'],
headers: { Authorization: `Bearer ${process.env.LINEAR_API_KEY}` },
requireApproval: 'never',
},
],
},
}) as ResponseObject;
console.log(response.outputText);
```
```python Python theme={null}
import os
response = sdk.llm.responses.create(
model="auto",
instructions="Use Linear tools when the user asks about tasks, bugs, or projects.",
input="List my most recent Linear issue assigned to me.",
tools=[
{
"type": "mcp",
"server_label": "Linear MCP",
"server_url": "https://mcp.linear.app/mcp",
"allowed_tools": ["issues.list"],
"headers": {"Authorization": f"Bearer {os.environ['LINEAR_API_KEY']}"},
"require_approval": "never",
},
],
)
print(response.output_text)
```
The model calls the allowed MCP tool and returns the final message in one request. With `require_approval: "always"`, create the response in background mode, poll it, and handle the `mcp_approval_request` item by sending back an `mcp_approval_response`.
## Prompts, skills & guardrails
A **saved agent** is a reusable agent object that stores its own behavior so you don't rebuild a Responses request every time. Each agent persists a model, instructions, and a tool configuration (`tools`, `tool_choice`, `parallel_tool_calls`, `max_tool_calls`, `text`, `reasoning`). When you run it, the service combines your per-run input with the saved config and forwards it into the Responses API through mkllm-gateway. Every run persists the input plus the upstream Responses result, so you also get run history for free. Agents get a stable id like `agt_...`.
### Create an agent
Create an agent once with the MKA1 Python, TypeScript, or C# SDKs, including a built-in `web_search` tool so runs can pull in current external information:
```ts TypeScript theme={null}
import { SDK } from '@meetkai/mka1';
const mka1 = new SDK({ bearerAuth: 'Bearer YOUR_API_KEY' });
const agent = await mka1.agents.createAgent({
createAgentRequest: {
name: 'release-research-agent',
description: 'Looks up current release information before answering.',
model: 'auto',
instructions: 'Use web search when the question depends on current external information.',
tools: [{ type: 'web_search', searchContextSize: 'medium' }],
metadata: { team: 'docs' },
},
});
console.log(agent.id);
```
```python Python theme={null}
from meetkai_mka1 import SDK
sdk = SDK(bearer_auth="Bearer YOUR_API_KEY")
agent = sdk.agents.create_agent(
name="release-research-agent",
description="Looks up current release information before answering.",
model="auto",
instructions="Use web search when the question depends on current external information.",
tools=[{"type": "web_search", "search_context_size": "medium"}],
metadata={"team": "docs"},
)
print(agent.id)
```
The full `tools` array (as sent over HTTPS) configures the built-in tool:
```json theme={null}
"tools": [
{ "type": "web_search", "search_context_size": "medium" }
],
"tool_choice": "auto",
"parallel_tool_calls": true
```
### Run an agent
Execute by sending only the per-run input. The run persists `status`, the stored `gateway_response`, and `gateway_response_id` from the upstream call. If the run used `web_search`, the persisted `gateway_response` includes the tool-call entries.
```ts TypeScript theme={null}
const run = await mka1.agentRuns.createAgentRun({
agentId: agent.id,
createAgentRunRequest: {
input: "What is Bun's current stable version? Use web search before answering.",
metadata: { request_source: 'docs' },
},
});
console.log(run.gatewayResponseId);
console.log(run.status);
```
```python Python theme={null}
run = sdk.agent_runs.create_agent_run(
agent_id="agt_123",
input="What is Bun's current stable version? Use web search before answering.",
metadata={"request_source": "docs"},
)
print(run.gateway_response_id)
print(run.status)
```
Use `sdk.agents.list_agents(...)` / `sdk.agent_runs.list_agent_runs(agent_id=...)` to inspect saved agents and prior runs.
```ts TypeScript theme={null}
const agents = await mka1.agents.listAgents({});
const runs = await mka1.agentRuns.listAgentRuns({ agentId: agent.id });
```
```python Python theme={null}
agents = sdk.agents.list_agents()
runs = sdk.agent_runs.list_agent_runs(agent_id="agt_123")
```
### Version history & rollback
Every committed change to a saved agent — create, update, rollback — appends an immutable version, so an agent's configuration history is always inspectable. Rolling back doesn't rewrite history: it appends a new version restored from the target.
```ts TypeScript theme={null}
// Update the agent — this commits version 2
await mka1.agents.updateAgent({
agentId: agent.id,
updateAgentRequest: { instructions: 'Answer in exhaustive detail.' },
});
// Inspect the history
const versions = await mka1.agentVersions.listAgentVersions({ agentId: agent.id });
// versions.data → [ { version: 2, isCurrent: true, … }, { version: 1, … } ]
// Fetch one version in full
const v2 = await mka1.agentVersions.getAgentVersion({ agentId: agent.id, version: 2 });
// Roll back to v1 — appends v3 with restoredFromVersion: 1
await mka1.agentVersions.rollbackAgentVersion({ agentId: agent.id, version: 1 });
```
```python Python theme={null}
sdk.agents.update_agent(agent_id=agent.id, instructions="Answer in exhaustive detail.")
versions = sdk.agent_versions.list_agent_versions(agent_id=agent.id)
# versions.data → [AgentVersion(version=2, is_current=True, …), AgentVersion(version=1, …)]
v2 = sdk.agent_versions.get_agent_version(agent_id=agent.id, version=2)
sdk.agent_versions.rollback_agent_version(agent_id=agent.id, version=1)
# history is now v3 (current, restored_from_version=1), v2, v1
```
### Attach an MCP tool server
Beyond built-in tools, you can let the model call tools from an external MCP server by adding an `mcp` entry to `tools`. Set `require_approval` to `"never"` to run immediately, or `"always"` to pause for end-user approval. Limit callable tools with `allowed_tools`; pass upstream credentials in `headers` (these are masked in stored responses).
```ts TypeScript theme={null}
import type { ResponseObject } from '@meetkai/mka1/models/components';
const response = await mka1.llm.responses.create({
responsesCreateRequest: {
model: 'auto',
instructions: 'Use Linear tools when the user asks about tasks, bugs, or projects.',
input: 'List my most recent Linear issue assigned to me.',
tools: [
{
type: 'mcp',
serverLabel: 'Linear MCP',
serverUrl: 'https://mcp.linear.app/mcp',
allowedTools: ['issues.list'],
headers: { Authorization: `Bearer ${process.env.LINEAR_API_KEY}` },
requireApproval: 'never',
},
],
},
}) as ResponseObject;
console.log(response.outputText);
```
```python Python theme={null}
import os
response = sdk.llm.responses.create(
model="auto",
instructions="Use Linear tools when the user asks about tasks, bugs, or projects.",
input="List my most recent Linear issue assigned to me.",
tools=[
{
"type": "mcp",
"server_label": "Linear MCP",
"server_url": "https://mcp.linear.app/mcp",
"allowed_tools": ["issues.list"],
"headers": {"Authorization": f"Bearer {os.environ['LINEAR_API_KEY']}"},
"require_approval": "never",
},
],
)
print(response.output_text)
```
The model calls the allowed MCP tool and returns the final message in one request. With `require_approval: "always"`, create the response in background mode, poll it, and handle the `mcp_approval_request` item by sending back an `mcp_approval_response`.
## Prompts, skills & guardrails
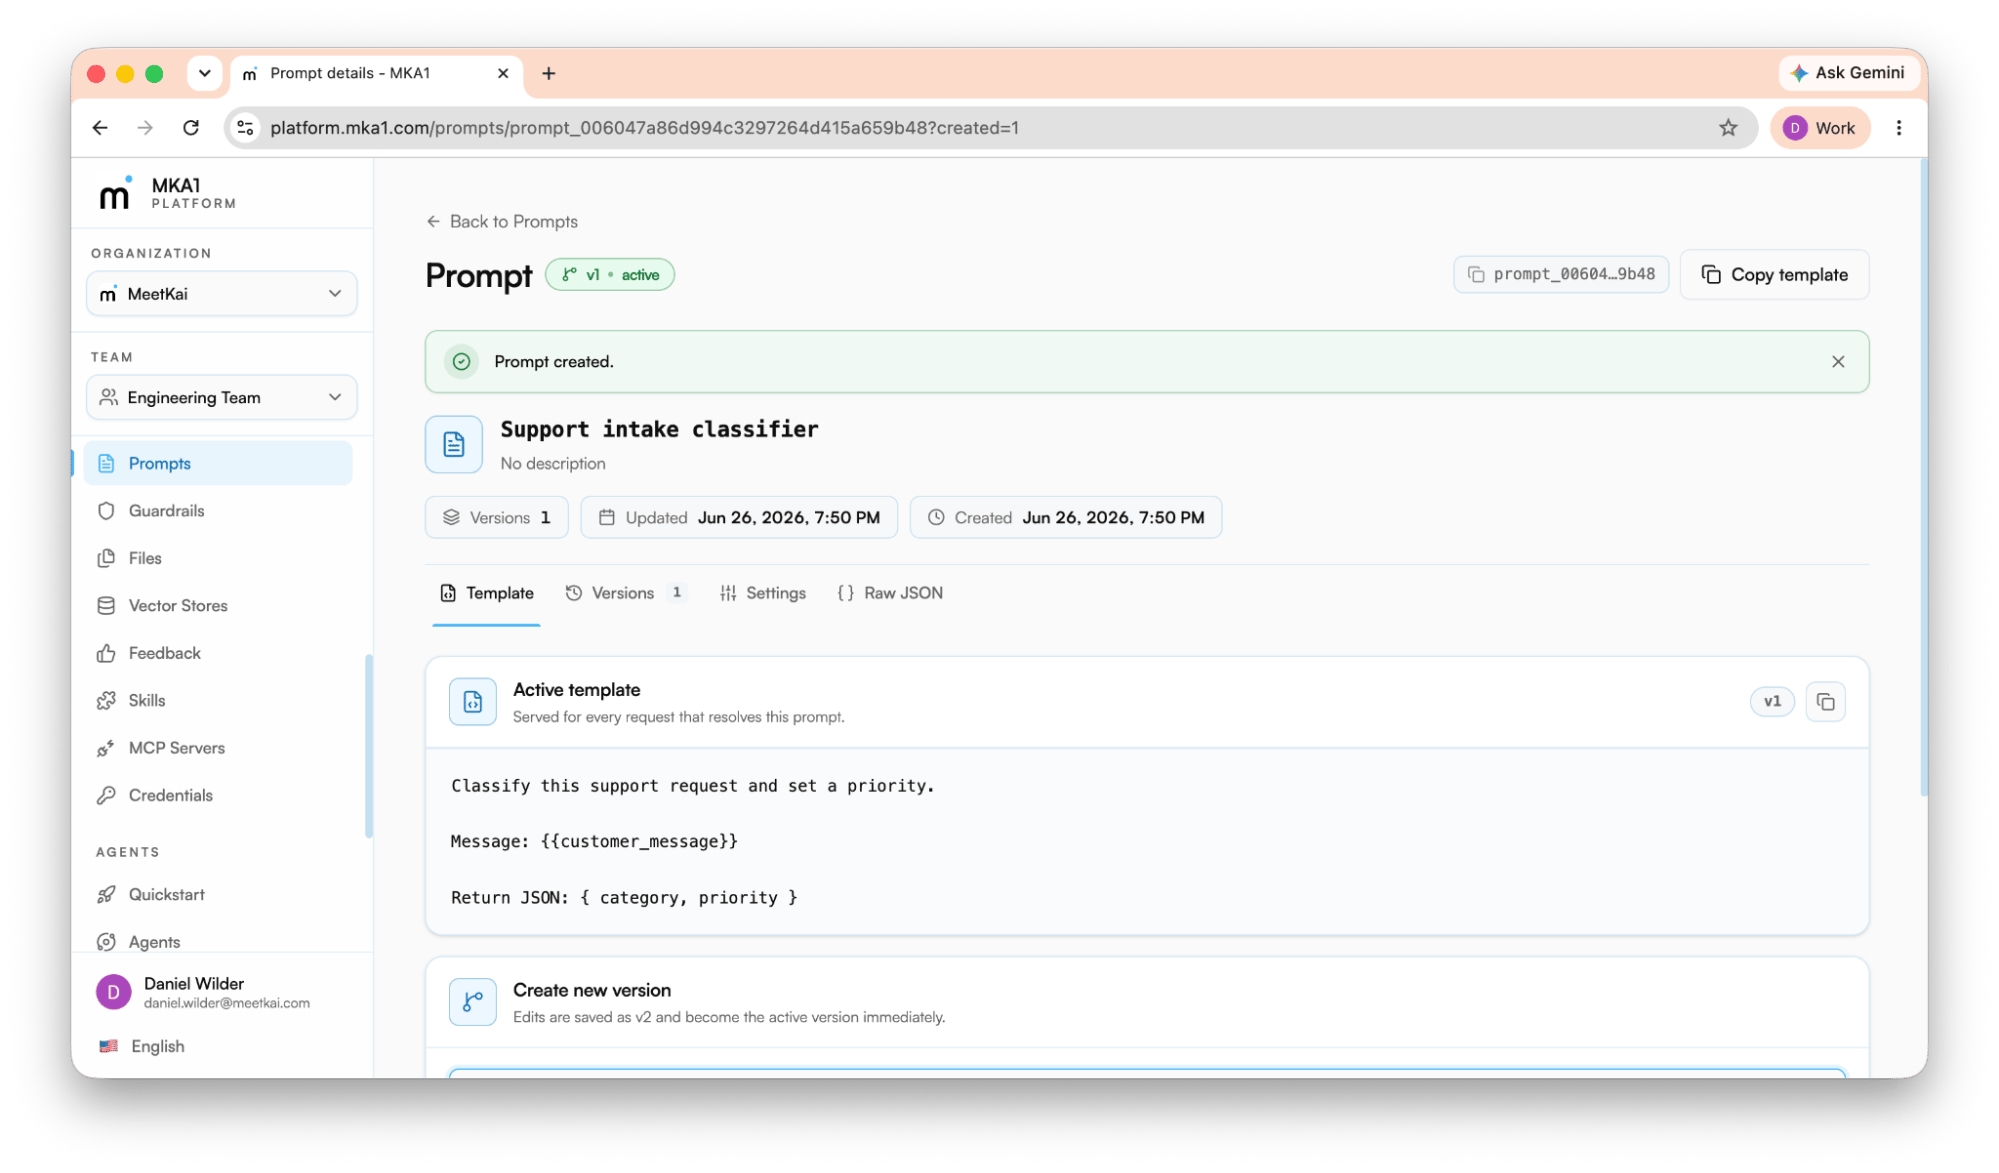 MKA1 separates the *what* of an LLM call (your prompts), the *capabilities* you bundle for it (skills), and the *governance* that keeps usage safe and accountable (guardrails, rate limiting, and auditing).
### Prompt repository
The Prompts API stores, versions, and renders prompt templates centrally. Every template change creates an immutable version, so you get a full change history and can roll back to any earlier version at any time. A rollback is non-destructive and only switches the active version. Templates use `{{variable}}` placeholders that are rendered server-side when you retrieve a prompt, letting you reuse one template across contexts. Prompts are isolated per API key.
```ts TypeScript theme={null}
import { SDK } from '@meetkai/mka1';
const mka1 = new SDK({ bearerAuth: `Bearer ${YOUR_API_KEY}` });
const prompt = await mka1.llm.prompts.create({
createPromptRequest: {
name: 'greeting',
template: 'Hello, {{name}}! Welcome to {{company}}.',
},
});
const rendered = await mka1.llm.prompts.get({
id: prompt.id,
variables: JSON.stringify({ name: 'Alice', company: 'Acme' }),
});
console.log(rendered.renderedTemplate); // "Hello, Alice! Welcome to Acme."
```
```python Python theme={null}
import json
prompt = sdk.llm.prompts.create(
name="greeting",
template="Hello, {{name}}! Welcome to {{company}}.",
)
rendered = sdk.llm.prompts.get(
id=prompt.id,
variables=json.dumps({"name": "Alice", "company": "Acme"}),
)
print(rendered.rendered_template) # "Hello, Alice! Welcome to Acme."
```
### Skills
Skills are reusable, versioned capability bundles you upload to the gateway. Each skill packages tool behavior behind a SKILL.md manifest. The skill's name and description are read directly from that manifest. You can upload a single file set or a full bundle, manage versions (each skill tracks a default and latest version), and review every file before creating it. Manage skills in the dashboard under **Skills**, or via the Skills API.
### Guardrails, rate limiting & usage auditing
These three governance features keep delegated, multi-user traffic controlled and accountable:
* **Rate limiting** - Each API key can carry a quota over one configurable window — per minute, hour, or day. When a key exceeds its limit the gateway returns `429 Too Many Requests` before the request reaches the model, so no tokens are consumed and no usage is billed. Handle 429s with exponential-backoff retries.
* **Usage auditing** - Review token, request, and storage usage per org and team under **Admin → Usage**, filterable by user (org members). For per-end-user reports, query the usage API with its `external_user_ids` filter — the `X-On-Behalf-Of` identity. Each response also returns an `X-Request-ID` you can store as a correlation key.
* **Guardrails** - Policy decisions are recorded in the same audit stream: outcomes such as `policy_violation` or `throttled` and `policy_action` values of `warn`, `block`, or `escalate` flow into the Guardrails page, giving you a consistent path from a usage report to the exact action that was allowed, warned, blocked, or escalated.
Sources: [prompt repositories](https://docs.mka1.com/docs/prompt-repository), [rate limiting](https://docs.mka1.com/docs/rate-limiting), [usage auditing](https://docs.mka1.com/docs/usage-auditing), and [skills](https://reference.mka1.com/reference#tag/skills).
## Speech & voice
MKA1 separates the *what* of an LLM call (your prompts), the *capabilities* you bundle for it (skills), and the *governance* that keeps usage safe and accountable (guardrails, rate limiting, and auditing).
### Prompt repository
The Prompts API stores, versions, and renders prompt templates centrally. Every template change creates an immutable version, so you get a full change history and can roll back to any earlier version at any time. A rollback is non-destructive and only switches the active version. Templates use `{{variable}}` placeholders that are rendered server-side when you retrieve a prompt, letting you reuse one template across contexts. Prompts are isolated per API key.
```ts TypeScript theme={null}
import { SDK } from '@meetkai/mka1';
const mka1 = new SDK({ bearerAuth: `Bearer ${YOUR_API_KEY}` });
const prompt = await mka1.llm.prompts.create({
createPromptRequest: {
name: 'greeting',
template: 'Hello, {{name}}! Welcome to {{company}}.',
},
});
const rendered = await mka1.llm.prompts.get({
id: prompt.id,
variables: JSON.stringify({ name: 'Alice', company: 'Acme' }),
});
console.log(rendered.renderedTemplate); // "Hello, Alice! Welcome to Acme."
```
```python Python theme={null}
import json
prompt = sdk.llm.prompts.create(
name="greeting",
template="Hello, {{name}}! Welcome to {{company}}.",
)
rendered = sdk.llm.prompts.get(
id=prompt.id,
variables=json.dumps({"name": "Alice", "company": "Acme"}),
)
print(rendered.rendered_template) # "Hello, Alice! Welcome to Acme."
```
### Skills
Skills are reusable, versioned capability bundles you upload to the gateway. Each skill packages tool behavior behind a SKILL.md manifest. The skill's name and description are read directly from that manifest. You can upload a single file set or a full bundle, manage versions (each skill tracks a default and latest version), and review every file before creating it. Manage skills in the dashboard under **Skills**, or via the Skills API.
### Guardrails, rate limiting & usage auditing
These three governance features keep delegated, multi-user traffic controlled and accountable:
* **Rate limiting** - Each API key can carry a quota over one configurable window — per minute, hour, or day. When a key exceeds its limit the gateway returns `429 Too Many Requests` before the request reaches the model, so no tokens are consumed and no usage is billed. Handle 429s with exponential-backoff retries.
* **Usage auditing** - Review token, request, and storage usage per org and team under **Admin → Usage**, filterable by user (org members). For per-end-user reports, query the usage API with its `external_user_ids` filter — the `X-On-Behalf-Of` identity. Each response also returns an `X-Request-ID` you can store as a correlation key.
* **Guardrails** - Policy decisions are recorded in the same audit stream: outcomes such as `policy_violation` or `throttled` and `policy_action` values of `warn`, `block`, or `escalate` flow into the Guardrails page, giving you a consistent path from a usage report to the exact action that was allowed, warned, blocked, or escalated.
Sources: [prompt repositories](https://docs.mka1.com/docs/prompt-repository), [rate limiting](https://docs.mka1.com/docs/rate-limiting), [usage auditing](https://docs.mka1.com/docs/usage-auditing), and [skills](https://reference.mka1.com/reference#tag/skills).
## Speech & voice
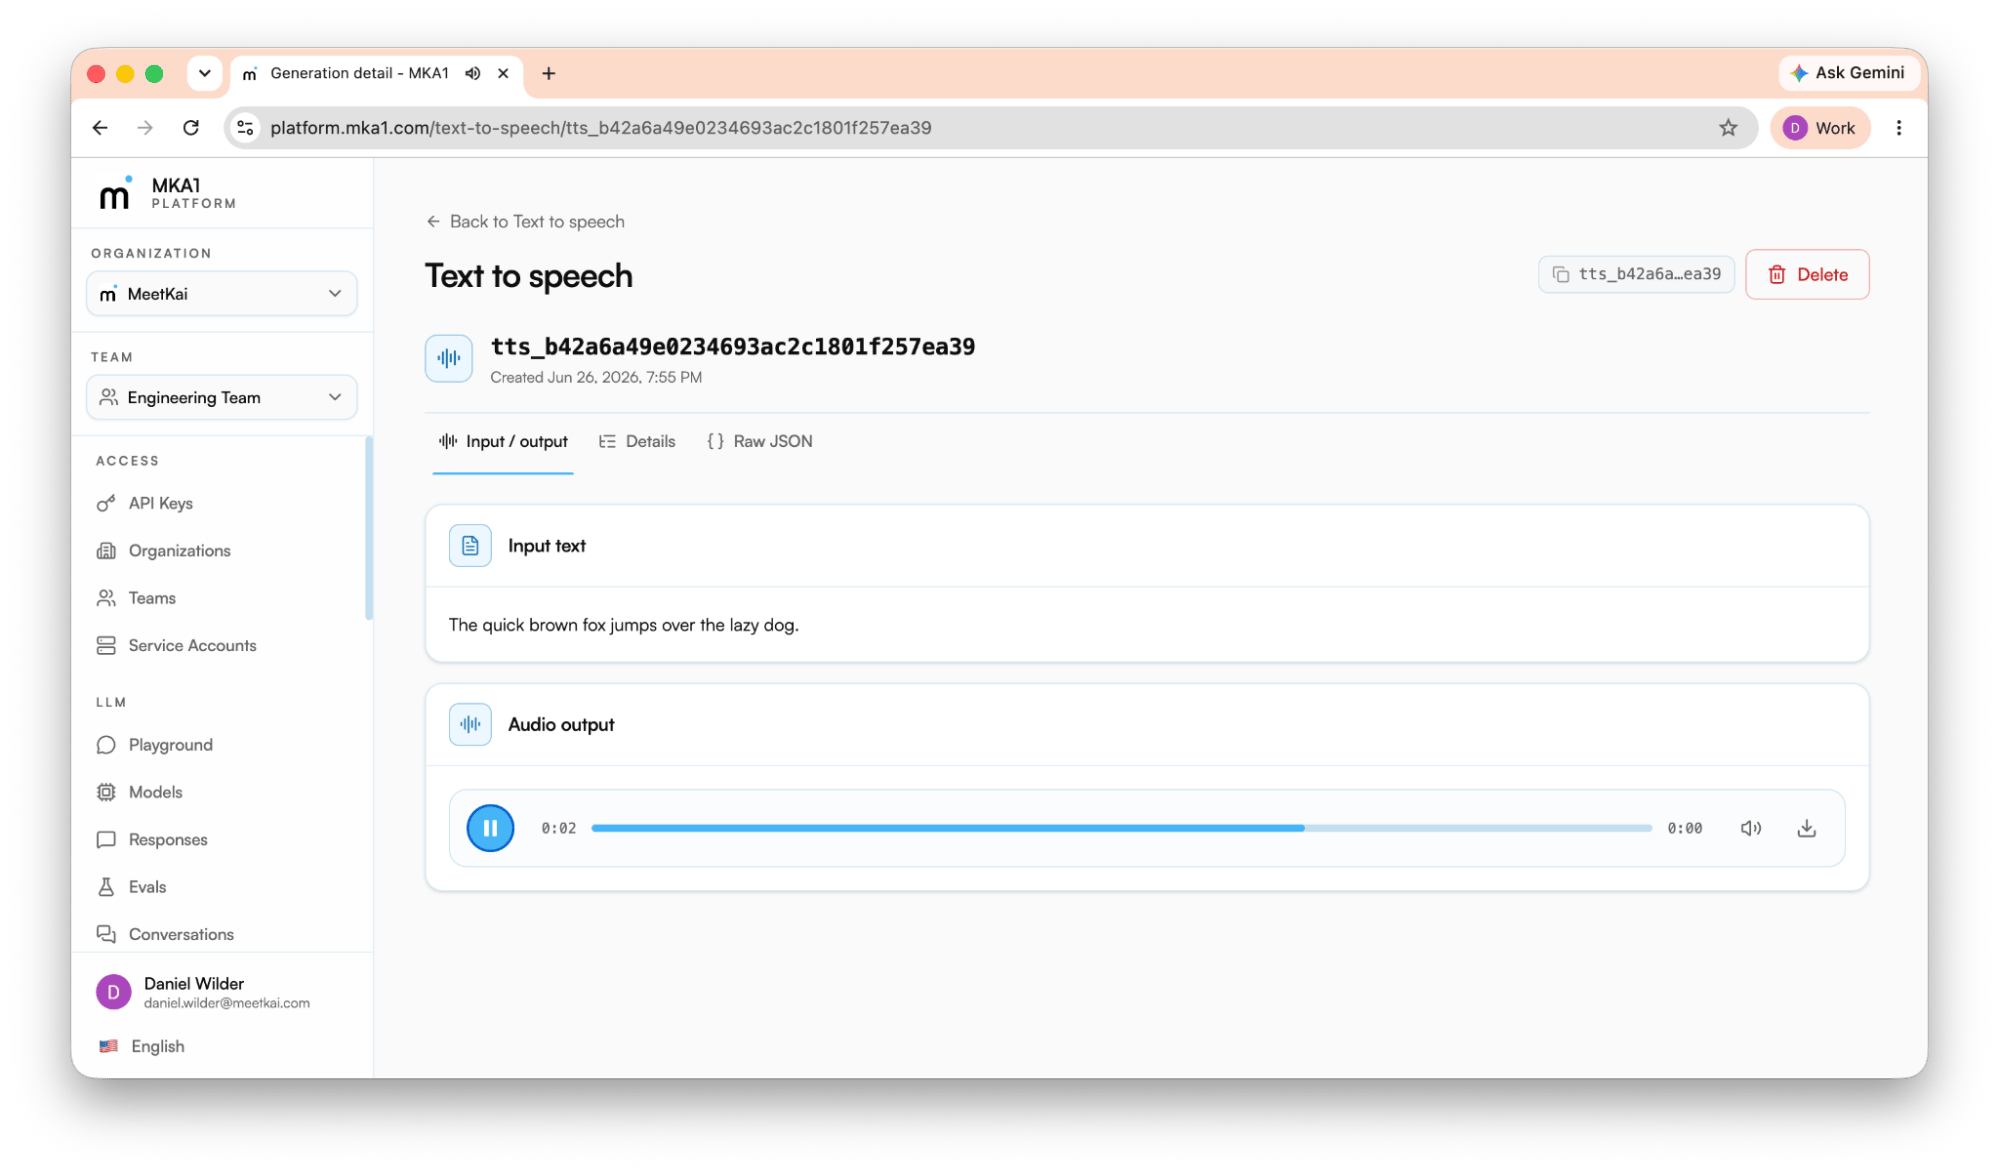 MKA1 exposes file-based speech through the SDK's `llm.speech` resource. Use `speak` for text-to-speech and `transcribe` for speech-to-text. For real-time, bidirectional conversations, use Advanced voice mode instead. Advanced voice mode is covered separately.
### Text-to-speech
`speak` returns a complete WAV file. The response body is binary audio, and the response headers include `X-Language-Code`.
```ts TypeScript theme={null}
import { SDK } from '@meetkai/mka1';
import { writeFileSync } from 'node:fs';
const mka1 = new SDK({ bearerAuth: 'Bearer ' });
const { headers, result } = await mka1.llm.speech.speak({
textToSpeechRequest: {
text: 'Welcome to the MKA1 API speech guide.',
language: 'en',
},
});
// headers['x-language-code'] → ['en']
const chunks = [];
for await (const chunk of result) chunks.push(chunk);
writeFileSync('speech.wav', Buffer.concat(chunks));
```
```python Python theme={null}
res = sdk.llm.speech.speak(
text="Welcome to the MKA1 API speech guide.",
language="en",
)
# res.headers["x-language-code"] → ["en"]; res.result streams the WAV bytes
with open("speech.wav", "wb") as fh:
fh.write(res.result.read())
```
For low-latency playback that starts before the full file is ready, use `speakStreaming` and choose `mp3` (smaller) or `pcm` (uncompressed):
```ts TypeScript theme={null}
// Low-latency variant
const streamed = await mka1.llm.speech.speakStreaming({
textToSpeechStreamingRequest: {
text: 'Start speaking this response as soon as audio is ready.',
language: 'en',
format: 'mp3',
},
});
```
```python Python theme={null}
# Low-latency variant — note format_ with a trailing underscore
streamed = sdk.llm.speech.speak_streaming(
text="Start speaking this response as soon as audio is ready.",
language="en",
format_="mp3",
)
```
### Speech-to-text
`transcribe` accepts an audio file (FLAC, MP3, MP4, M4A, OGG, WAV, WebM, PCM, and more) and returns the transcript plus detected language and confidence:
```ts TypeScript theme={null}
import { openAsBlob } from 'node:fs';
const result = await mka1.llm.speech.transcribe({
language: 'en',
prompt: 'This is a technical podcast about machine learning.',
temperature: 0.2,
requestBody: { file: await openAsBlob('episode.wav') },
});
console.log(result.text); // transcript
console.log(result.confidence); // detection confidence
```
```python Python theme={null}
with open("episode.wav", "rb") as fh:
result = sdk.llm.speech.transcribe(
file={"file_name": "episode.wav", "content": fh.read()},
language="en",
prompt="This is a technical podcast about machine learning.",
temperature=0.2,
)
print(result.text) # transcript
print(result.confidence) # detection confidence
```
For multi-speaker separation, set `includeSpeakerData: true` (requires WAV or PCM audio). The response then includes a `speakers` array with labeled segments and `offset_ms` / `duration_ms` timing.
Source files: [speech](https://docs.mka1.com/docs/speech), [multimodal output](https://docs.mka1.com/docs/multimodal-output).
## Evaluate & observe
Once something works, MKA1 helps you measure it and watch it in production.
MKA1 exposes file-based speech through the SDK's `llm.speech` resource. Use `speak` for text-to-speech and `transcribe` for speech-to-text. For real-time, bidirectional conversations, use Advanced voice mode instead. Advanced voice mode is covered separately.
### Text-to-speech
`speak` returns a complete WAV file. The response body is binary audio, and the response headers include `X-Language-Code`.
```ts TypeScript theme={null}
import { SDK } from '@meetkai/mka1';
import { writeFileSync } from 'node:fs';
const mka1 = new SDK({ bearerAuth: 'Bearer ' });
const { headers, result } = await mka1.llm.speech.speak({
textToSpeechRequest: {
text: 'Welcome to the MKA1 API speech guide.',
language: 'en',
},
});
// headers['x-language-code'] → ['en']
const chunks = [];
for await (const chunk of result) chunks.push(chunk);
writeFileSync('speech.wav', Buffer.concat(chunks));
```
```python Python theme={null}
res = sdk.llm.speech.speak(
text="Welcome to the MKA1 API speech guide.",
language="en",
)
# res.headers["x-language-code"] → ["en"]; res.result streams the WAV bytes
with open("speech.wav", "wb") as fh:
fh.write(res.result.read())
```
For low-latency playback that starts before the full file is ready, use `speakStreaming` and choose `mp3` (smaller) or `pcm` (uncompressed):
```ts TypeScript theme={null}
// Low-latency variant
const streamed = await mka1.llm.speech.speakStreaming({
textToSpeechStreamingRequest: {
text: 'Start speaking this response as soon as audio is ready.',
language: 'en',
format: 'mp3',
},
});
```
```python Python theme={null}
# Low-latency variant — note format_ with a trailing underscore
streamed = sdk.llm.speech.speak_streaming(
text="Start speaking this response as soon as audio is ready.",
language="en",
format_="mp3",
)
```
### Speech-to-text
`transcribe` accepts an audio file (FLAC, MP3, MP4, M4A, OGG, WAV, WebM, PCM, and more) and returns the transcript plus detected language and confidence:
```ts TypeScript theme={null}
import { openAsBlob } from 'node:fs';
const result = await mka1.llm.speech.transcribe({
language: 'en',
prompt: 'This is a technical podcast about machine learning.',
temperature: 0.2,
requestBody: { file: await openAsBlob('episode.wav') },
});
console.log(result.text); // transcript
console.log(result.confidence); // detection confidence
```
```python Python theme={null}
with open("episode.wav", "rb") as fh:
result = sdk.llm.speech.transcribe(
file={"file_name": "episode.wav", "content": fh.read()},
language="en",
prompt="This is a technical podcast about machine learning.",
temperature=0.2,
)
print(result.text) # transcript
print(result.confidence) # detection confidence
```
For multi-speaker separation, set `includeSpeakerData: true` (requires WAV or PCM audio). The response then includes a `speakers` array with labeled segments and `offset_ms` / `duration_ms` timing.
Source files: [speech](https://docs.mka1.com/docs/speech), [multimodal output](https://docs.mka1.com/docs/multimodal-output).
## Evaluate & observe
Once something works, MKA1 helps you measure it and watch it in production.
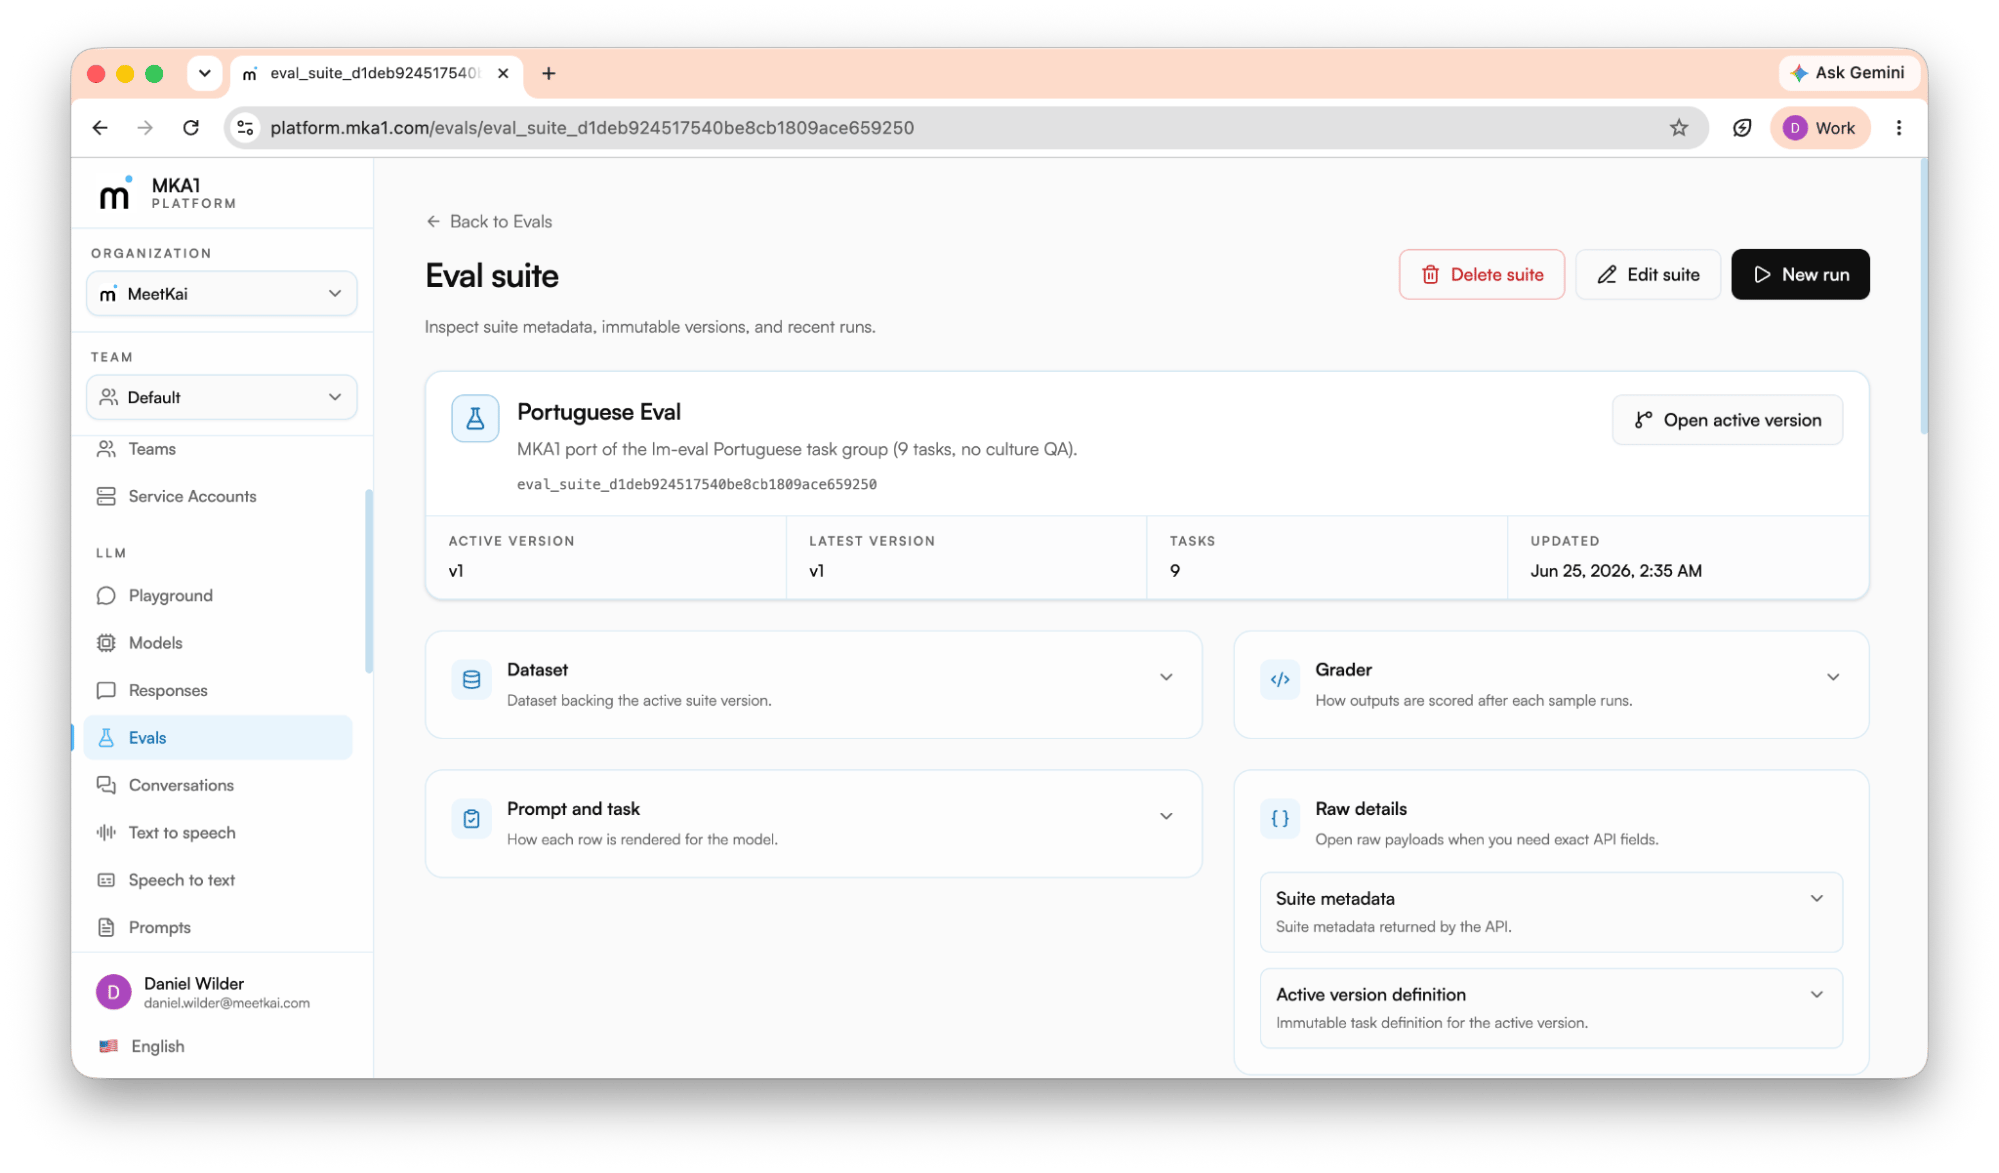 * **Evals** - Build an eval suite from datasets, prompts, and graders, then launch durable runs against one or more models. Track accuracy and per-sample scores, and compare models on a leaderboard. Use it to choose a model and to catch regressions before they ship.
* **Sessions** - Every agent run is recorded. Replay the transcript (messages, reasoning, tool calls) and step through raw events to debug exactly what an agent did.
* **Usage & auditing** - Review token, request, and storage usage per org and team under **Admin → Usage**, and filter by end user when you send `X-On-Behalf-Of`. Each response also returns an `X-Request-ID` you can store as a correlation key.
### Audit
* **Evals** - Build an eval suite from datasets, prompts, and graders, then launch durable runs against one or more models. Track accuracy and per-sample scores, and compare models on a leaderboard. Use it to choose a model and to catch regressions before they ship.
* **Sessions** - Every agent run is recorded. Replay the transcript (messages, reasoning, tool calls) and step through raw events to debug exactly what an agent did.
* **Usage & auditing** - Review token, request, and storage usage per org and team under **Admin → Usage**, and filter by end user when you send `X-On-Behalf-Of`. Each response also returns an `X-Request-ID` you can store as a correlation key.
### Audit
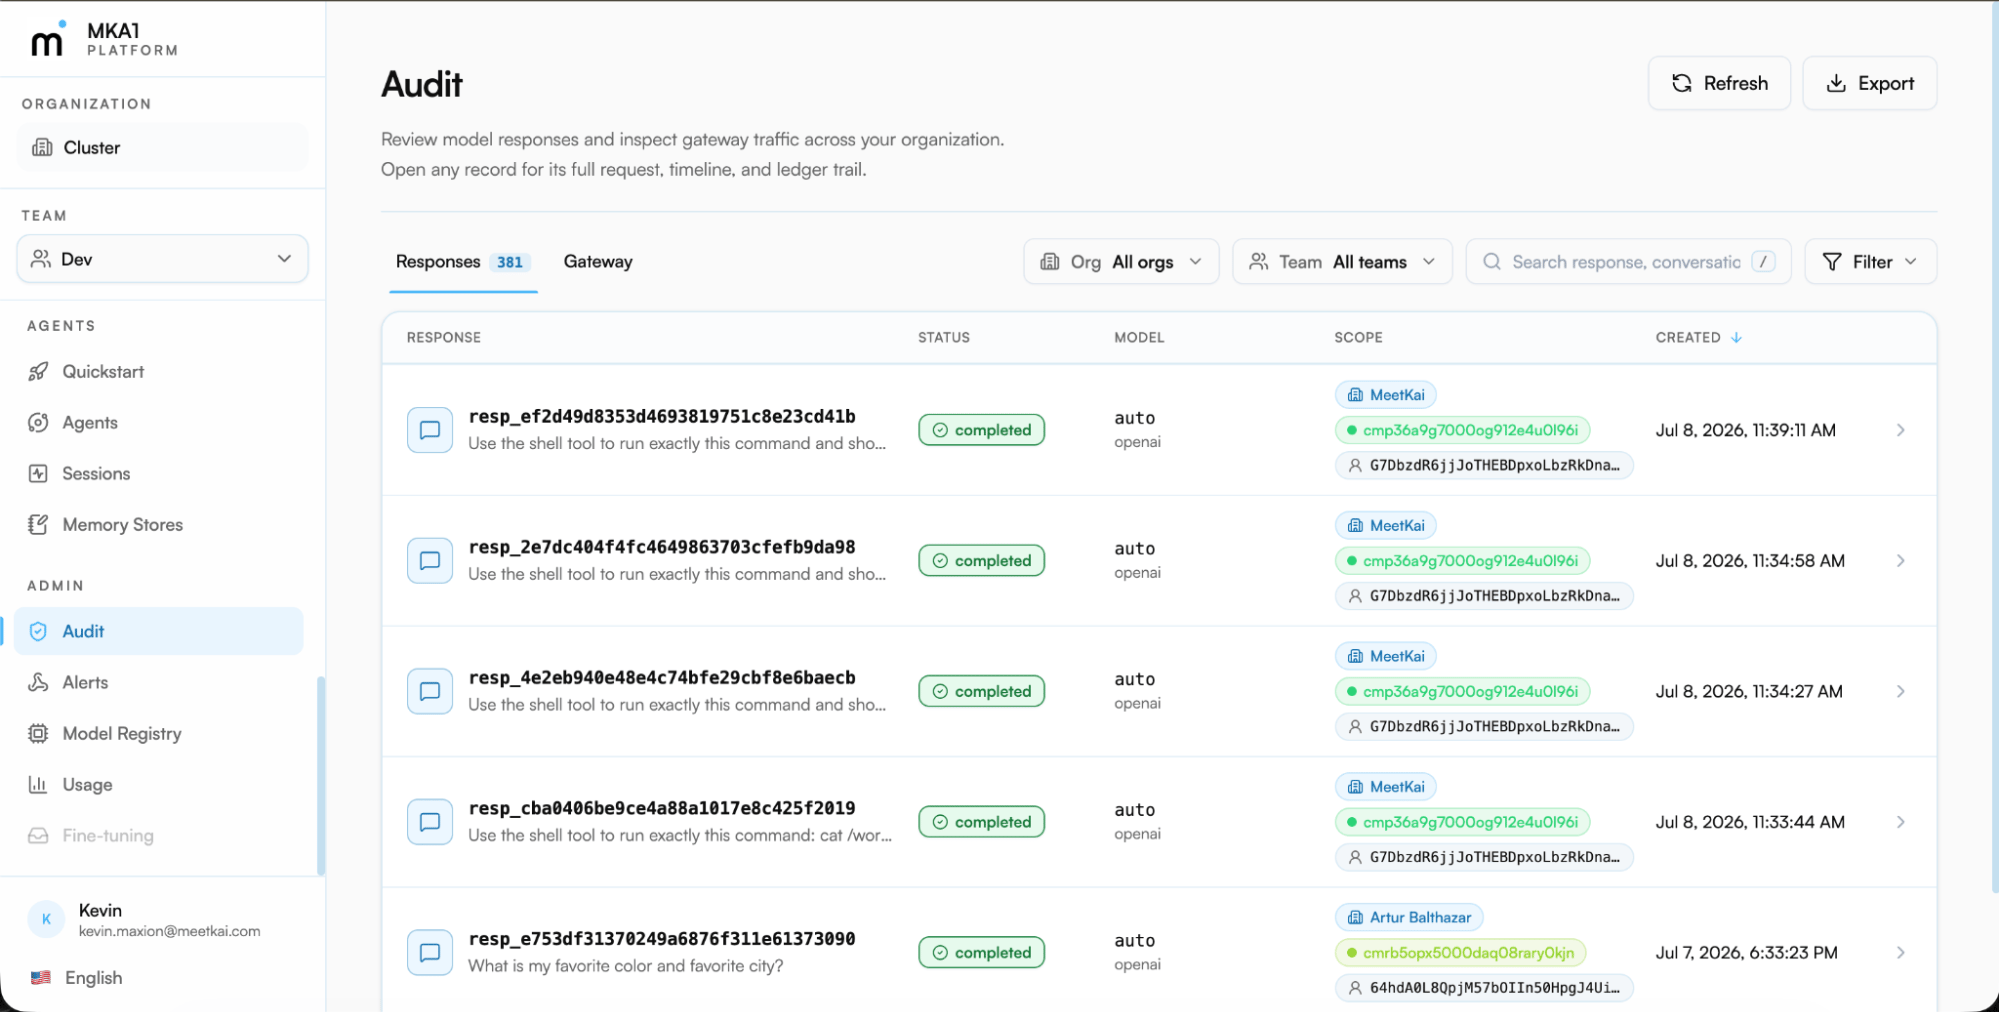 Audit (**Admin → Audit**) is the review surface for traffic that passed through the gateway. Cluster admins see requests across every organization and team; organization admins see their own org's activity. Search by route, path, or user; filter by service, method, status, model, or review state; or paste an `X-Request-ID` — returned on every API response — to jump to the exact request. Flag entries for review, group related requests into cases, and export response data for offline analysis.
### Alerts
Audit (**Admin → Audit**) is the review surface for traffic that passed through the gateway. Cluster admins see requests across every organization and team; organization admins see their own org's activity. Search by route, path, or user; filter by service, method, status, model, or review state; or paste an `X-Request-ID` — returned on every API response — to jump to the exact request. Flag entries for review, group related requests into cases, and export response data for offline analysis.
### Alerts
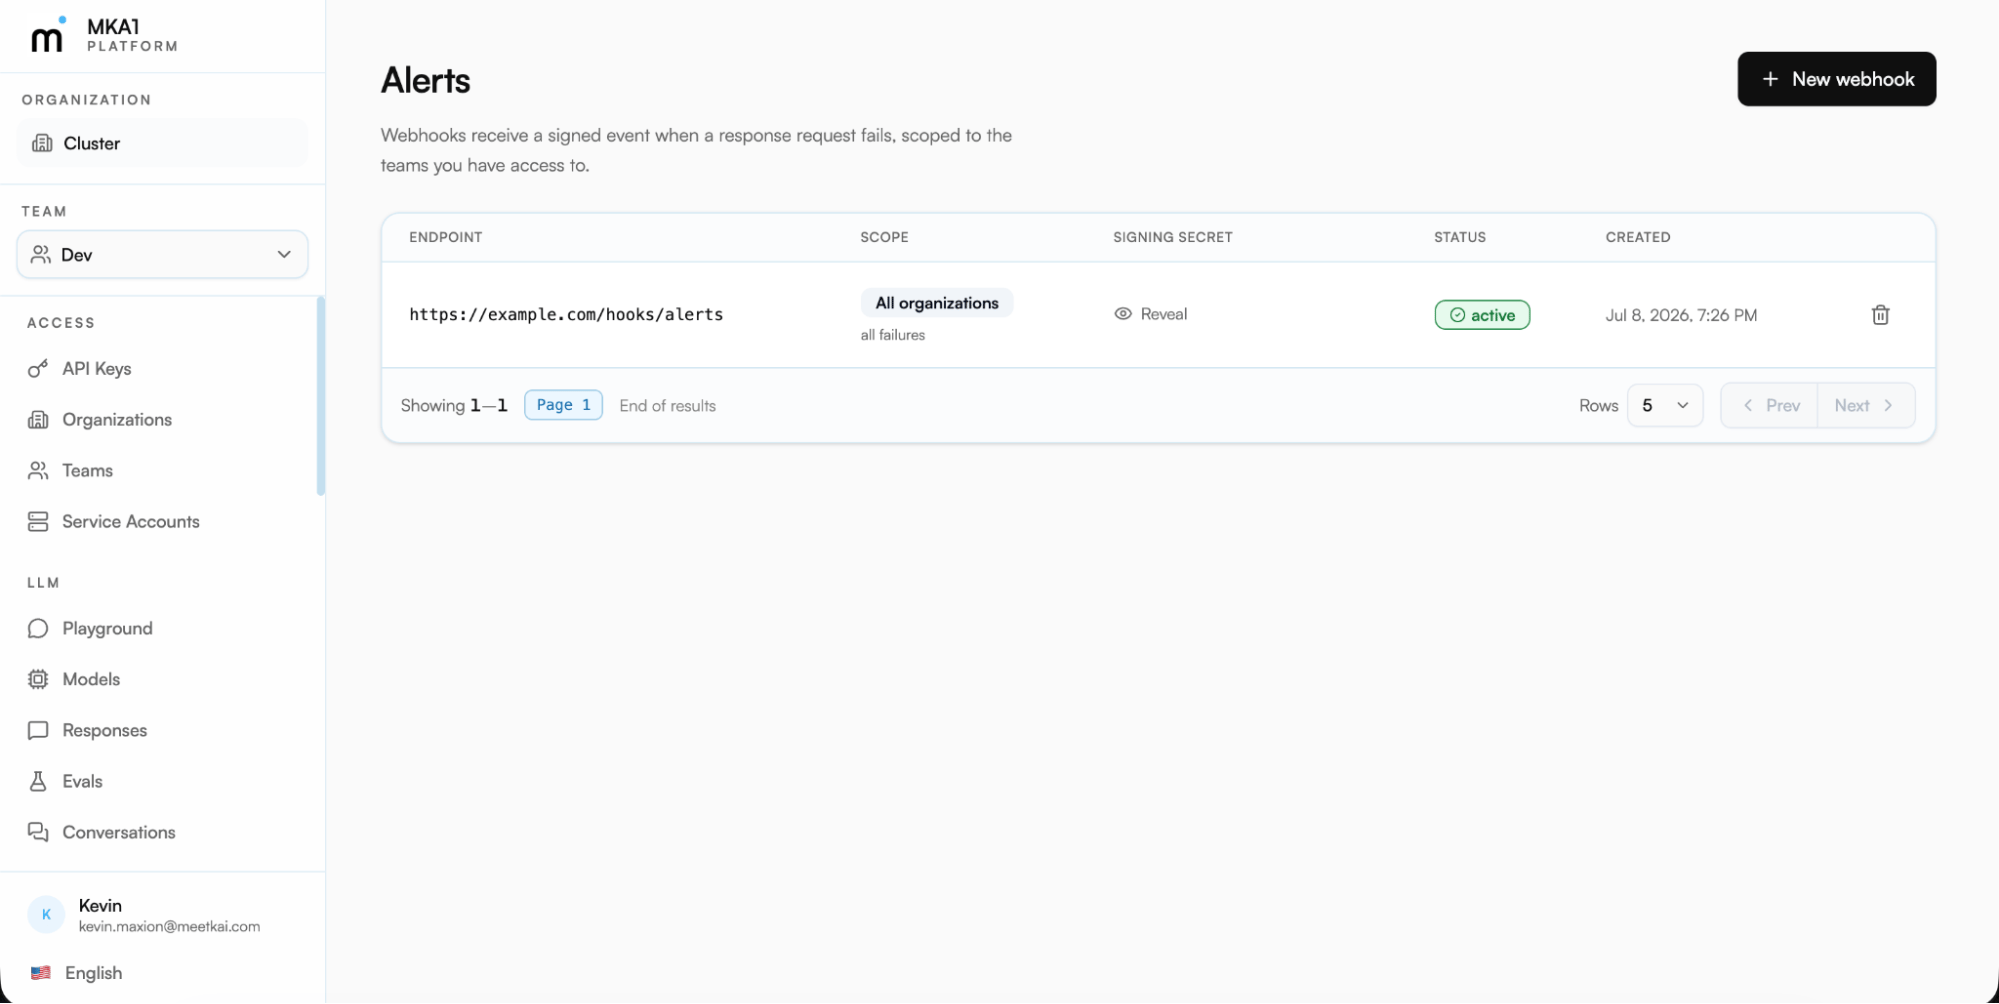 Alerts turn failures into webhooks. Under **Admin → Alerts**, register an endpoint URL and choose its scope: the whole cluster (cluster admins), your organization (org owners and admins), or a single team — org admins can target any team, and team members can manage webhooks for their own active team. Subscribe the endpoint to one or both event types — `response.failed` (a response request failed at the model provider) and `gateway.request.failed` (any gateway request returned a 5xx) — or leave the subscription empty to receive all of them. Optional filters narrow delivery to specific API keys, error codes, or models.
Every endpoint has a detail page showing its configuration, its signing secret (reveal, copy, or rotate it), and recent deliveries with payloads and succeeded / failed / pending status. From there you can re-send a delivery, fire a test alert while integrating, and edit, disable, or delete the endpoint — editing never changes the signing secret.
## Pricing, budgets & usage
Every request flows through a billing pipeline: usage records the volumes, the model price book turns them into costs, and budgets enforce limits on the result. This section covers all three.
### Pricing
Alerts turn failures into webhooks. Under **Admin → Alerts**, register an endpoint URL and choose its scope: the whole cluster (cluster admins), your organization (org owners and admins), or a single team — org admins can target any team, and team members can manage webhooks for their own active team. Subscribe the endpoint to one or both event types — `response.failed` (a response request failed at the model provider) and `gateway.request.failed` (any gateway request returned a 5xx) — or leave the subscription empty to receive all of them. Optional filters narrow delivery to specific API keys, error codes, or models.
Every endpoint has a detail page showing its configuration, its signing secret (reveal, copy, or rotate it), and recent deliveries with payloads and succeeded / failed / pending status. From there you can re-send a delivery, fire a test alert while integrating, and edit, disable, or delete the endpoint — editing never changes the signing secret.
## Pricing, budgets & usage
Every request flows through a billing pipeline: usage records the volumes, the model price book turns them into costs, and budgets enforce limits on the result. This section covers all three.
### Pricing
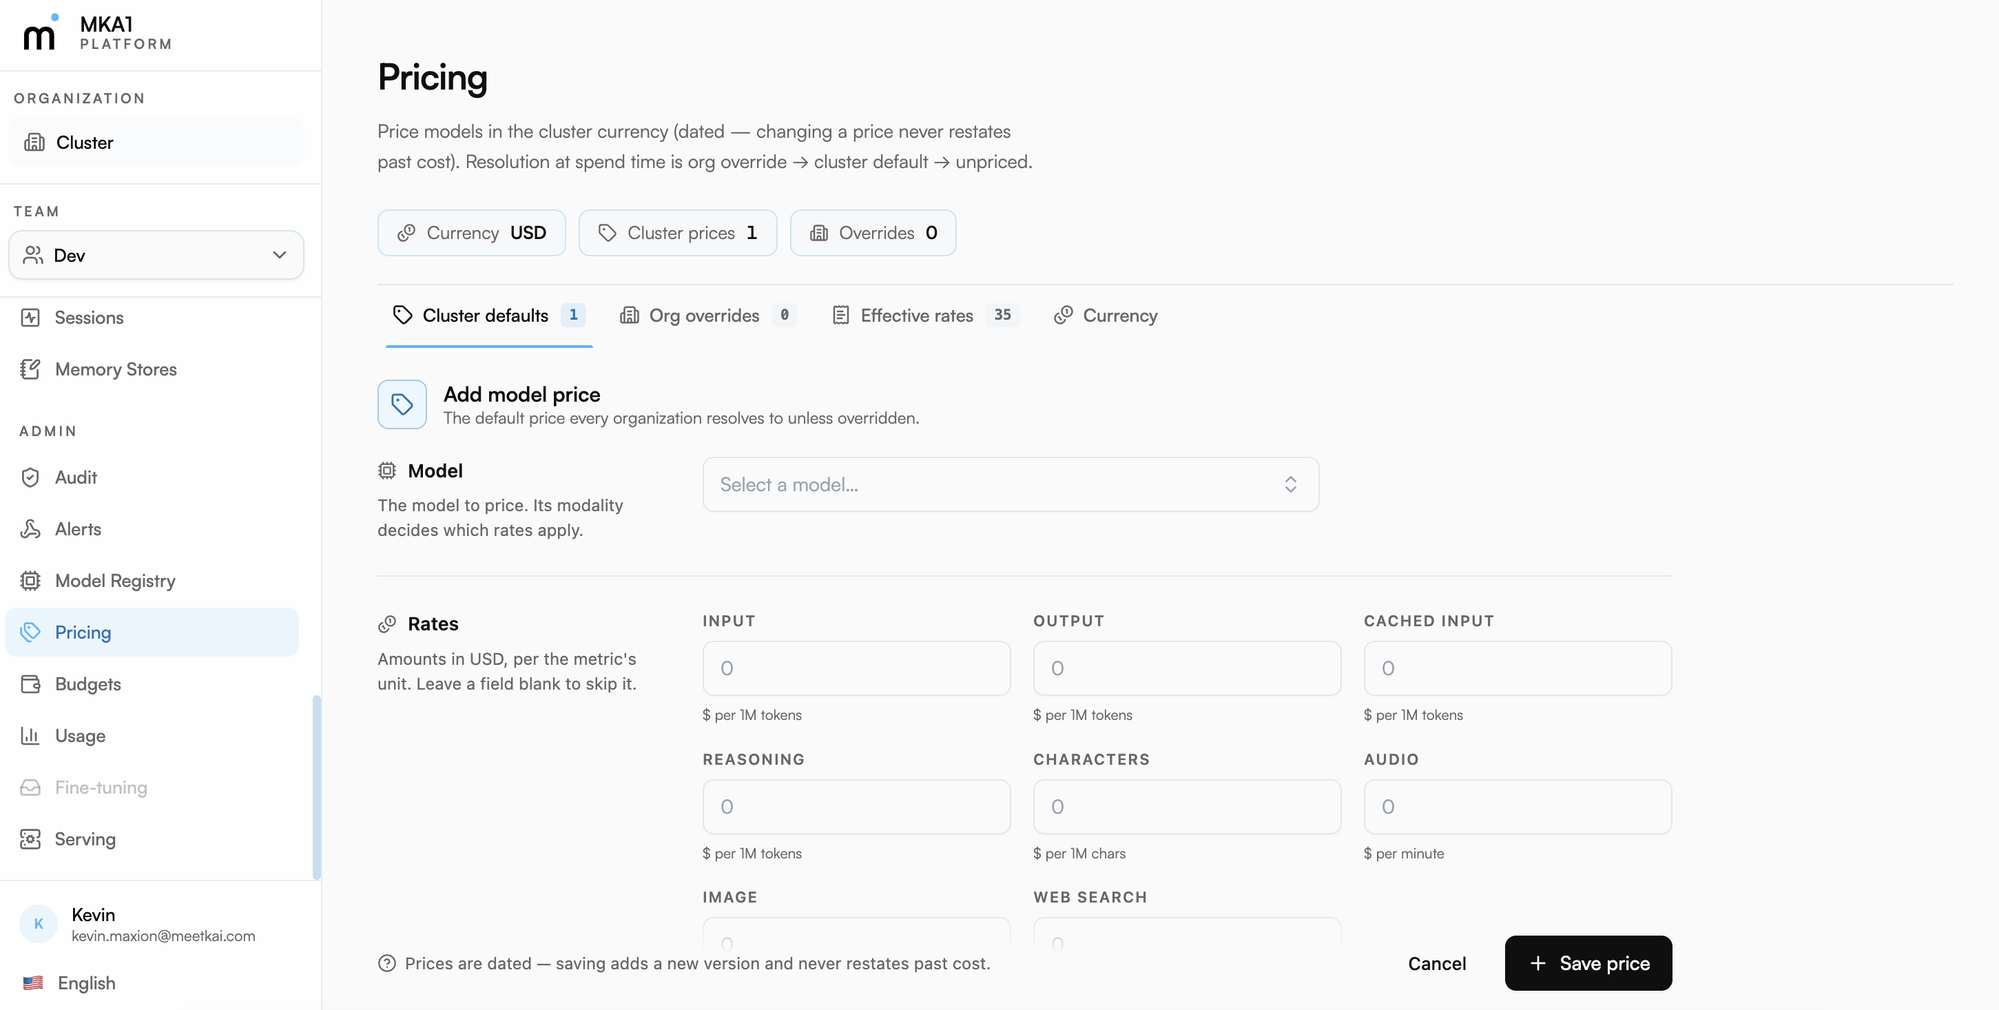 Every request is metered and priced against your cluster's model price book. Cluster admins maintain the price book under **Admin → Pricing**:
* **Cluster currency** - The currency every price and budget is denominated in.
* **Model prices** - The cluster-default rate card, one price per model. Rate dimensions follow the model's modality: input, output, cached-input, and reasoning tokens for LLMs; audio and characters for speech; per-image rates with optional per-size tiers; web search.
* **Org overrides** - Per-organization prices for when one org bills differently from the cluster default.
* **Effective rates** - A resolver view showing which price — cluster default, org override, or unpriced — each model resolves to for a given organization. Unpriced models bill at 0.
Prices are dated: saving adds a new version and never restates past cost. Spend then shows up in two places:
* **Admin → Usage** - Total spend priced from the price book, broken down by organization, team, API key, and model — alongside the underlying volumes (see Usage below).
* **The API** - Query spend over any time range, grouped by model, API key, team, organization, or end user (the `X-On-Behalf-Of` identity). This is the feed for billing systems; Budgets (below) enforce limits against the same spend.
```ts TypeScript theme={null}
const now = Math.floor(Date.now() / 1000);
const spend = await mka1.usage.costs({
startTime: now - 7 * 24 * 60 * 60, // last 7 days (unix seconds)
endTime: now,
groupBy: 'model,api_key_id', // comma-separated dimensions
});
// spend.data → [{ model, apiKeyId, teamId, externalUserId, orgId, cost }, …]
```
```python Python theme={null}
import time
now = int(time.time())
spend = sdk.usage.costs(
start_time=now - 7 * 24 * 3600, # last 7 days (unix seconds)
end_time=now,
group_by="model,api_key_id", # comma-separated dimensions
)
# spend.data → rows with model, api_key_id, team_id, external_user_id, org_id, cost
```
### Budgets
Every request is metered and priced against your cluster's model price book. Cluster admins maintain the price book under **Admin → Pricing**:
* **Cluster currency** - The currency every price and budget is denominated in.
* **Model prices** - The cluster-default rate card, one price per model. Rate dimensions follow the model's modality: input, output, cached-input, and reasoning tokens for LLMs; audio and characters for speech; per-image rates with optional per-size tiers; web search.
* **Org overrides** - Per-organization prices for when one org bills differently from the cluster default.
* **Effective rates** - A resolver view showing which price — cluster default, org override, or unpriced — each model resolves to for a given organization. Unpriced models bill at 0.
Prices are dated: saving adds a new version and never restates past cost. Spend then shows up in two places:
* **Admin → Usage** - Total spend priced from the price book, broken down by organization, team, API key, and model — alongside the underlying volumes (see Usage below).
* **The API** - Query spend over any time range, grouped by model, API key, team, organization, or end user (the `X-On-Behalf-Of` identity). This is the feed for billing systems; Budgets (below) enforce limits against the same spend.
```ts TypeScript theme={null}
const now = Math.floor(Date.now() / 1000);
const spend = await mka1.usage.costs({
startTime: now - 7 * 24 * 60 * 60, // last 7 days (unix seconds)
endTime: now,
groupBy: 'model,api_key_id', // comma-separated dimensions
});
// spend.data → [{ model, apiKeyId, teamId, externalUserId, orgId, cost }, …]
```
```python Python theme={null}
import time
now = int(time.time())
spend = sdk.usage.costs(
start_time=now - 7 * 24 * 3600, # last 7 days (unix seconds)
end_time=now,
group_by="model,api_key_id", # comma-separated dimensions
)
# spend.data → rows with model, api_key_id, team_id, external_user_id, org_id, cost
```
### Budgets
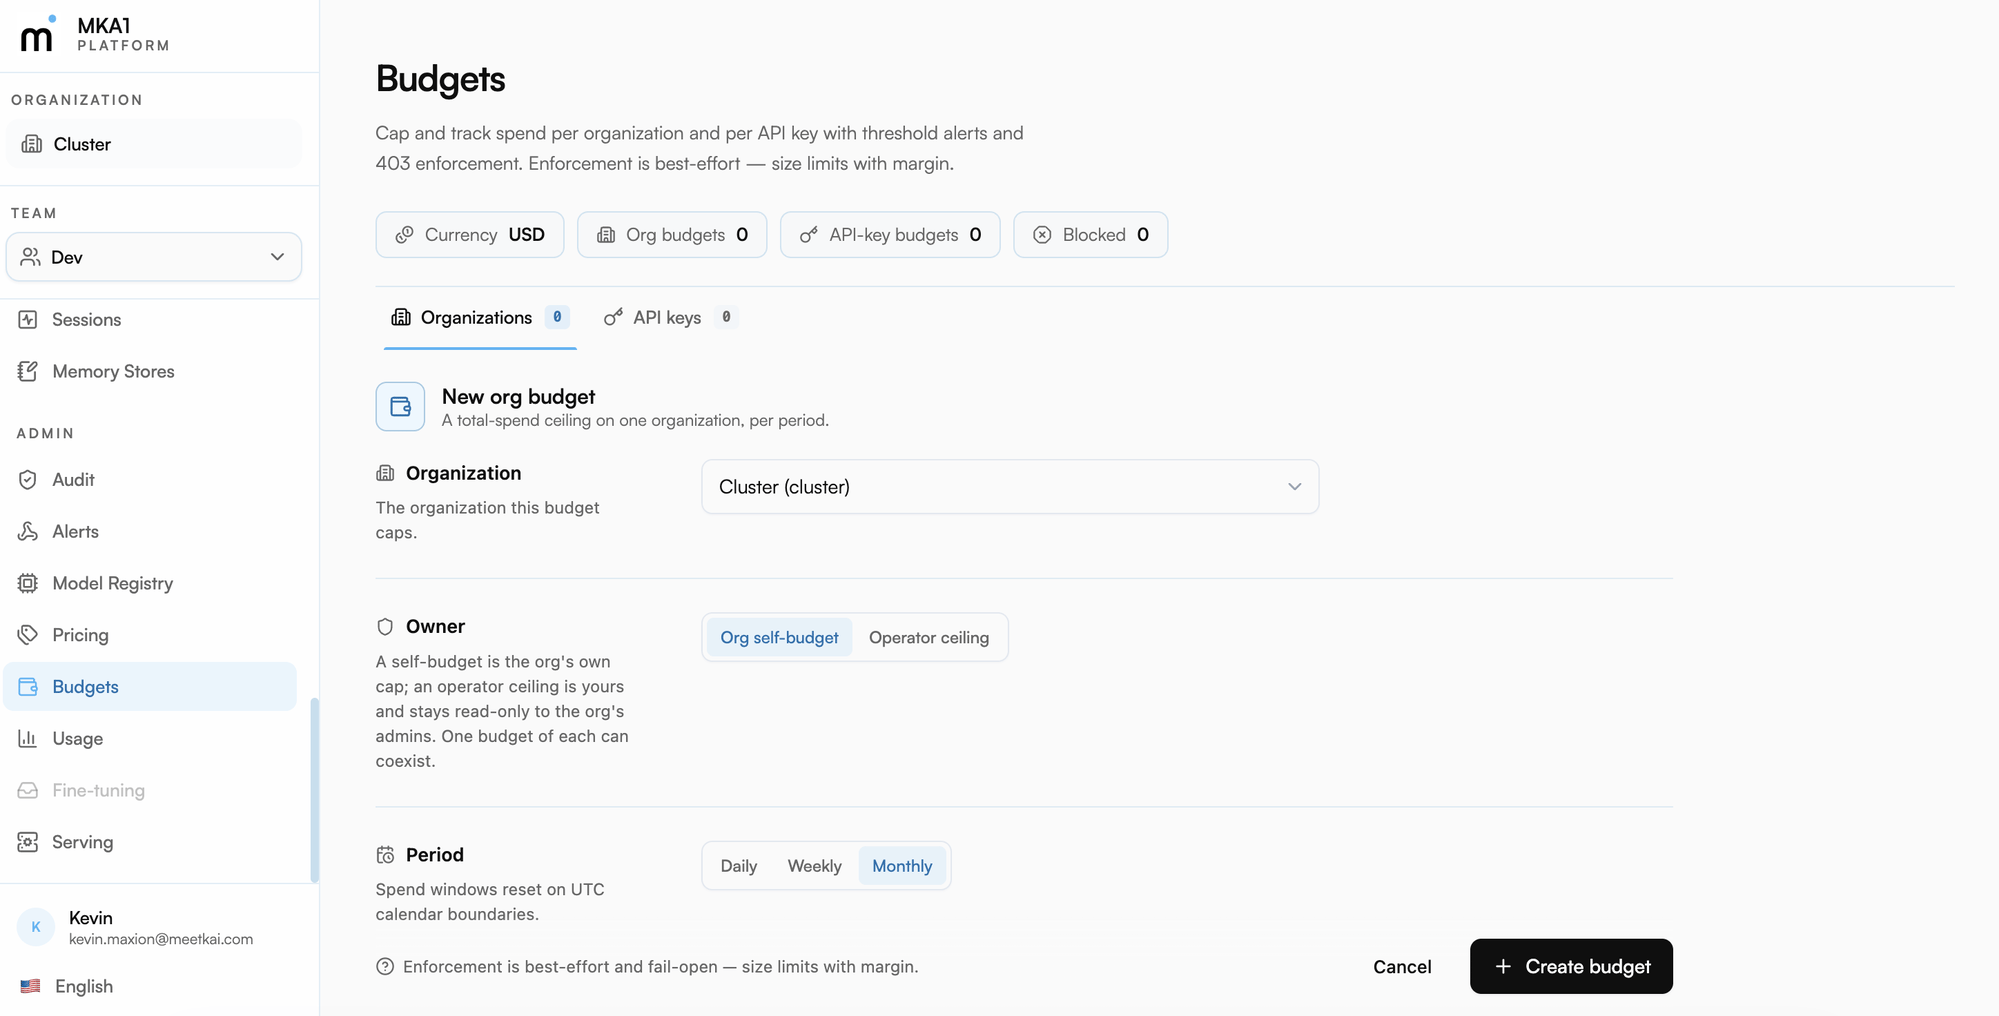 Budgets cap total spend per period on one organization or one API key. Create and manage them under **Admin → Budgets** — organization admins manage their org's budgets, while API-key budgets are cluster-admin managed today. A budget has three parts:
* **Period & limit** - Daily, weekly, or monthly, with a limit in the cluster currency. Spend windows reset on UTC calendar boundaries.
* **Thresholds** - Unique percentages of the limit, each paired with an action: `alert` (notify) or `block` (reject further requests). A budget past a block threshold shows Blocked in the live Spend and Status columns.
* **Alert webhook (optional)** - A URL plus HMAC signing secret that receives threshold notifications.
Each budget row shows live spend against its limit; open a budget's history to review the period's threshold events, and edit or delete budgets as needs change. Budgets have two ownerships: cluster budgets are operator ceilings (read-only for org admins), while org budgets are self-imposed. Enforcement is best-effort and fail-open, so size limits with margin.
The same operations are available over the API — grant the key the admin-only Budgets scopes (`read:budgets` / `write:budgets`) in Step 4's key wizard.
```ts TypeScript theme={null}
// Monthly self-budget on an API key: warn at 80%, block at 100%
await mka1.budgets.setApiKey({
apiKeyId: 'ak_…',
requestBody: {
period: 'monthly',
limit: 250, // in your cluster currency — see budgets.getCurrency()
thresholds: [
{ pct: 80, action: 'alert' },
{ pct: 100, action: 'block' },
],
webhookUrl: 'https://your-app.example.com/hooks/budget',
webhookSecret: process.env.MKA1_WEBHOOK_SECRET,
},
});
const budgets = await mka1.budgets.getApiKey({ apiKeyId: 'ak_…' });
const events = await mka1.budgets.apiKeyEvents({ apiKeyId: 'ak_…' });
await mka1.budgets.deleteApiKey({ apiKeyId: 'ak_…', owner: 'org' });
// Org-level variants: budgets.setOrg / getOrg / deleteOrg / orgEvents ({ orgId, … })
```
```python Python theme={null}
sdk.budgets.set_api_key(
api_key_id="ak_…",
period="monthly",
limit=250,
thresholds=[
{"pct": 80, "action": "alert"},
{"pct": 100, "action": "block"},
],
)
budgets = sdk.budgets.get_api_key(api_key_id="ak_…")
events = sdk.budgets.api_key_events(api_key_id="ak_…")
sdk.budgets.delete_api_key(api_key_id="ak_…", owner="org")
# Org-level variants: set_org / get_org / delete_org / org_events (org_id=…)
```
### Usage
Budgets cap total spend per period on one organization or one API key. Create and manage them under **Admin → Budgets** — organization admins manage their org's budgets, while API-key budgets are cluster-admin managed today. A budget has three parts:
* **Period & limit** - Daily, weekly, or monthly, with a limit in the cluster currency. Spend windows reset on UTC calendar boundaries.
* **Thresholds** - Unique percentages of the limit, each paired with an action: `alert` (notify) or `block` (reject further requests). A budget past a block threshold shows Blocked in the live Spend and Status columns.
* **Alert webhook (optional)** - A URL plus HMAC signing secret that receives threshold notifications.
Each budget row shows live spend against its limit; open a budget's history to review the period's threshold events, and edit or delete budgets as needs change. Budgets have two ownerships: cluster budgets are operator ceilings (read-only for org admins), while org budgets are self-imposed. Enforcement is best-effort and fail-open, so size limits with margin.
The same operations are available over the API — grant the key the admin-only Budgets scopes (`read:budgets` / `write:budgets`) in Step 4's key wizard.
```ts TypeScript theme={null}
// Monthly self-budget on an API key: warn at 80%, block at 100%
await mka1.budgets.setApiKey({
apiKeyId: 'ak_…',
requestBody: {
period: 'monthly',
limit: 250, // in your cluster currency — see budgets.getCurrency()
thresholds: [
{ pct: 80, action: 'alert' },
{ pct: 100, action: 'block' },
],
webhookUrl: 'https://your-app.example.com/hooks/budget',
webhookSecret: process.env.MKA1_WEBHOOK_SECRET,
},
});
const budgets = await mka1.budgets.getApiKey({ apiKeyId: 'ak_…' });
const events = await mka1.budgets.apiKeyEvents({ apiKeyId: 'ak_…' });
await mka1.budgets.deleteApiKey({ apiKeyId: 'ak_…', owner: 'org' });
// Org-level variants: budgets.setOrg / getOrg / deleteOrg / orgEvents ({ orgId, … })
```
```python Python theme={null}
sdk.budgets.set_api_key(
api_key_id="ak_…",
period="monthly",
limit=250,
thresholds=[
{"pct": 80, "action": "alert"},
{"pct": 100, "action": "block"},
],
)
budgets = sdk.budgets.get_api_key(api_key_id="ak_…")
events = sdk.budgets.api_key_events(api_key_id="ak_…")
sdk.budgets.delete_api_key(api_key_id="ak_…", owner="org")
# Org-level variants: set_org / get_org / delete_org / org_events (org_id=…)
```
### Usage
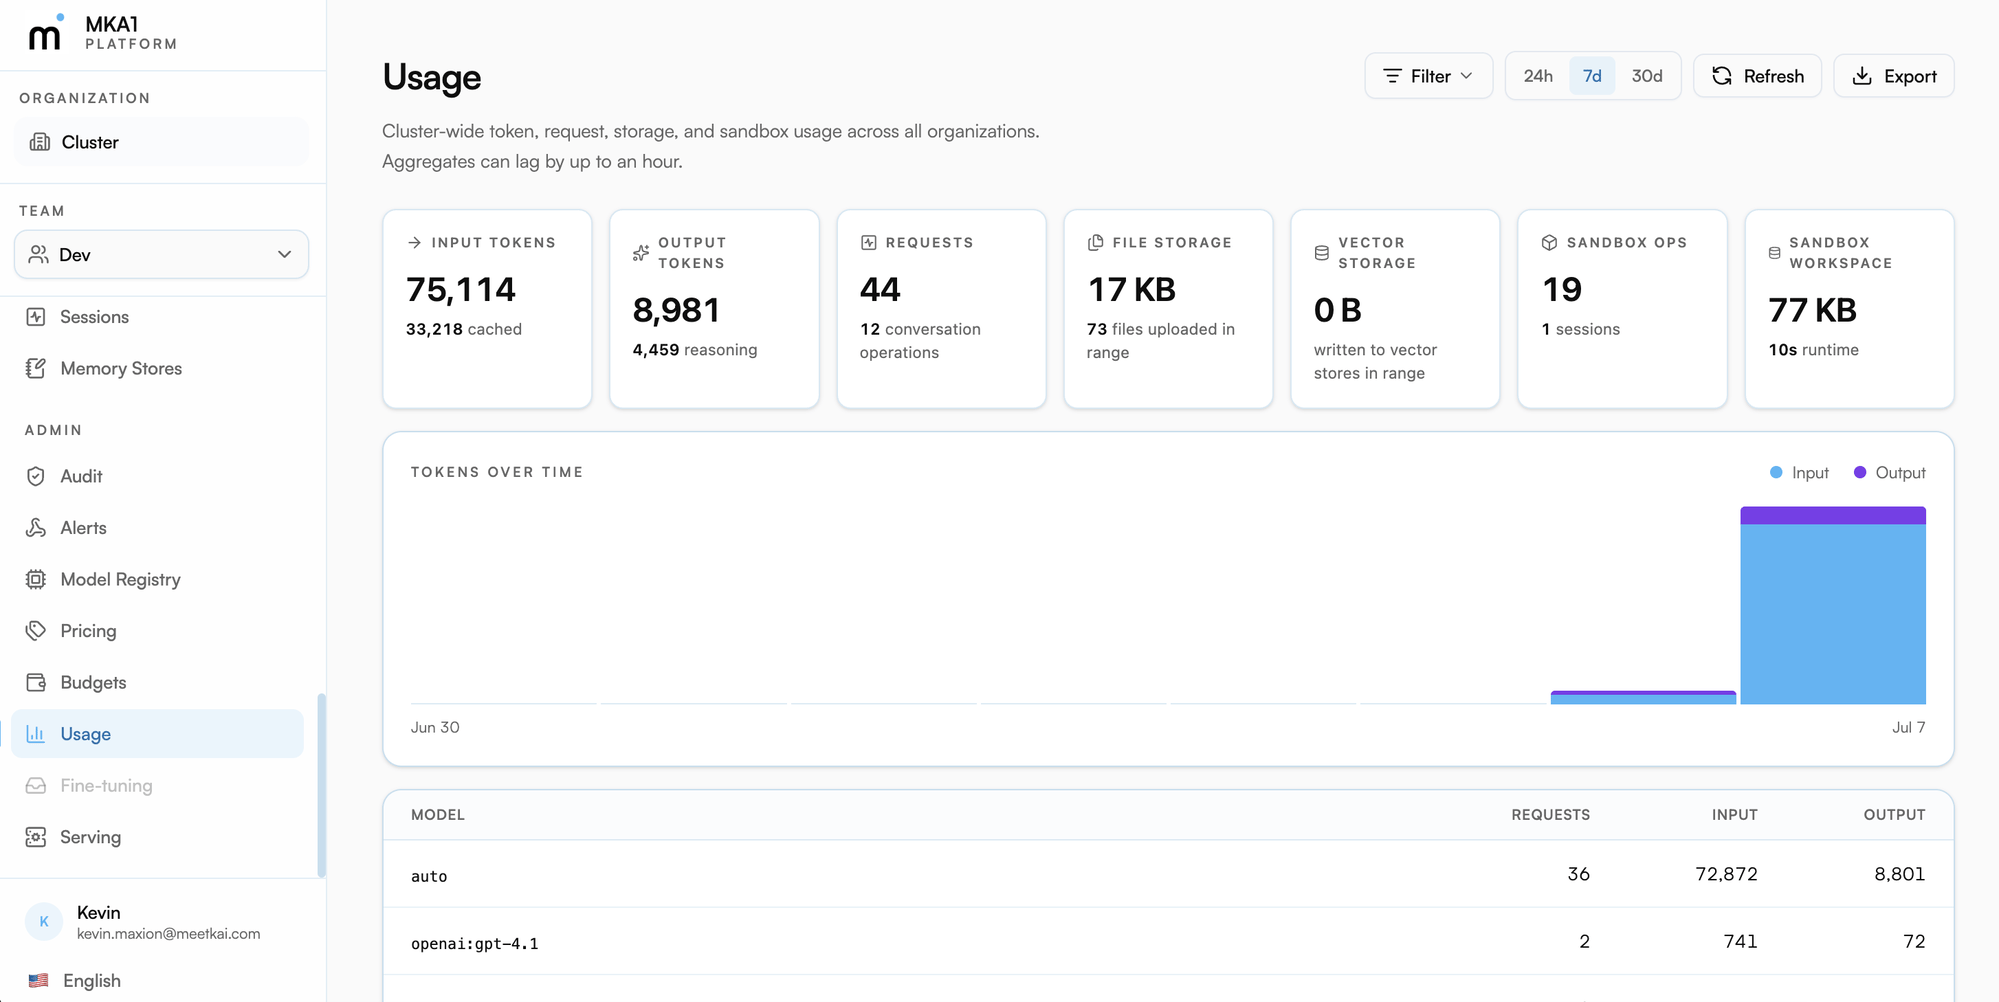 Usage is the volume ledger behind pricing and budgets — every request's tokens, request counts, and storage are metered per organization, team, API key, and end user. It lives in two places:
* **In the console** - **Admin → Usage** shows a tokens-over-time chart (24h / 7d / 30d), per-category breakdowns (Responses, Completions, Embeddings, Classify, Extract) with input/output tokens and request counts per model, per-end-user rows, file and vector storage, and sandbox operations — all exportable as CSV. The spend section prices these volumes from the model price book (see **Pricing** above).
* **Over the API** - Per-category endpoints (`llm.usage.responses`, `completions`, `conversations`, `embeddings`, `extract`, `classify`, `vectorStores`, `files`) return time-bucketed series. Pick a `bucket_width`, filter by `models`, `user_ids`, or `external_user_ids` (the `X-On-Behalf-Of` identity), and group by `model`, `api_key_id`, `user_id`, `org_id`, or `background` for per-dimension reports.
```ts TypeScript theme={null}
const now = Math.floor(Date.now() / 1000);
const usage = await mka1.llm.usage.responses({
startTime: now - 7 * 24 * 60 * 60, // last 7 days (unix seconds)
endTime: now,
bucketWidth: '1d',
groupBy: 'model',
});
// usage.data → one bucket per day, each with per-model results
// (input/output tokens, request counts)
```
```python Python theme={null}
import time
now = int(time.time())
usage = sdk.llm.usage.responses(
start_time=now - 7 * 24 * 3600, # last 7 days (unix seconds)
end_time=now,
bucket_width="1d",
group_by="model",
)
# usage.data → one bucket per day, each with per-model results
```
## Serving
Serving turns your cluster's accelerators — GPU, NPU, or TPU — into autoscaling inference endpoints for models you choose. It lives in its own Serving sidebar section (organization and cluster admins), and your organization must be provisioned for serving by the cluster operator before first use. Six building blocks:
* **Deployments** - A model served behind an inference endpoint on dedicated accelerators, backed by vLLM or SGLang. Configuration changes roll a new revision — roll back to any prior revision at any time — while scaling changes apply in place. The endpoint URL is assigned once the deployment is ready, and endpoint auth requires callers to present a valid API key. Each deployment exposes status, replicas, revisions, logs, and metrics.
* **Models** - Register a servable model by name and source, optionally pinning a branch, tag, or commit revision for reproducible deploys.
* **Images** - Build custom container images (base OCI image, apt packages, build commands) for serving engines and fine-tune jobs; deployments default to the engine's stock image.
* **Fine-tune jobs** - Train on cluster accelerators: a base model, a dataset, a strategy (LoRA by default, or full fine-tune), and free-form hyperparameters. Follow logs and the event timeline, collect checkpoints, and cancel anytime.
* **Accelerators** - The accelerator types available to your organization (e.g. A100, H100) and their per-type limits.
* **Volumes & secrets** - Persistent volumes (fixed-size, or elastic and growing on demand) and secrets such as an hf-token, injected into deployments as environment variables.
Autoscaling is per deployment: minimum and maximum replicas, buffer replicas held ready to absorb bursts, a cap on concurrent requests routed to a replica before scaling out, and an idle window (2–1200 seconds) before scaling down.
```ts TypeScript theme={null}
// 1. Register the model to serve (pin a revision for reproducible deploys)
await mka1.serving.models.register({
modelRegister: { name: 'qwen-7b', source: 'Qwen/Qwen2.5-7B-Instruct' },
});
// 2. Deploy it behind an autoscaling endpoint
const deployment = await mka1.serving.deployments.create({
deploymentCreate: {
name: 'qwen-7b-prod',
model: 'qwen-7b',
engine: 'vllm',
accelerator: { type: 'H100', count: 1, fallback: ['A100'] },
scaling: { minContainers: 1, maxContainers: 4, maxConcurrentInputs: 32 },
engineArgs: ['--max-model-len', '8192'],
endpointAuth: true,
},
});
// the endpoint URL appears on the deployment once it's ready
// 3. Operate it
await mka1.serving.deployments.updateScaling({
deploymentId: deployment.id,
scaling: { minContainers: 2, maxContainers: 8 }, // applies in place — no new revision
});
const logs = await mka1.serving.deployments.getLogs({ deploymentId: deployment.id, tail: 100 });
await mka1.serving.deployments.rollback({
deploymentId: deployment.id,
deploymentRollbackRequest: { revision: 1 }, // config changes roll revisions
});
```
```python Python theme={null}
# 1. Register the model to serve (pin a revision for reproducible deploys)
sdk.serving.models.register(name="qwen-7b", source="Qwen/Qwen2.5-7B-Instruct")
# 2. Deploy it behind an autoscaling endpoint
deployment = sdk.serving.deployments.create(
name="qwen-7b-prod",
model="qwen-7b",
engine="vllm",
accelerator={"type": "H100", "count": 1, "fallback": ["A100"]},
scaling={"min_containers": 1, "max_containers": 4, "max_concurrent_inputs": 32},
engine_args=["--max-model-len", "8192"],
endpoint_auth=True,
)
# the endpoint URL appears on the deployment once it's ready
# 3. Operate it
sdk.serving.deployments.update_scaling(
deployment_id=deployment.id,
min_containers=2,
max_containers=8, # applies in place — no new revision
)
logs = sdk.serving.deployments.get_logs(deployment_id=deployment.id, tail=100)
sdk.serving.deployments.rollback(deployment_id=deployment.id, revision=1)
```
## Putting it together: build an agent end-to-end
The building blocks compose. Here's the flagship end-to-end flow: index knowledge, connect tools, package a skill, assemble an agent, run it, and trace the result.
Usage is the volume ledger behind pricing and budgets — every request's tokens, request counts, and storage are metered per organization, team, API key, and end user. It lives in two places:
* **In the console** - **Admin → Usage** shows a tokens-over-time chart (24h / 7d / 30d), per-category breakdowns (Responses, Completions, Embeddings, Classify, Extract) with input/output tokens and request counts per model, per-end-user rows, file and vector storage, and sandbox operations — all exportable as CSV. The spend section prices these volumes from the model price book (see **Pricing** above).
* **Over the API** - Per-category endpoints (`llm.usage.responses`, `completions`, `conversations`, `embeddings`, `extract`, `classify`, `vectorStores`, `files`) return time-bucketed series. Pick a `bucket_width`, filter by `models`, `user_ids`, or `external_user_ids` (the `X-On-Behalf-Of` identity), and group by `model`, `api_key_id`, `user_id`, `org_id`, or `background` for per-dimension reports.
```ts TypeScript theme={null}
const now = Math.floor(Date.now() / 1000);
const usage = await mka1.llm.usage.responses({
startTime: now - 7 * 24 * 60 * 60, // last 7 days (unix seconds)
endTime: now,
bucketWidth: '1d',
groupBy: 'model',
});
// usage.data → one bucket per day, each with per-model results
// (input/output tokens, request counts)
```
```python Python theme={null}
import time
now = int(time.time())
usage = sdk.llm.usage.responses(
start_time=now - 7 * 24 * 3600, # last 7 days (unix seconds)
end_time=now,
bucket_width="1d",
group_by="model",
)
# usage.data → one bucket per day, each with per-model results
```
## Serving
Serving turns your cluster's accelerators — GPU, NPU, or TPU — into autoscaling inference endpoints for models you choose. It lives in its own Serving sidebar section (organization and cluster admins), and your organization must be provisioned for serving by the cluster operator before first use. Six building blocks:
* **Deployments** - A model served behind an inference endpoint on dedicated accelerators, backed by vLLM or SGLang. Configuration changes roll a new revision — roll back to any prior revision at any time — while scaling changes apply in place. The endpoint URL is assigned once the deployment is ready, and endpoint auth requires callers to present a valid API key. Each deployment exposes status, replicas, revisions, logs, and metrics.
* **Models** - Register a servable model by name and source, optionally pinning a branch, tag, or commit revision for reproducible deploys.
* **Images** - Build custom container images (base OCI image, apt packages, build commands) for serving engines and fine-tune jobs; deployments default to the engine's stock image.
* **Fine-tune jobs** - Train on cluster accelerators: a base model, a dataset, a strategy (LoRA by default, or full fine-tune), and free-form hyperparameters. Follow logs and the event timeline, collect checkpoints, and cancel anytime.
* **Accelerators** - The accelerator types available to your organization (e.g. A100, H100) and their per-type limits.
* **Volumes & secrets** - Persistent volumes (fixed-size, or elastic and growing on demand) and secrets such as an hf-token, injected into deployments as environment variables.
Autoscaling is per deployment: minimum and maximum replicas, buffer replicas held ready to absorb bursts, a cap on concurrent requests routed to a replica before scaling out, and an idle window (2–1200 seconds) before scaling down.
```ts TypeScript theme={null}
// 1. Register the model to serve (pin a revision for reproducible deploys)
await mka1.serving.models.register({
modelRegister: { name: 'qwen-7b', source: 'Qwen/Qwen2.5-7B-Instruct' },
});
// 2. Deploy it behind an autoscaling endpoint
const deployment = await mka1.serving.deployments.create({
deploymentCreate: {
name: 'qwen-7b-prod',
model: 'qwen-7b',
engine: 'vllm',
accelerator: { type: 'H100', count: 1, fallback: ['A100'] },
scaling: { minContainers: 1, maxContainers: 4, maxConcurrentInputs: 32 },
engineArgs: ['--max-model-len', '8192'],
endpointAuth: true,
},
});
// the endpoint URL appears on the deployment once it's ready
// 3. Operate it
await mka1.serving.deployments.updateScaling({
deploymentId: deployment.id,
scaling: { minContainers: 2, maxContainers: 8 }, // applies in place — no new revision
});
const logs = await mka1.serving.deployments.getLogs({ deploymentId: deployment.id, tail: 100 });
await mka1.serving.deployments.rollback({
deploymentId: deployment.id,
deploymentRollbackRequest: { revision: 1 }, // config changes roll revisions
});
```
```python Python theme={null}
# 1. Register the model to serve (pin a revision for reproducible deploys)
sdk.serving.models.register(name="qwen-7b", source="Qwen/Qwen2.5-7B-Instruct")
# 2. Deploy it behind an autoscaling endpoint
deployment = sdk.serving.deployments.create(
name="qwen-7b-prod",
model="qwen-7b",
engine="vllm",
accelerator={"type": "H100", "count": 1, "fallback": ["A100"]},
scaling={"min_containers": 1, "max_containers": 4, "max_concurrent_inputs": 32},
engine_args=["--max-model-len", "8192"],
endpoint_auth=True,
)
# the endpoint URL appears on the deployment once it's ready
# 3. Operate it
sdk.serving.deployments.update_scaling(
deployment_id=deployment.id,
min_containers=2,
max_containers=8, # applies in place — no new revision
)
logs = sdk.serving.deployments.get_logs(deployment_id=deployment.id, tail=100)
sdk.serving.deployments.rollback(deployment_id=deployment.id, revision=1)
```
## Putting it together: build an agent end-to-end
The building blocks compose. Here's the flagship end-to-end flow: index knowledge, connect tools, package a skill, assemble an agent, run it, and trace the result.
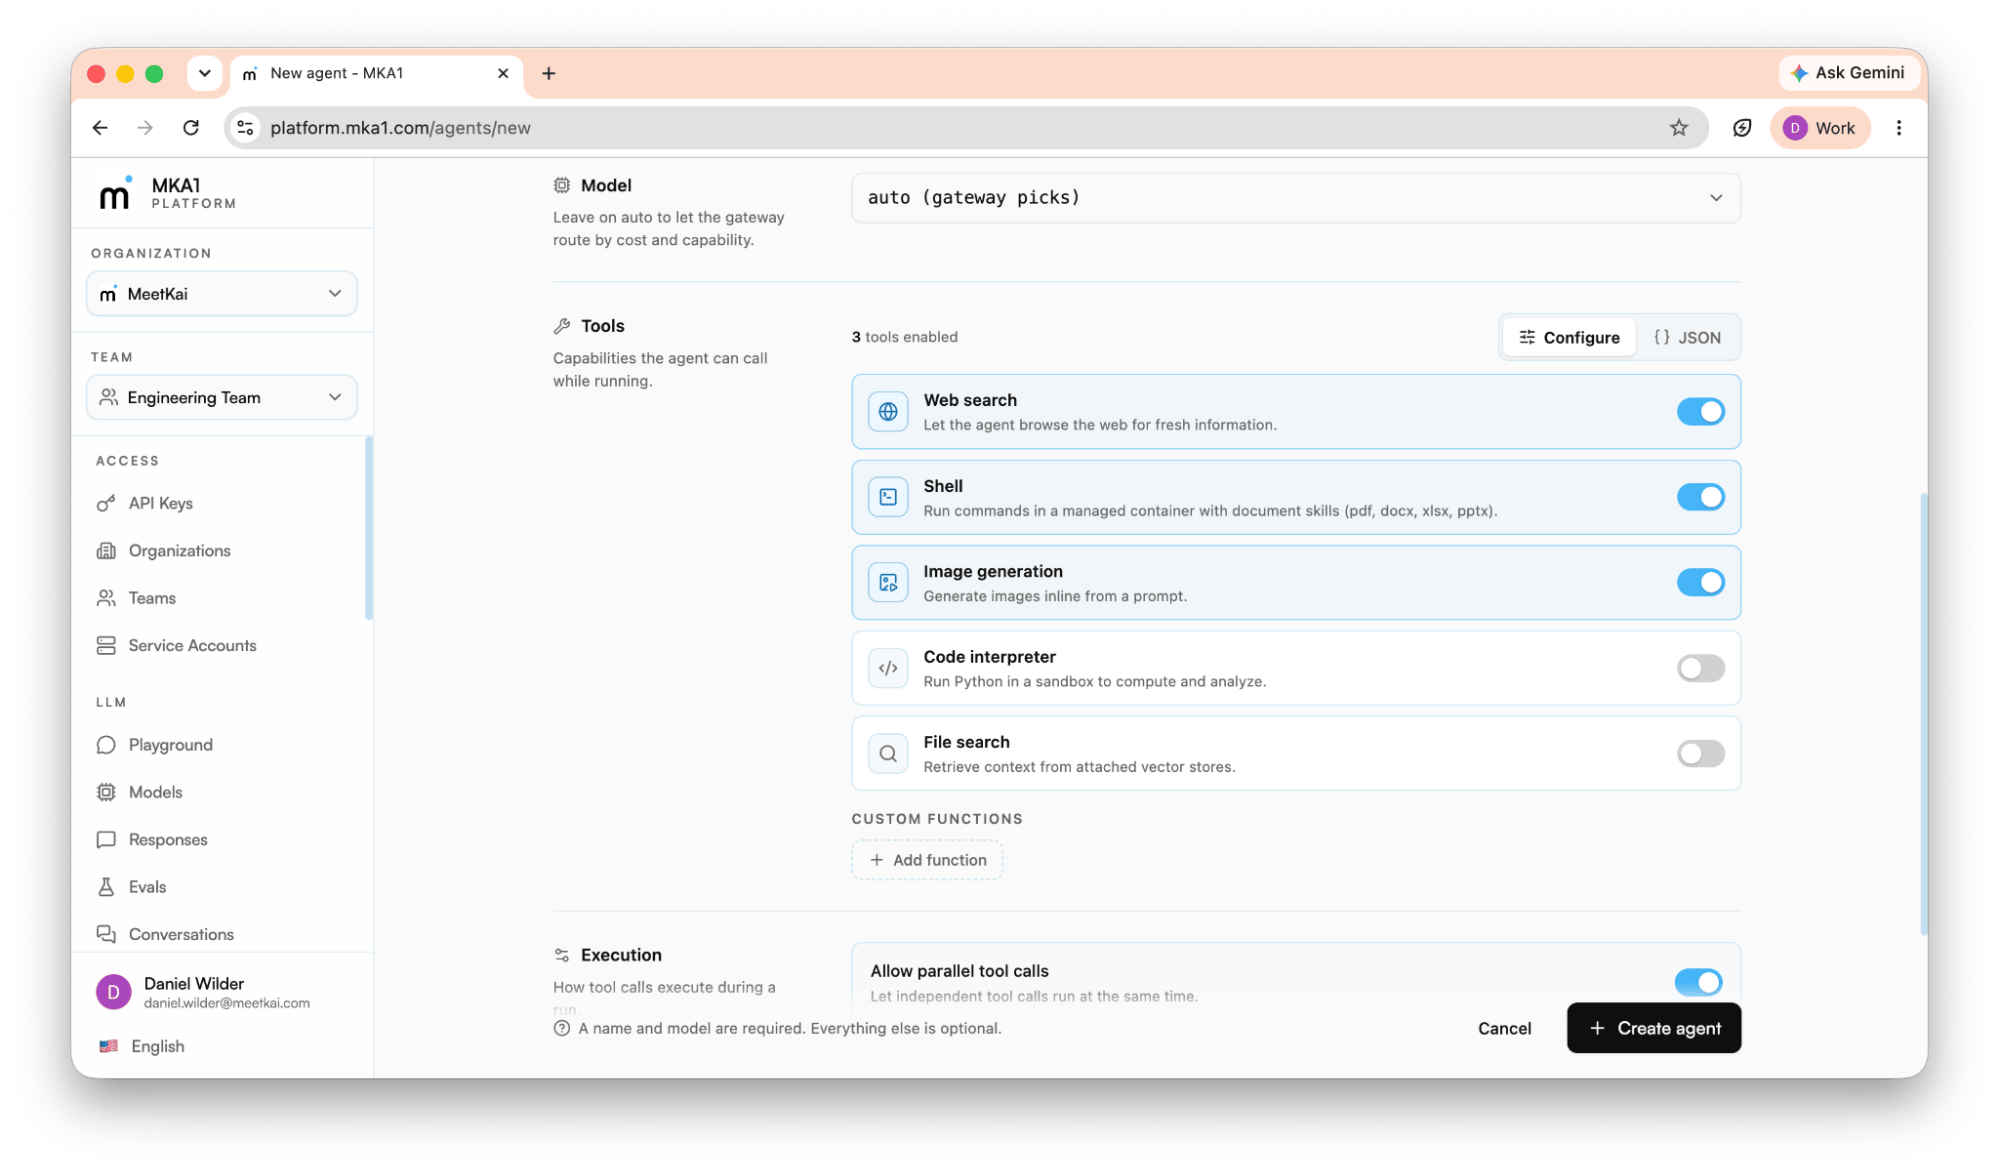 1. **Index knowledge.** Upload your documents as Files and attach them to a Vector Store so the agent can ground answers in your content (see *Files, vector stores & retrieval*).
2. **Connect tools.** Register an MCP server (or use built-in tools like `web_search`) so the agent can take actions and fetch live data (see *Agents, tools & MCP*).
3. **Package a skill.** Bundle reusable behavior behind a SKILL.md and upload it under **Skills**, then attach it.
4. **Assemble the agent.** Create a saved agent with a model, instructions, and that tool set. You configure the agent once, so you don't rebuild the request each call.
5. **Run it.** Execute the agent with fresh input from the console or `POST /api/v1/agents/{id}/runs`. Each run persists its input and the gateway response.
6. **Trace the run.** Open **Sessions** to replay the transcript and confirm the agent called the right tools.
## Reference & support
Keep these close as you build:
| Resource | Where |
| :-------------------------------------- | :----------------------------------------------------------------------------------------------- |
| Full API reference (OpenAPI + "Try it") | [API Reference](https://docs.mka1.com/api-reference/introduction) |
| Authentication | [docs.mka1.com/docs/authentication](https://docs.mka1.com/docs/authentication) |
| Generate a response | [docs.mka1.com/docs/generate-a-response](https://docs.mka1.com/docs/generate-a-response) |
| Files & vector stores | [docs.mka1.com/docs/files-and-vector-stores](https://docs.mka1.com/docs/files-and-vector-stores) |
| Managing agents | [docs.mka1.com/docs/managing-agents](https://docs.mka1.com/docs/managing-agents) |
| MCP tools | [docs.mka1.com/docs/mcp-tools](https://docs.mka1.com/docs/mcp-tools) |
| CLI | [docs.mka1.com/docs/cli/introduction](https://docs.mka1.com/docs/cli/introduction) |
| Python SDK | [pypi.org/project/meetkai-mka1/](https://pypi.org/project/meetkai-mka1/) |
| C# SDK | [nuget.org/packages/MeetKai.MKA1/](https://www.nuget.org/packages/MeetKai.MKA1/) |
| TypeScript SDK | [npmjs.com/package/@meetkai/mka1](https://www.npmjs.com/package/@meetkai/mka1) |
**Quick recap**
1. Accept the cluster invite → you own a new organization.
2. Create a team and invite teammates.
3. Mint an API key on that team (copy the secret once).
4. Install an SDK and authenticate with `Authorization: Bearer`.
5. Call `responses.create` — then compose conversations, memory, RAG, agents, tools, and speech into your app.
Welcome aboard. Now go build something.
1. **Index knowledge.** Upload your documents as Files and attach them to a Vector Store so the agent can ground answers in your content (see *Files, vector stores & retrieval*).
2. **Connect tools.** Register an MCP server (or use built-in tools like `web_search`) so the agent can take actions and fetch live data (see *Agents, tools & MCP*).
3. **Package a skill.** Bundle reusable behavior behind a SKILL.md and upload it under **Skills**, then attach it.
4. **Assemble the agent.** Create a saved agent with a model, instructions, and that tool set. You configure the agent once, so you don't rebuild the request each call.
5. **Run it.** Execute the agent with fresh input from the console or `POST /api/v1/agents/{id}/runs`. Each run persists its input and the gateway response.
6. **Trace the run.** Open **Sessions** to replay the transcript and confirm the agent called the right tools.
## Reference & support
Keep these close as you build:
| Resource | Where |
| :-------------------------------------- | :----------------------------------------------------------------------------------------------- |
| Full API reference (OpenAPI + "Try it") | [API Reference](https://docs.mka1.com/api-reference/introduction) |
| Authentication | [docs.mka1.com/docs/authentication](https://docs.mka1.com/docs/authentication) |
| Generate a response | [docs.mka1.com/docs/generate-a-response](https://docs.mka1.com/docs/generate-a-response) |
| Files & vector stores | [docs.mka1.com/docs/files-and-vector-stores](https://docs.mka1.com/docs/files-and-vector-stores) |
| Managing agents | [docs.mka1.com/docs/managing-agents](https://docs.mka1.com/docs/managing-agents) |
| MCP tools | [docs.mka1.com/docs/mcp-tools](https://docs.mka1.com/docs/mcp-tools) |
| CLI | [docs.mka1.com/docs/cli/introduction](https://docs.mka1.com/docs/cli/introduction) |
| Python SDK | [pypi.org/project/meetkai-mka1/](https://pypi.org/project/meetkai-mka1/) |
| C# SDK | [nuget.org/packages/MeetKai.MKA1/](https://www.nuget.org/packages/MeetKai.MKA1/) |
| TypeScript SDK | [npmjs.com/package/@meetkai/mka1](https://www.npmjs.com/package/@meetkai/mka1) |
**Quick recap**
1. Accept the cluster invite → you own a new organization.
2. Create a team and invite teammates.
3. Mint an API key on that team (copy the secret once).
4. Install an SDK and authenticate with `Authorization: Bearer`.
5. Call `responses.create` — then compose conversations, memory, RAG, agents, tools, and speech into your app.
Welcome aboard. Now go build something.